In a previous lesson I explained how Etherchannels work and how to configure them, but I didn’t write about layer 3 Etherchannels before. In this lesson, I’ll show you how to configure them.
A layer three etherchannel is similar to an interface on a router. The switch won’t “switch” traffic on this interface but route it. Because it’s a layer three interface, we configure an IP address on it.
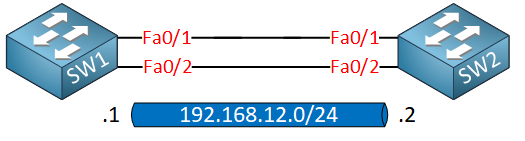
I’ll be using two switches for this:
Before we configure the port channel settings, you need to make sure that all interfaces have the exact same configuration. Once you use the channel-group command, the port-channel interface will automatically inherit all settings from your physical interface. If you forget to run the no switchport command on an interface, your etherchannel will be layer 2 instead of layer 3!
Having said that, let’s configure our switches:
SW1(config)#interface range fastEthernet 0/1 - 2
SW1(config-if-range)#no switchport
SW1(config-if-range)#channel-group 12 mode on
Creating a port-channel interface Port-channel 12SW2(config)#interface range fa0/1 - 2
SW2(config-if-range)#no switchport
SW2(config-if-range)#channel-group 12 mode on
Creating a port-channel interface Port-channel 12This creates our Etherchannel. We can verify our work like this:
SW1#show etherchannel 12 summary
Flags:  D - down        P - bundled in port-channel
        I - stand-alone s - suspended
        H - Hot-standby (LACP only)
        R - Layer3      S - Layer2
        U - in use      f - failed to allocate aggregator

        M - not in use, minimum links not met
        u - unsuitable for bundling
        w - waiting to be aggregated
        d - default port

Number of channel-groups in use: 1
Number of aggregators:           1

Group  Port-channel  Protocol    Ports
------+-------------+-----------+-----------------------------------------------
12     Po12(RU)         -        Fa0/1(P)   Fa0/2(P)
Above, you can see that our port-channel 12 interface is layer 3, and it’s operational. Just like any other layer 3 interface, we can configure an IP address on this port-channel interface:
you are inspirational teacher .
thanks for your books
and your website
Thank you for the kind words Mohammed!
Thanks a lot, Rene, you are amazing, Im studying for ccna certification and then I wanna do the ccnp and ccie, Thanks for your help and this an amazing Web.
Grettings From Venezuela
Hi rene, I am trying to configure a layer 3 etherchannel, the new version of GNS3 but once configured everything, I can not do ping between the two portchannel, I appreciate your usual help, I’m using the version that uses the IOU of a virtual machine built to GNS3
Hi Catalino N,
I think this might be an IOU problem, I’ve read before that it accepts the configuration but that you can’t send any traffic through L3 etherchannels.
When you use the show commands, everything looks fine?
Rene