Lesson Contents
The default behavior of MPLS Traffic Engineering (TE) is that when something happens with a tunnel’s LSP, the head-end router calculates a new best path to the tail-end router. This works, but it takes time. It could be too slow for delay-sensitive applications like VoIP.
MPLS supports Fast Reroute (FRR) link and node protection. This provides recovery against link and node failures under ~50 ms. The technique is similar to other fast reroute mechanisms like:
- EIGRP Loop-Free Alternate (LFA) Fast Reroute (FRR)
- OSPF Loop-Free Alternate (LFA) Fast Reroute (FRR)
- BGP Prefix Independent Convergence (PIC)
Without fast reroute, MPLS TE works like this:
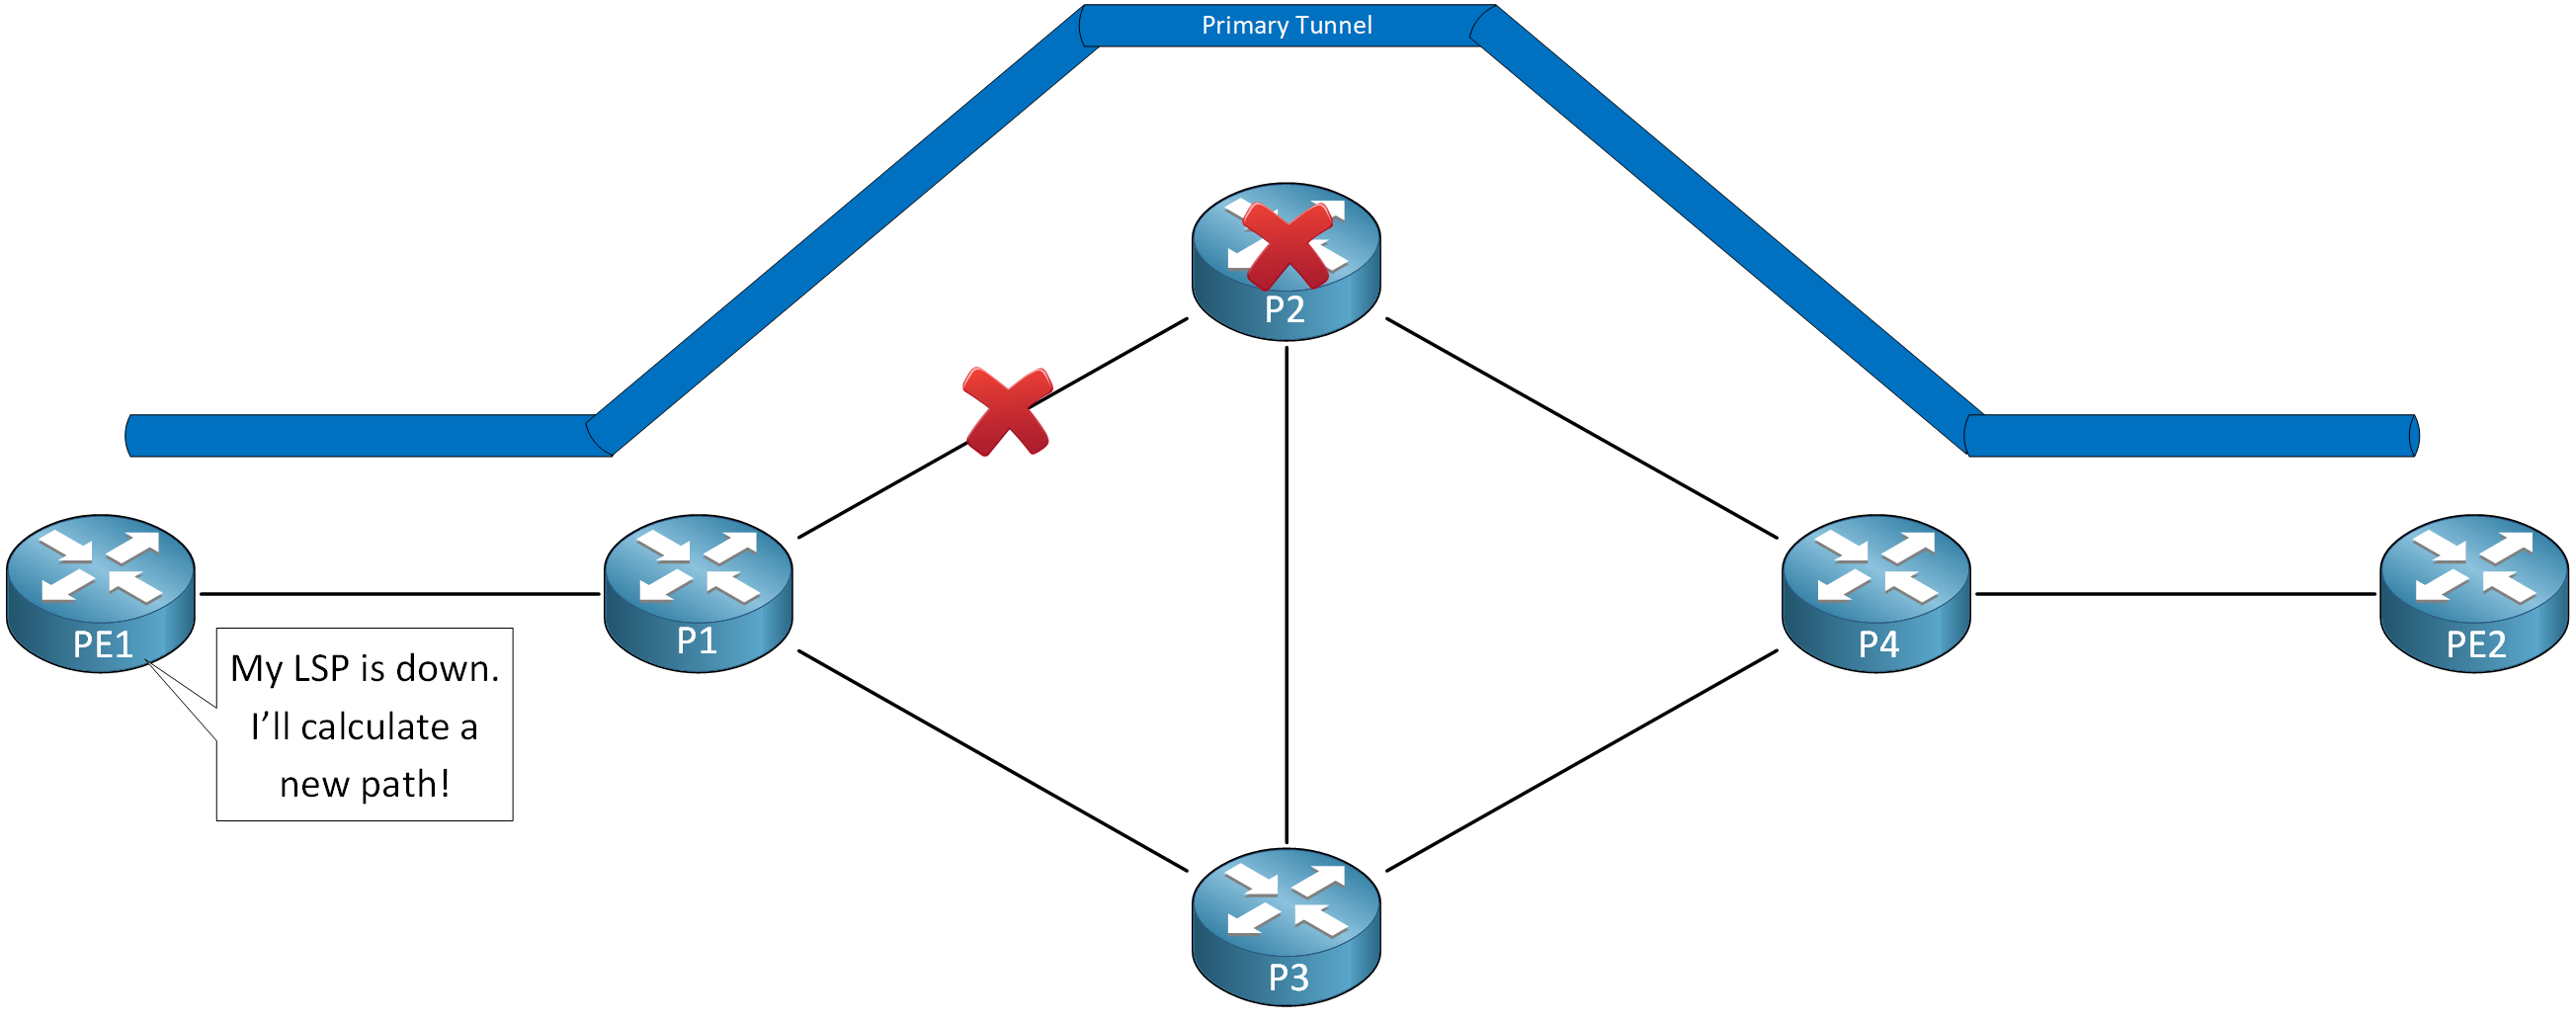
In the topology above, we have a tunnel between PE1 and PE2:
- PE1 is the headend router.
- PE2 is the tailend router.
I’ll call this tunnel the “primary” tunnel. It’s the tunnel that we want to protect. When something happens with the LSP because of a link or node failure, PE1 will calculate a new path. The only other option is through P3.
With MPLS TE Fast Reroute, we configure a backup tunnel. When something happens with the LSP of the primary tunnel, instead of taking it down, we use the backup tunnel to forward the traffic:
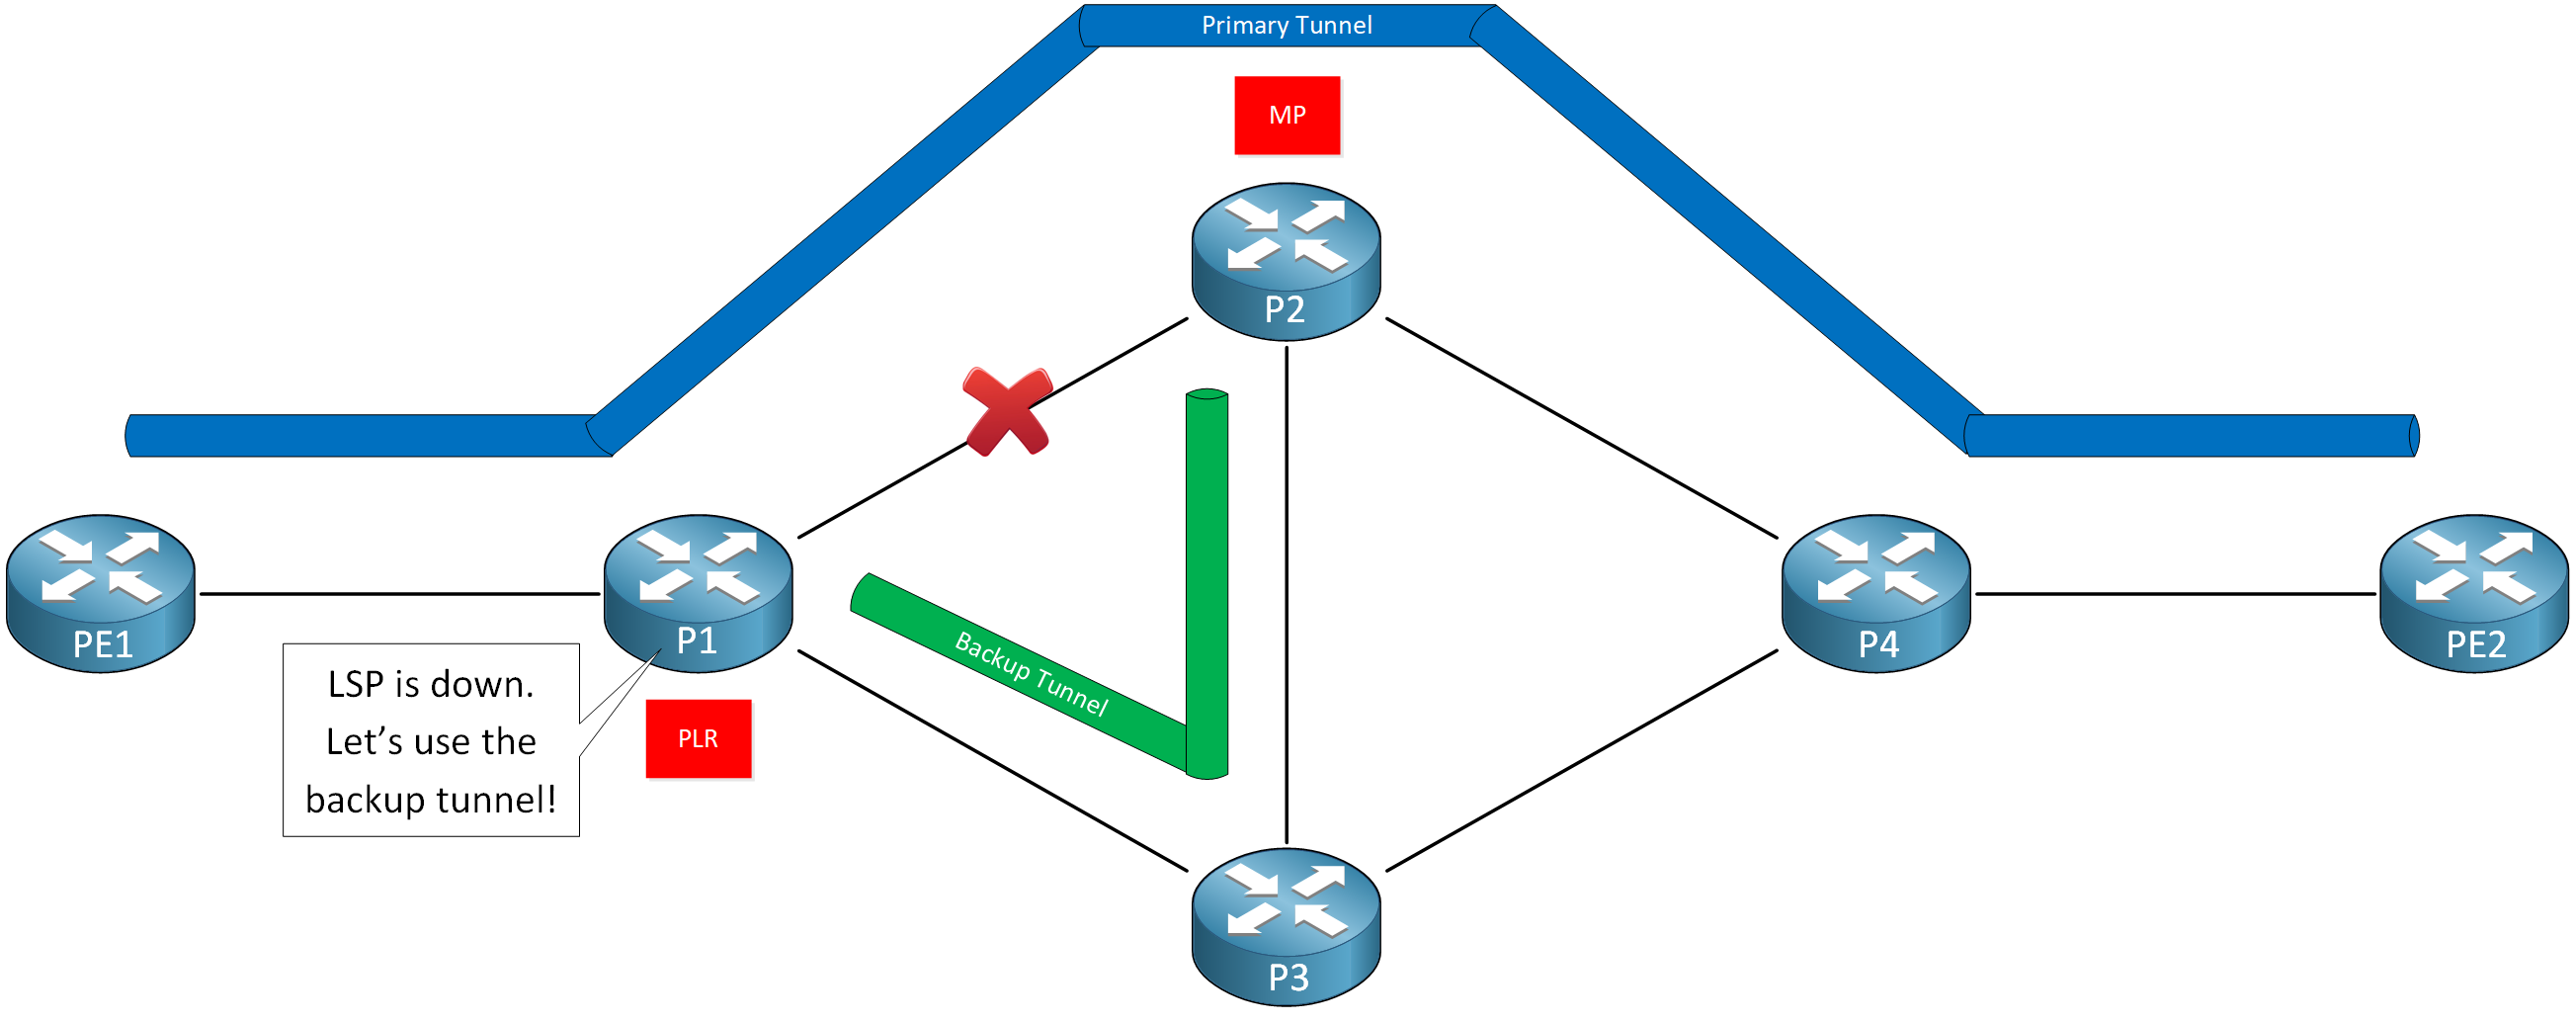
This way, we repair the LSP at the point of failure, allowing traffic to continue. The headend router of the backup tunnel is P1, and P2 is the tail-end. When we talk about the backup tunnel, we call the headend router the point of local repair (PLR) because this is where we repair the LSP. The tail-end router is the merge point (MP) because this is where the traffic from the backup tunnel rejoins the LSP of the primary tunnel.
Once we use the backup tunnel, P1 will inform PE1 about this. PE1 will then recalculate a new best path for its tunnel. Once that is completed, we don’t use the backup tunnel anymore.
MPLS TE fast reroute offers two protection options:
– Link protection
– Node protection
Let’s take a look at both.
Link Protection
With link protection, we have a backup tunnel that bypasses only a single link of the LSP:
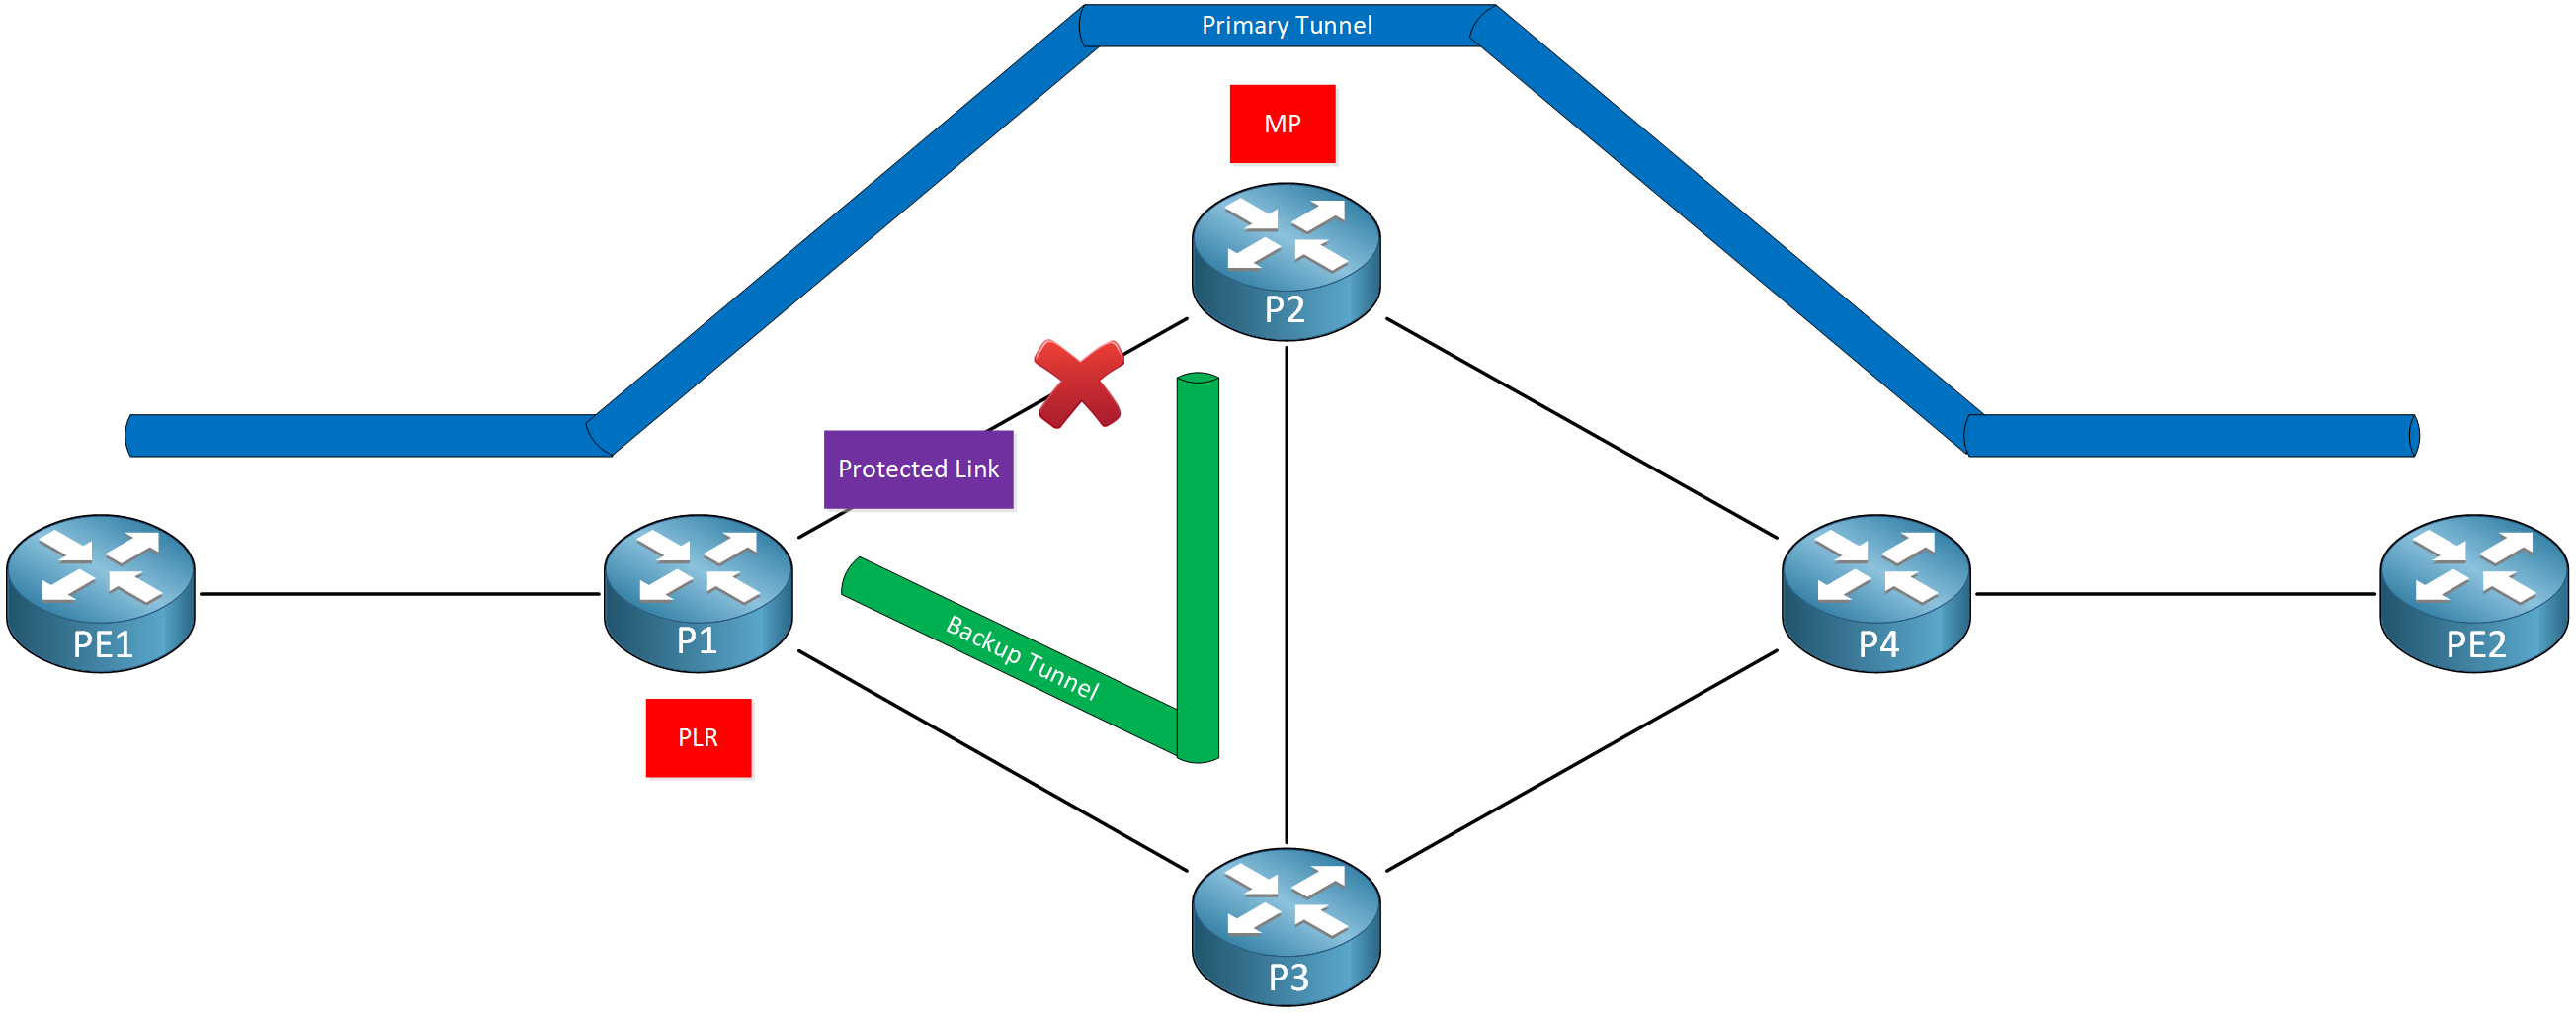
P1 protects the link that connects to P2. We bypass this link by building a backup tunnel that goes through P3 and terminates at P2. We call this backup tunnel an NHOP (Next Hop) tunnel because it’s a tunnel to your next hop (from P1’s perspective), only bypassing the link.
Node Protection
With node protection, we have a backup tunnel that bypasses a next-hop node (router):
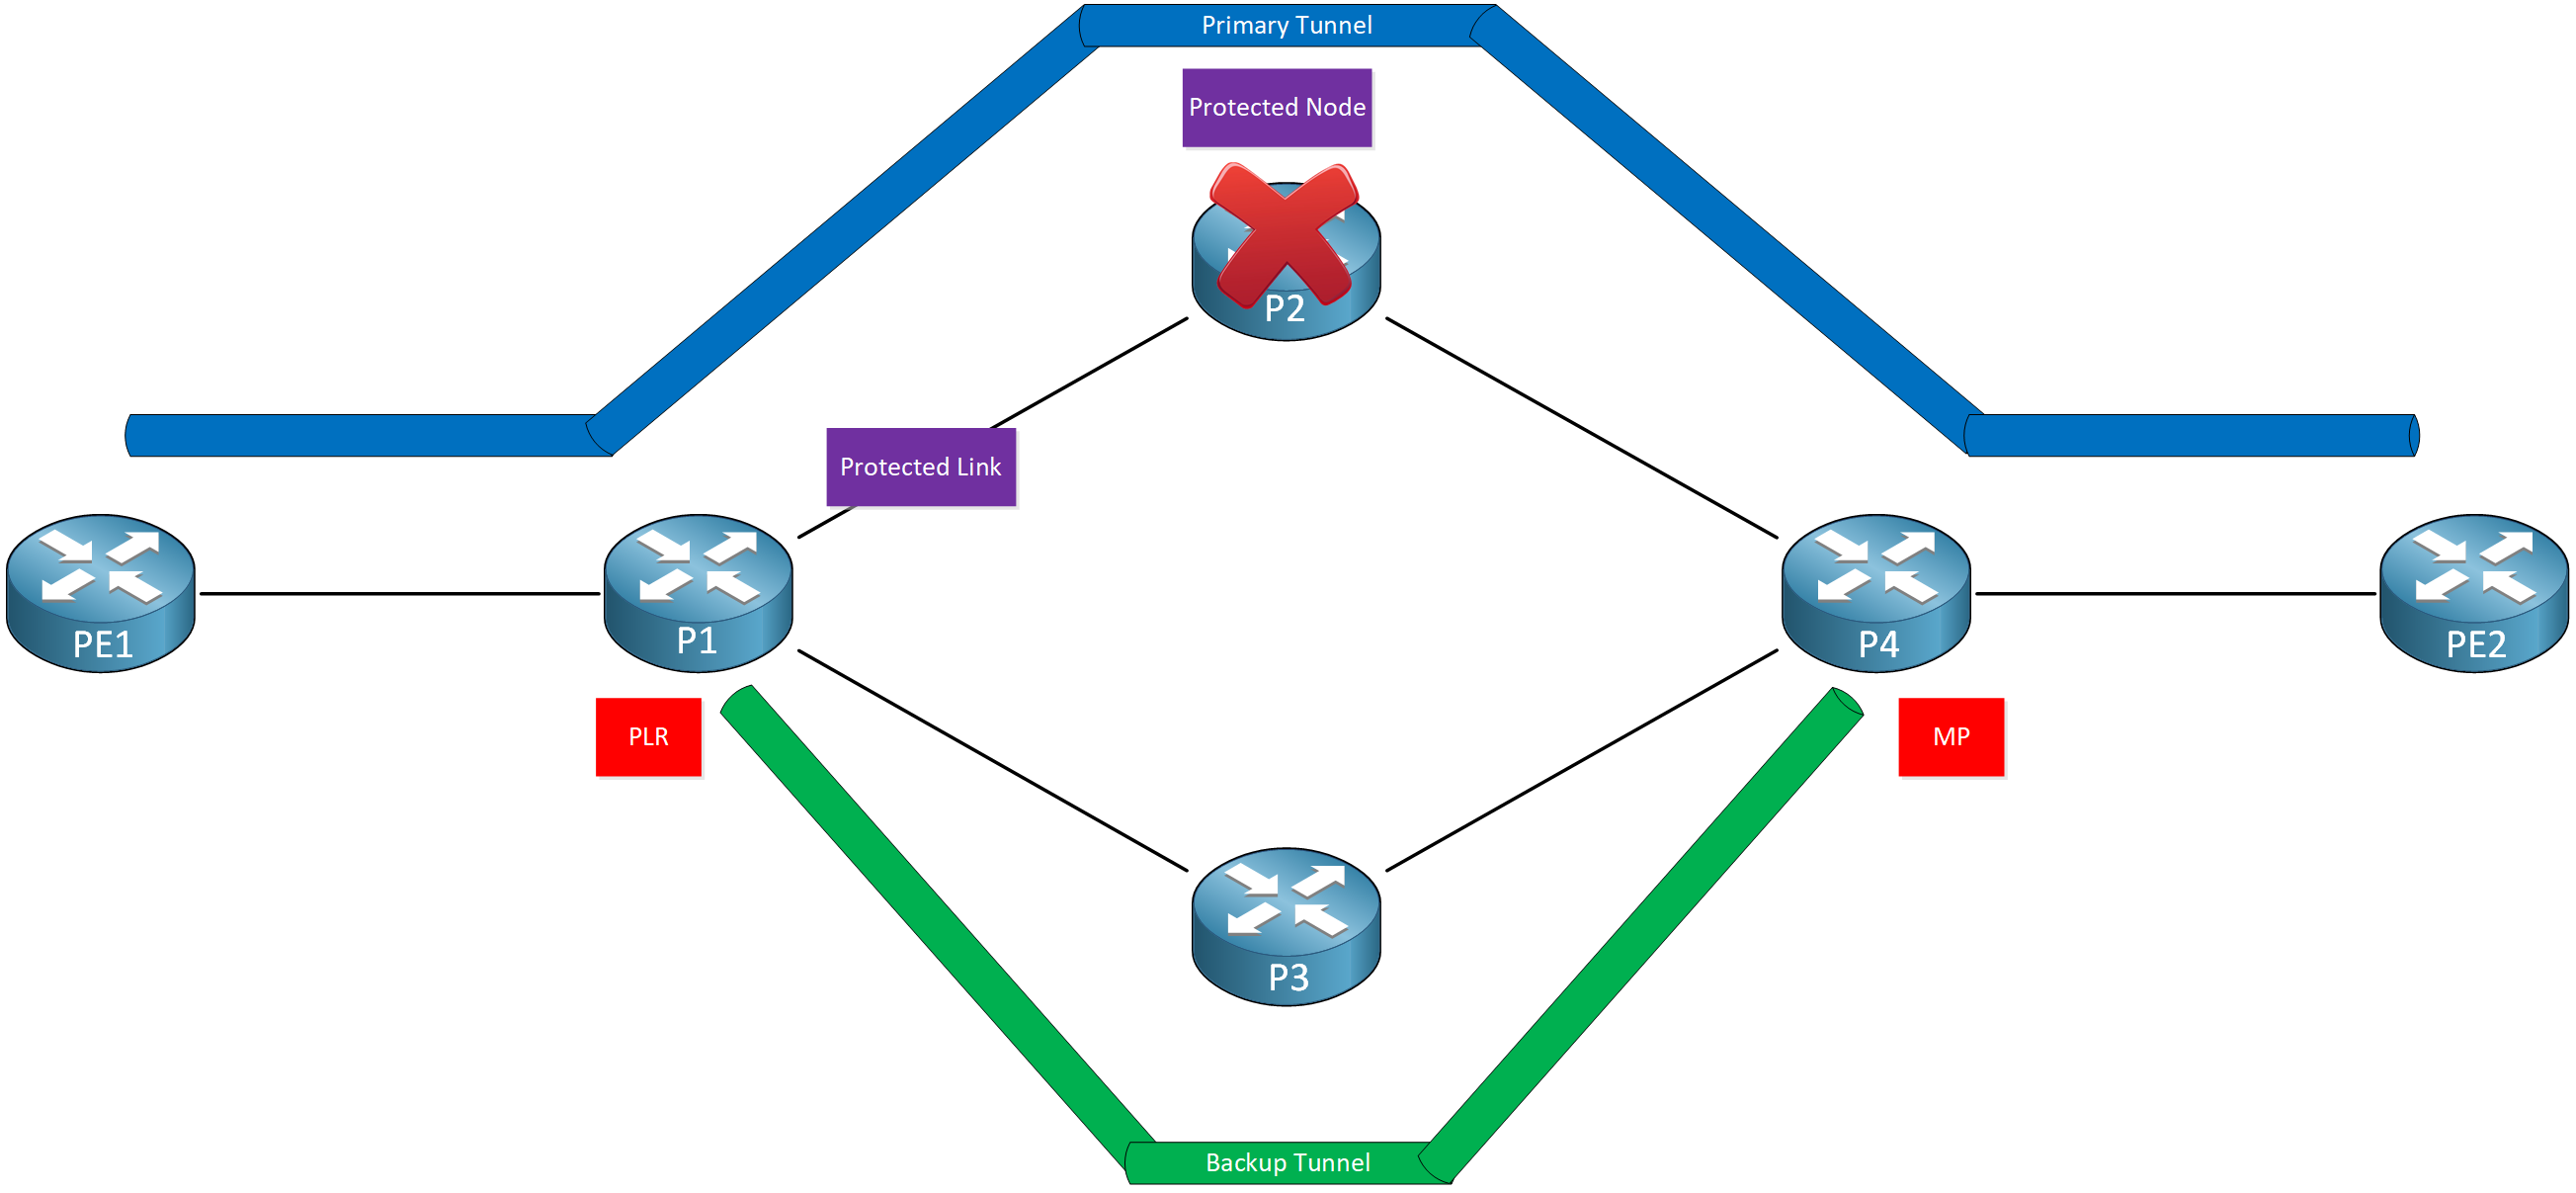
This backup tunnel starts at P1 and terminates at P4. We call this backup tunnel an NNHOP (Next Next-Hop) tunnel because it’s a tunnel to the next hop of your next-hop router. From P1’s perspective, P4 is the next hop behind its next hop, P2. Node protection also offers link protection because we bypass both the link and the next-hop router.
Scalability
When using backup tunnels, there are two options when it comes to scalability:
– One-to-One Backup (1:1)
– Many-to-One (Facility) Backup (1:N)
With one-to-one (1:1) backup, we configure a backup tunnel for each LSP we want to protect. This means that if you have 100 tunnels to protect, you need 100 backup tunnels.