In a perfect world where we can trust anyone and nobody makes a mistake, we don’t need security. In real life, however, bad things can happen to our network, so we’ll need to protect it.
This lesson is an introduction to access-lists and you’ll learn the difference between standard and extended access-lists.
Access-lists work on the network (layer 3) and the transport (layer 4) layer and can be used for two different things:
- Filtering
- Classification

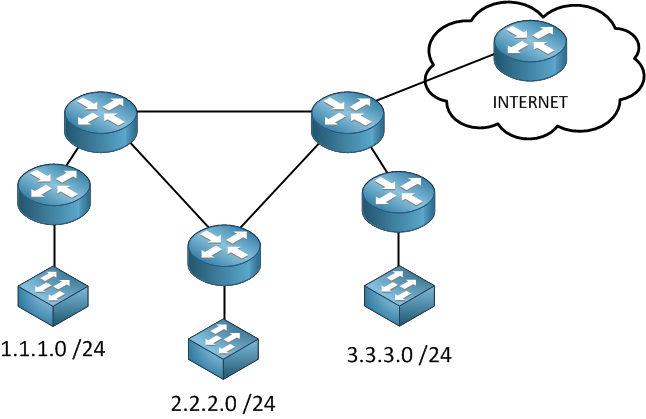
Filtering permits or denies traffic reaching certain parts of our network. Without filtering, traffic can go anywhere, if you look at the picture above you probably don’t want IP packets from the internet to freely enter your network. You can also use an access-list to block IP packets from 3.3.3.0 /24 going to 1.1.1.0 /24 or something else.
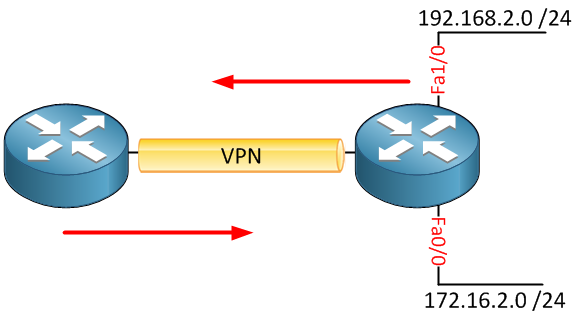
Classification does not drop IP packets as filtering does, but we use it to “select” traffic. Let’s take a look at an example:

In the picture above, we have a VPN that encrypts traffic between the two routers. Whenever we create a VPN, we can use an access-list to “select” what traffic should be encrypted. Perhaps I want traffic from network 192.168.2.0 /24 to be encrypted but not traffic from 172.16.2.0 /24. We can use an access-list to “select” traffic, this is called classification.
Let’s take a closer look at filtering. After creating an access-list, there are three spots where you can place them:

You can put them inbound on the interface which means that all packets that reach your router will hit the access-list and will have to be checked against the access-list.

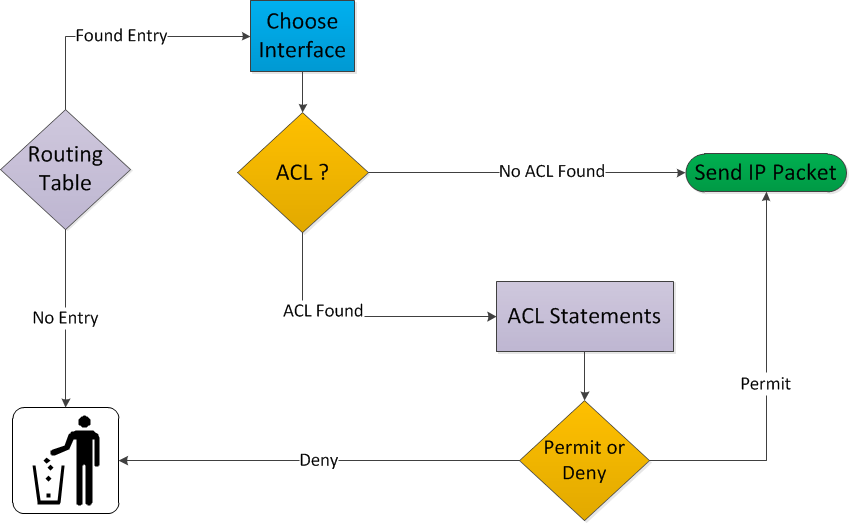
Another option is to put the access-list outbound. In this case, IP packets will go through the router, and once they leave the interface, they will be checked against the access-list. When you place an access-list outbound, this is what your router will do:

- IP Packets will enter your router.
- Your router will check if it knows about the destination by looking in its routing table.
- If there is no entry in the routing table, the IP packet will be discarded.
- If there is an entry in the routing table, it will select the correct outgoing interface.
- If there is no access-list, the IP packet will be sent out of the interface.
- If there is an access-list, we’ll have to check our IP packet and compare it with the access-list.
- If the IP packet is permitted, it will be forwarded, otherwise, it will be discarded and go to IP heaven.
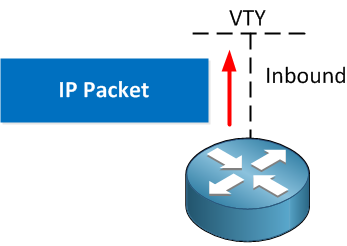
The third option is applying it to the VTY line. We can use this to secure telnet and/or SSH traffic.

Let me give you an example of what an access-list looks like:


On your Introduction to Access-Lists on Cisco IOS Router lesson, you have, in the picture for where to place the ACL, the word inbound twice. I believe that the top router should be “inbound” and the bottom router should be the “outbound.”
Hi Eric,
Thanks for pointing that out, I just fixed it.
Rene
Everything very clear but little confusing in number range.
standard access list number range(1300-199) confusing & 199 overlap with extended acl
You caught a typo It has to be 1300 - 1999, just fixed it.
You explain complex in English. Thanks Rene Molenaar. I am going to advertise you to college students here In Uganda. You make it all simple.
God bless you!!