Lesson Contents
The Cisco ASA supports VPN filters that let you filter decrypted traffic that exits a tunnel or pre-encrypted traffic before it enters a tunnel. You can use the VPN filter for both LAN-to-LAN (L2L) VPNs and remote access VPN.
VPN filters use access-lists and you can apply them to:
- Group policy
- Username attributes
- Dynamic access policy (DAP)
A VPN filter attached to username attributes overrules a VPN filter which is attached to a group policy. A VPN filter attached to a DAP overrules VPN filters on both username attributes and a group policy.
In this lesson, I’ll show you how to configure and verify a VPN filter on a remote access VPN using a group policy and username attributes.
Configuration
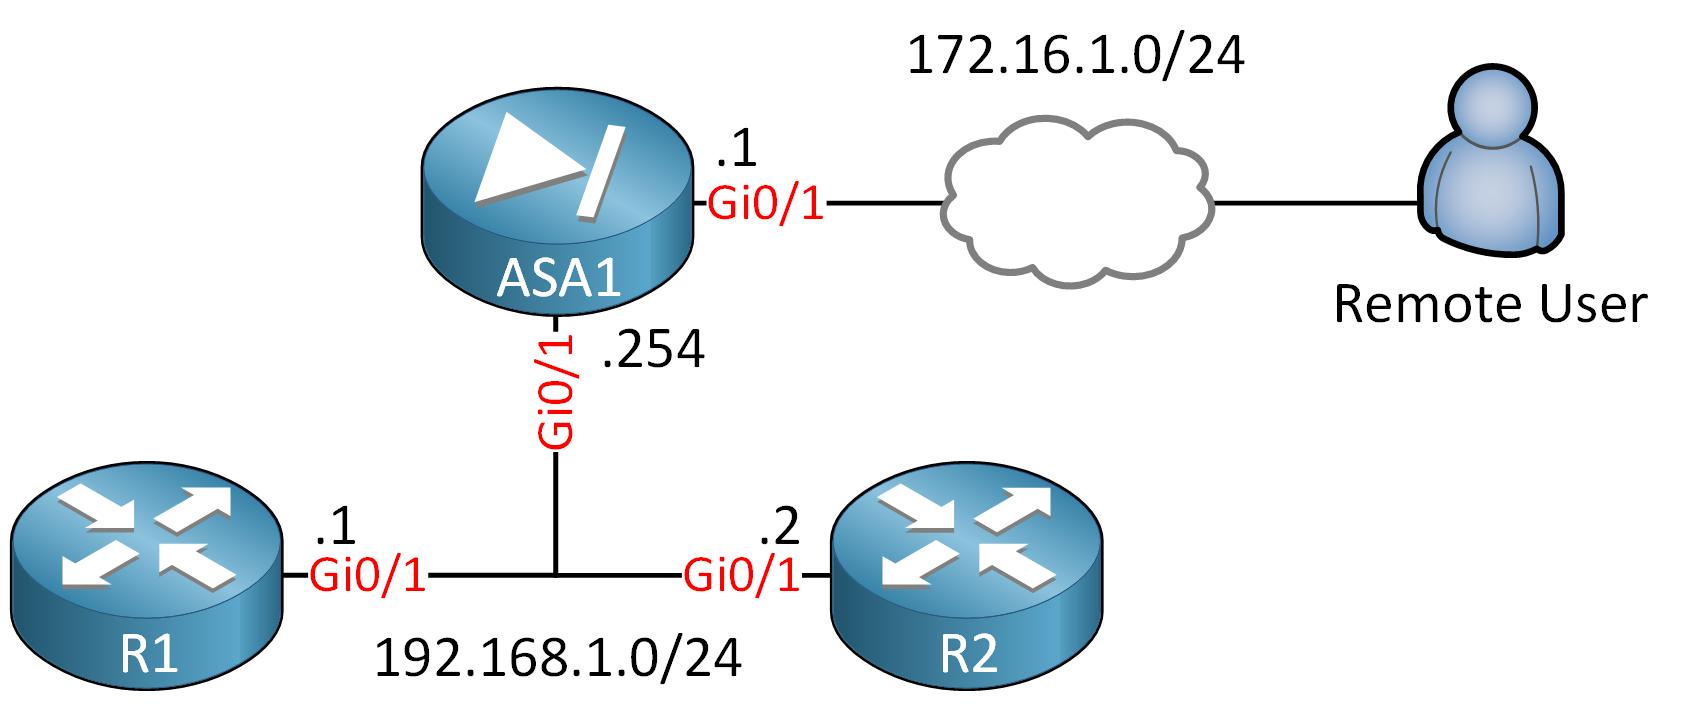
Here is the topology we’ll use for this example:

The remote user connects with IPSec remote VPN to ASA1 to get access to the 192.168.1.0/24 network. The user can access both routers. We are going to configure the VPN to restrict the traffic from the user to the routers.
We start with a basic remote VPN configuration.
Configurations
Want to take a look for yourself? Here you will find the startup configuration of each device.
ASA1
hostname ASA1
!
ip local pool VPN_POOL 192.168.10.100-192.168.10.200
!
interface GigabitEthernet0/0
 nameif INSIDE
 security-level 100
 ip address 192.168.1.254 255.255.255.0
!
interface GigabitEthernet0/1
 nameif OUTSIDE
 security-level 0
 ip address 10.10.10.1 255.255.255.0
!
access-list SPLIT_TUNNEL standard permit 192.168.1.0 255.255.255.0
!
crypto ipsec ikev1 transform-set MY_TRANSFORM_SET esp-aes esp-sha-hmac
!
crypto dynamic-map MY_DYNA_MAP 10 set ikev1 transform-set MY_TRANSFORM_SET
crypto map MY_CRYPTO_MAP 10 ipsec-isakmp dynamic MY_DYNA_MAP
crypto map MY_CRYPTO_MAP interface OUTSIDE
!
crypto isakmp identity address
crypto ikev1 enable OUTSIDE
crypto ikev1 policy 10
 authentication pre-share
 encryption aes
 hash sha
 group 2
 lifetime 86400
!
group-policy VPN_POLICY internal
group-policy VPN_POLICY attributes
 dns-server value 8.8.8.8
 vpn-idle-timeout 15
 split-tunnel-policy tunnelspecified
 split-tunnel-network-list value SPLIT_TUNNEL
!
username VPN_USER password MY_PASSWORD
tunnel-group MY_TUNNEL type remote-access
tunnel-group MY_TUNNEL general-attributes
 address-pool VPN_POOL
 default-group-policy VPN_POLICY
tunnel-group MY_TUNNEL ipsec-attributes
 ikev1 pre-shared-key MY_SHARED_KEY
!
end
R1
hostname R1
!
no ip routing
!
interface GigabitEthernet0/1
 ip address 192.168.1.1 255.255.255.0
!
ip default-gateway 192.168.1.254
!
end
R2
hostname R2
!
no ip routing
!
interface GigabitEthernet0/1
 ip address 192.168.1.2 255.255.255.0
!
ip default-gateway 192.168.1.254
!
end
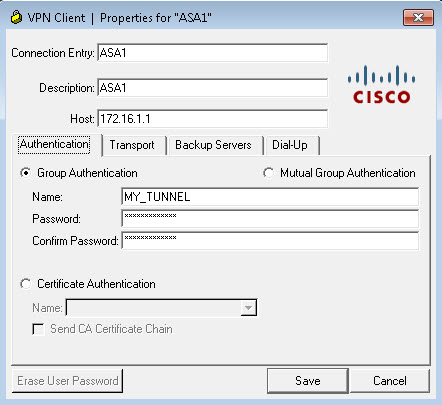
I’ll use the Cisco VPN client. Here are the properties of the VPN connection:

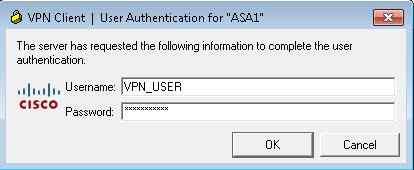
Let’s connect:

Once the VPN client is connected, I can ping both routers. Let’s try R1:
C:\Users\h1>ping 192.168.1.1

Pinging 192.168.1.1 with 32 bytes of data:
Reply from 192.168.1.1: bytes=32 time=4ms TTL=255
Reply from 192.168.1.1: bytes=32 time=3ms TTL=255
Reply from 192.168.1.1: bytes=32 time=3ms TTL=255
Reply from 192.168.1.1: bytes=32 time=3ms TTL=255

Ping statistics for 192.168.1.1:
    Packets: Sent = 4, Received = 4, Lost = 0 (0% loss),
Approximate round trip times in milli-seconds:
    Minimum = 3ms, Maximum = 4ms, Average = 3ms
And R2:
C:\Users\h1>ping 192.168.1.2

Pinging 192.168.1.2 with 32 bytes of data:
Reply from 192.168.1.2: bytes=32 time=3ms TTL=255
Reply from 192.168.1.2: bytes=32 time=3ms TTL=255
Reply from 192.168.1.2: bytes=32 time=2ms TTL=255
Reply from 192.168.1.2: bytes=32 time=4ms TTL=255

Ping statistics for 192.168.1.2:
    Packets: Sent = 4, Received = 4, Lost = 0 (0% loss),
Approximate round trip times in milli-seconds:
    Minimum = 2ms, Maximum = 4ms, Average = 3ms
We have full access to the 192.168.1.0/24 network. Let’s restrict this.
Group Policy
We’ll start with the group policy option. I will first create an access-list that only permits ICMP traffic to R1:
ASA1(config)# access-list RESTRICT_VPN permit icmp any host 192.168.1.1We have to apply the access-list to the group policy:
ASA1(config)# group-policy VPN_POLICY attributes
ASA1(config-group-policy)# vpn-filter value RESTRICT_VPN
We need to disconnect and reconnect our VPN client before this setting becomes active. Do this from the VPN client or reset the connection on the ASA:
ASA1# clear crypto ipsec saBefore we reconnect, let’s enable a debug:
ASA1# debug acl filterOnce you reconnect, you see the following debug lines:
ASA1#
ASA1# ACL FILTER INFO:(ID:0x00007f11b93406a0) first reference to outbound filter RESTRICT_VPN(2): Installing rule into NP.
ACL FILTER INFO:(ID:0x00007f11b99bfbd0) first reference to inbound filter RESTRICT_VPN(2): Installing rule into NP.
The output above tells us that the VPN filter is installed. You can also verify this in the Accelerated Security Path (ASP) table:
ASA1# show asp table filter

Global Filter Table:
in  id=0x7f11b99ce080, priority=13, domain=filter-aaa, deny=false
        hits=0, user_data=0x7f11c485cd00, filter_id=0x2(RESTRICT_VPN), protocol=1
        src ip=0.0.0.0, mask=0.0.0.0, icmp-type=0
        dst ip=192.168.1.1, mask=255.255.255.255, icmp-code=0
in  id=0x7f11b923dac0, priority=12, domain=filter-aaa, deny=true
        hits=4, user_data=0x7f11c485d000, filter_id=0x0(-implicit deny-), protocol=0
        src ip=0.0.0.0, mask=0.0.0.0, port=0
        dst ip=0.0.0.0, mask=0.0.0.0, port=0
in  id=0x7f11b923e200, priority=12, domain=filter-aaa, deny=true
        hits=0, user_data=0x7f11c485ce80, filter_id=0x0(-implicit deny-), protocol=0
        src ip=::/0, port=0
        dst ip=::/0, port=0
out id=0x7f11b99c34d0, priority=13, domain=filter-aaa, deny=false
        hits=0, user_data=0x7f11c485cc40, filter_id=0x2(RESTRICT_VPN), protocol=1
        src ip=192.168.1.1, mask=255.255.255.255, icmp-type=0
        dst ip=0.0.0.0, mask=0.0.0.0, icmp-code=0
out id=0x7f11b923de60, priority=12, domain=filter-aaa, deny=true
        hits=0, user_data=0x7f11c485cf40, filter_id=0x0(-implicit deny-), protocol=0
        src ip=0.0.0.0, mask=0.0.0.0, port=0
        dst ip=0.0.0.0, mask=0.0.0.0, port=0
out id=0x7f11b923e5d0, priority=12, domain=filter-aaa, deny=true
        hits=0, user_data=0x7f11c485cdc0, filter_id=0x0(-implicit deny-), protocol=0
        src ip=::/0, port=0
        dst ip=::/0, port=0
The debug and the show command for the ASP table are useful to verify our work from the ASA. Let’s send some pings from H1:
C:\Users\h1>ping 192.168.1.1

Pinging 192.168.1.1 with 32 bytes of data:
Reply from 192.168.1.1: bytes=32 time=4ms TTL=255
Reply from 192.168.1.1: bytes=32 time=3ms TTL=255
Reply from 192.168.1.1: bytes=32 time=3ms TTL=255
Reply from 192.168.1.1: bytes=32 time=3ms TTL=255

Ping statistics for 192.168.1.1:
    Packets: Sent = 4, Received = 4, Lost = 0 (0% loss),
Approximate round trip times in milli-seconds:
    Minimum = 3ms, Maximum = 4ms, Average = 3ms
Pings to R1 still work. What about R2? Let’s try:
C:\Users\h1>ping 192.168.1.2

Pinging 192.168.1.2 with 32 bytes of data:
Request timed out.
Request timed out.
Request timed out.
Request timed out.

Ping statistics for 192.168.1.2:
    Packets: Sent = 4, Received = 0, Lost = 4 (100% loss),
These pings fail, as expected. Let’s check the access-list:
ASA1# show access-list RESTRICT_VPN
access-list RESTRICT_VPN; 1 elements; name hash: 0xa57c5d8b
access-list RESTRICT_VPN line 1 extended permit icmp any host 192.168.1.1 (hitcnt=1) 0x4f86339c
Above, you can see we have a hit on the access-list.


Hi Laz,
Query related to Cisco ASA Remote Access VPN ::
My query is that What traffic is showing by in id=0x7f11b99ce080 ( Source and Destination) and out id=0x7f11b99c34d0 in the output of show asp table filter according do ASA, I am little bit confused which traffic is being inbound filtered and which one outbound filtered ?
Hello Pradyumna
First of all, when you post your question, please post it in the forum topic associated with the lesson that you are asking about. This way it is easier for us to understand the context of your question, and it eliminates the need to move your post to the appropriate forum topic… Thanks!
Now as for your question, you can see in the output that the in indicator shows source traffic from anywhere (0.0.0.0) to R1 (192.168.1.1). So this is for traffic from the VPN remote user towards the internal network. So this is the inbound filter. The out i
... Continue reading in our forumHi. i configure Cisco ASA remote vpn. i have 2 vpn users–vpnuser1 and vpnuser2.
on local network i have 2 host(host1 192.168.1.1 host2 192.168.1.2). i want to add vpn filter which will be deny icmp to host2 from vpnuser1. i know on this site there is course (Cisco ASA VPN Filter) which demonstrite this config.but what i want this is not there
Hello Cemil
Yes, you are correct that there is a lesson about the Cisco ASA VPN Filter:
https://networklessons.com/cisco/asa-firewall/cisco-asa-vpn-filter#Username_Attributes
Now in the above lesson, you will find that you are able to apply access lists to specific users. So you can create an extended access list that will deny ICMP packets to the IP address of host2. You can then apply the access list as a VPN filter on the specific username. This should give you the result you require.
Try it out and let us know how you get along.
I hope this has been helpful!
Laz