Cisco’s ASDM (Adaptive Security Device Manager) is the GUI that Cisco offers to configure and monitor your Cisco ASA firewall. In this lesson I’ll show you how you can enable it. First of all, make sure you have the ASDM image on the flash memory of your ASA:
ASA1(config)# show disk0:
--#--  --length--  -----date/time------  path
   10  8192        Dec 02 2014 19:09:34  log
   18  8192        Dec 02 2014 19:09:44  crypto_archive
  106  25088760    Aug 04 2014 13:59:20  asdm-731.bin
   19  8192        Dec 02 2014 19:10:00  coredumpinfo
   20  59          Dec 02 2014 19:10:00  coredumpinfo/coredump.cfg
  109  27113472    Aug 25 2014 13:10:56  asa915-k8.bin
  112  31522773    Aug 09 2014 15:01:52  anyconnect-win-3.1.03103-k9.pkg
  113  9993060     Aug 09 2014 15:06:50  anyconnect-linux-3.1.03103-k9.pkg
  114  11293375    Aug 09 2014 15:08:34  anyconnect-macosx-i386-3.1.03103-k9.pkg

255426560 bytes total (149430272 bytes free)
If you don’t have one, copy it to the flash memory before you continue. Our next step is to tell the ASA which ASDM image we want to use:
ASA1(config)# asdm image disk0:/asdm-731.binASDM requires HTTP and it’s disabled by default, let’s enable it:
ASA1(config)# http server enableInstead of giving everyone access to the HTTP server we will specify which network and interface are permitted to use the HTTP server:
ASA1(config)# http 192.168.1.0 255.255.255.0 INSIDEThis will only allow network 192.168.1.0 /24 on the inside interface to reach the HTTP server. It might be even a better idea to only allow one or two IP addresses that you use for management instead of an entire network.
Let’s continue and make a user account:
ASA1(config)# username ADMIN password PASSWORD privilege 15That’s all we have to do on the ASA. Now you can open a web browser on your computer, I’ll be using Windows 7 and Internet Explorer for this. Open the following URL:
https://192.168.1.254You will see the following screen:
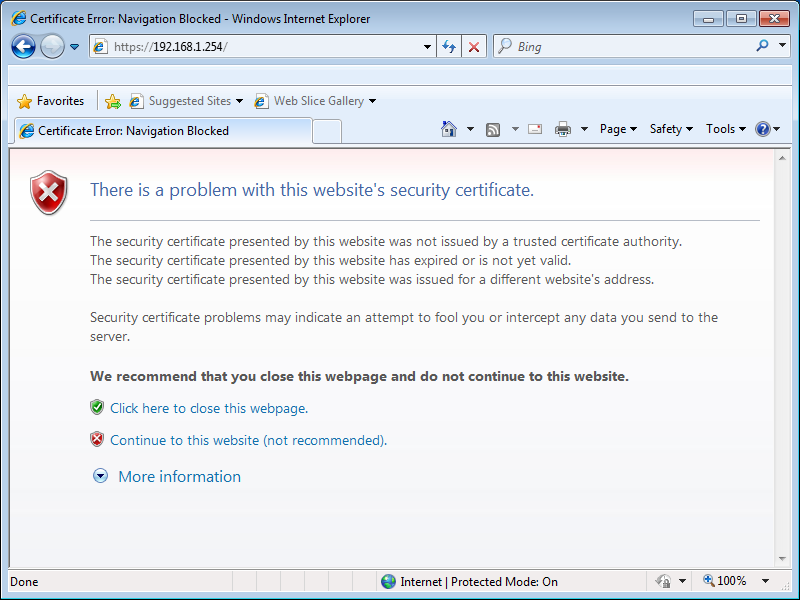
The ASA uses a self signed certificate so that’s why you see this error above. Just click on Continue to this website and you will see the following screen:
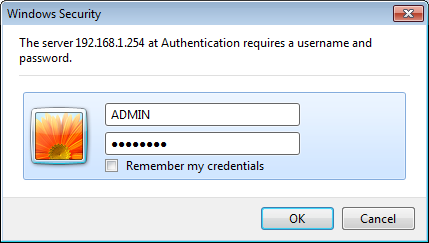
Now you can enter the username and password we created earlier. Click OK to continue and you will see the main screen:
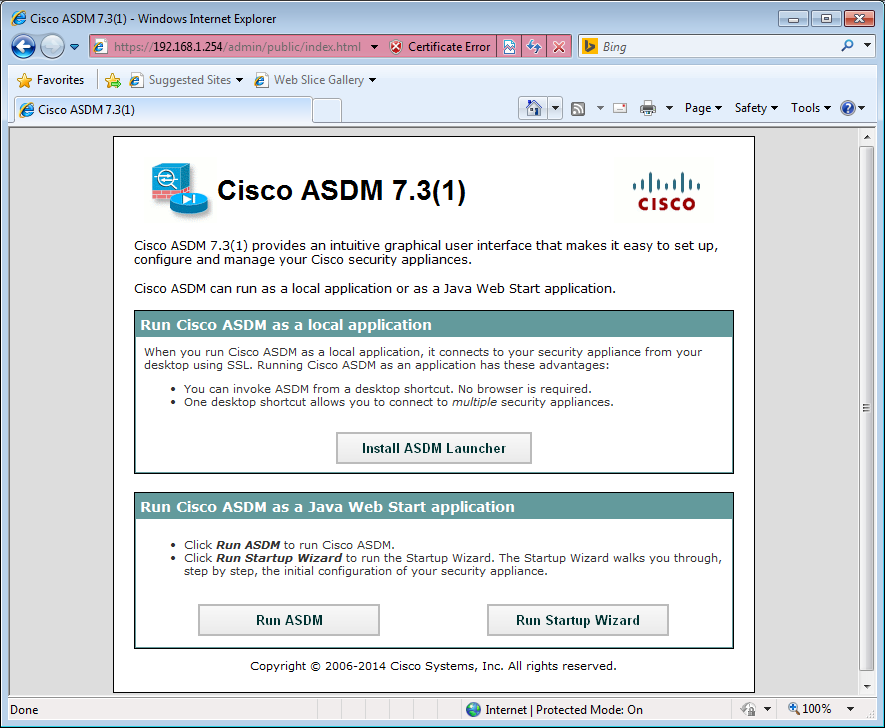
You now have two options…you can run ASDM directly from the ASA’s flash memory or you can install it on your computer first.
Let’s install it on our computer. Click “Install ASDM Launcher” to continue and your web browser will download a file:
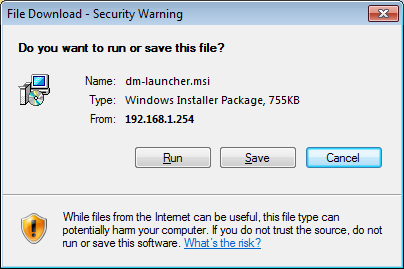
Click Run and the ASM installation will start, click continue a couple of times and it will be installed. You can launch ASDM by clicking on the shortcut on your desktop and you will see this login screen:
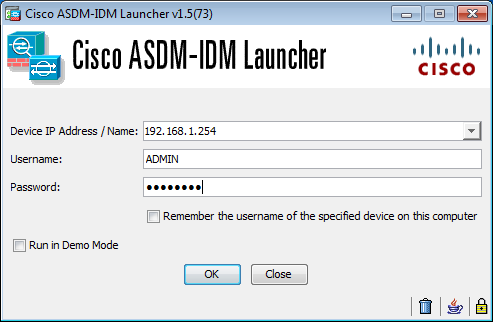
Enter the IP address of the ASA and the username/password that we created earlier. Click on OK and you will see this:
Rene,
Hi. I assume that it is just syntax on the ASA, but does the " http server enable" command enable http and https access or only https access?
Many thanks,
Thomas
Hi Thomas,
It only enables HTTPS.
Rene
Hi Rene,
Why " Admin " account does not require privilege 15
Thanks
I’ll change this, it should be a privilege level 15 account.
Hi Rene,
I am pretty new to ASA world,Just wondering This would work to allow only two IPs(10&11) to access HTTPs
Http 192.168.10.10 255.255.255.254 like a wild card mask or will it be just one line for every IP to connect via http