Lesson Contents
In previous lessons you learned how to configure the ASA for anyconnect SSL VPN and also how to self-sign certificates on the ASA. In both of these lessons the remote user was authenticating with username and password.
When we configured the ASA to self-sign its certificate, we used the ASA as a local CA. The cool thing is that we can also use this feature to create certificates for our users. This allows us to have two-factor authentication for the remote users: username/password + user certificate.
I’m going to assume that you have a working anyconnect SSL VPN configuration, if you don’t…follow the steps in the anyconnect SSL VPN lesson before you continue.
We will use the following topology:
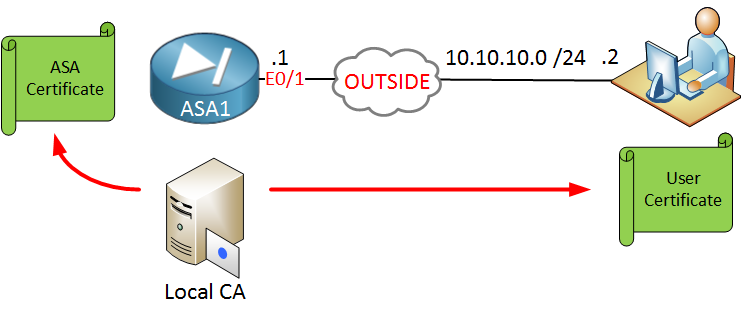
On the left side we have the ASA and on the right side is a remote user that reaches the ASA on its outside interface. The ASA will be configured as a local CA and we will generate two certificates:
- User certificate that the user will use for authentication.
- ASA certificate so that the user can validate the ASA firewall.
We will start with the configuration of the local CA!
Configuration
ASA Local CA Configuration
First we will configure the ASA as a local CA:
ASA1(config)# crypto ca server
ASA1(config-ca-server)# smtp from-address LOCAL-CA@NETWORKLESSONS.LOCAL
ASA1(config-ca-server)# subject-name-default CN=ASA1 O=NETWORKLESSONS.LOCAL C=NL
ASA1(config-ca-server)# lifetime ca-certificate 1825
ASA1(config-ca-server)# lifetime certificate 365
ASA1(config-ca-server)# issuer-name CN=ASA1-LOCAL-CA C=NL O=NETWORKLESSONS.LOCAL
ASA1(config-ca-server)# keysize server 2048
ASA1(config-ca-server)# no shutdown
The from address is a required field so I just made up an e-mail address. The lifetime of the root CA is 1825 days (5 years) and when our local CA issues a certificate, it is valid for 365 days ( 1 year). Once you enable the local CA with no shutdown you will see this:
% Some server settings cannot be changed after CA certificate generation.
% Please enter a passphrase to protect the private key
% or press return to exit
Passphrase: ***********

Re-enter passphrase: ***********

Keypair generation process begin. Please wait...

Completed generation of the certificate and keypair...

Archiving certificate and keypair to storage... Complete
INFO:
Certificate Server enabled.
The ASA will ask you to choose a passphrase for the private key. Create a strong passphrase and once it’s done, the certificate server will be up and running. You can see our certificate here:
ASA1# show crypto ca certificates
CA Certificate
  Status: Available
  Certificate Serial Number: 01
  Certificate Usage: Signature
  Public Key Type: RSA (2048 bits)
  Signature Algorithm: SHA1 with RSA Encryption
  Issuer Name:
    cn=ASA1-LOCAL-CA C=NL O=NETWORKLESSONS.LOCAL
  Subject Name:
    cn=ASA1-LOCAL-CA C=NL O=NETWORKLESSONS.LOCAL
  Validity Date:
    start date: 14:36:13 UTC Dec 16 2014
    end   date: 14:36:13 UTC Dec 15 2019
  Associated Trustpoints: LOCAL-CA-SERVER

Certificate
  Status: Available
  Certificate Serial Number: 370d8754
  Certificate Usage: General Purpose
  Public Key Type: RSA (1024 bits)
  Signature Algorithm: SHA1 with RSA Encryption
  Issuer Name:
    hostname=ASA1.NETWORKLESSONS.LOCAL
    cn=ASA1.NETWORKLESSONS.LOCAL
  Subject Name:
    hostname=ASA1.NETWORKLESSONS.LOCAL
    cn=ASA1.NETWORKLESSONS.LOCAL
  Validity Date:
    start date: 14:03:52 UTC Dec 10 2014
    end   date: 14:03:52 UTC Dec 7 2024
  Associated Trustpoints: SELF_TRUSTPOINT
You can see the certificate that we created. The trustpoint (that’s where the certificates are stored) is created automatically.
Enroll User Certificate
We can now add a user to the CA database, when you do this the username has to be the same as the common name (CN):
ASA1(config)# crypto ca server user-db add cert_user dn CN=cert_user
INFO: User added as 'cert_user'
The user account “cert_user” has been added. We will allow this user to enroll a certificate by using an OTP (One Time Password). Here’s how we enable this:
ASA1(config)# crypto ca server user-db allow cert_user display-otp
Username: cert_user
OTP: 805AF0FE3FD89EFE
Enrollment Allowed Until: 14:40:53 UTC Fri Dec 19 2014
Above you can see our OTP. When the user requests to enroll the certificate, we’ll need to enter the OTP. Instead of OTP you can also use e-mail delivery.
Everything is now in place on the ASA. Let’s enroll the user certificate on a computer. I will use a Windows 7 computer with Internet Explorer. Open the following URL:
https://asa1.networklessons.local/+CSCOCA+/enroll.htmlYou will see the following screen:
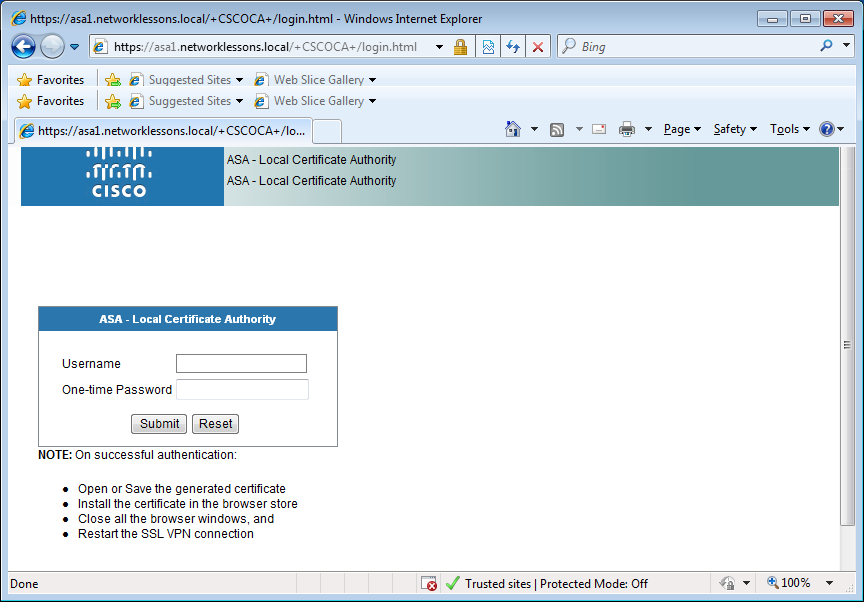
This is where the user can enroll a certificate. Enter the username that we created earlier and the OTP. Once you hit submit, the certificate will be created and you can download it:
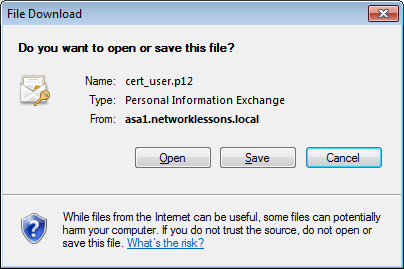
Save this file somewhere, I’ll call mine “cert_user”:
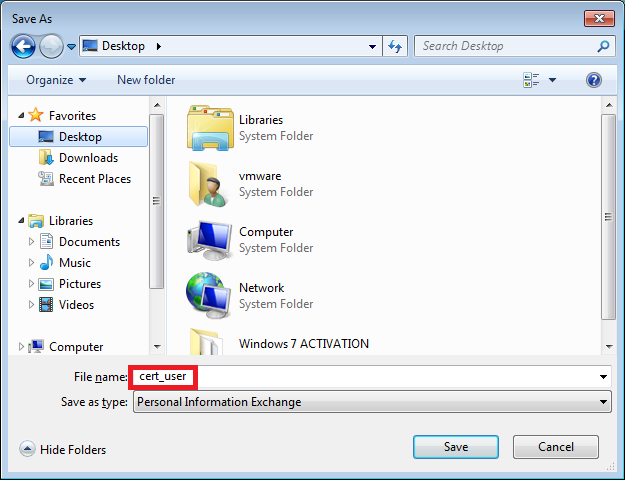
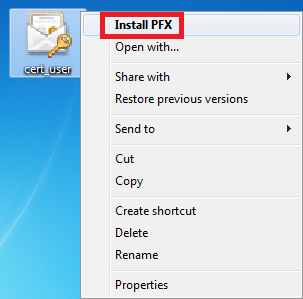
Open the folder where you saved your user certificate, right-click on the certificate file and select “Install PFX”:
Once you do this, it will start the certificate import wizard, it looks like this:
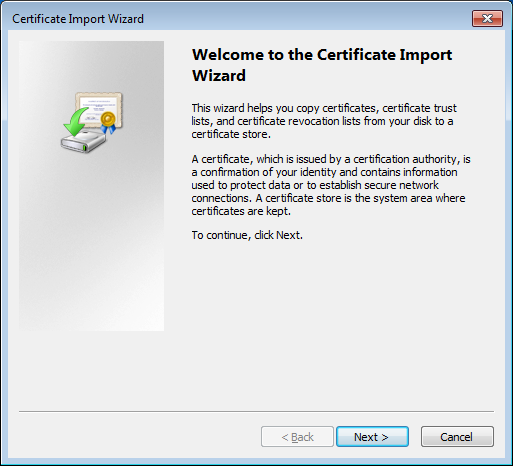
Click Next to continue and the wizard will ask what certificate we want to import:
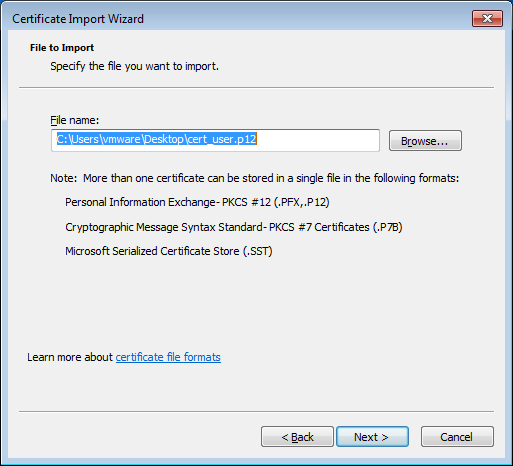
Our certificate is already selected so just hit Next to continue and we’ll see this:
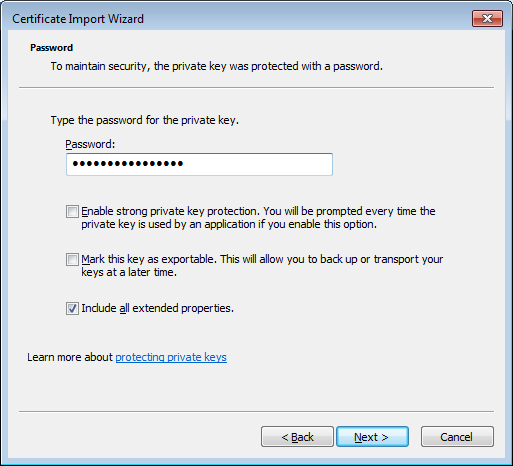
The wizard prompts for the password of the private key. You need to enter the OTP here and click Next to continue. Now we need to select where we want to store the certificate:
Hello Rene, first congratulations for your lessons, I have read many of them, and I have liked them all.
Now I have two questions regarded this lesson:
Thank you in advance
Hi Hector,
It’s not mandatory, you could configure the local CA first. The configuration for anyconnect is pretty much the same so that’s why I referred to the previous example.
The certificate that we exported to the computer and then back to the ASA is something you only have to do once…the ASA will present this certificate to the user so that the user can authenticate the ASA.
User certificates are easier to enroll. They can fetch it using their webbrowser.
Rene
Hi Rene
“Cisco ASA Anyconnect Local CA” Means ASA act like a CA?
I don’t want a group(In your example SSL_USERS) means users does not have a choice to select group from the combo box called groups . I think if I don’t need the groups I really dont’need this part " tunnel-group MY_TUNNEL webvpn-attributes " .
In that case how do I enable double auth like username (ldap ) and certificate .
If I am using a self signed certificate double authentication is part is same ? .How do i generate certificate for the end users if i am using a self signed certificate in asa ?
Thanks
Hi Sims,
That’s right, the ASA is the CA that creates certificates here. Although it works, I think it’s a better idea to use an external CA for your certificates.
The following command allows users to select a group:
If you remove it, users shouldn’t be able to get that option anymore.
Rene
Hi Loc,
Microsoft CA servers can be difficult to work with. I don’t have an exact example for the ASA. The only time I wrote something about Microsoft CA is when I did an example about a Wireless LAN controller where we use certificates for end users:
https://networklessons.com/miscellaneous/peap-and-eap-tls-on-server-2008-and-cisco-wlc