Lesson Contents
In this lesson we will see how you can use the anyconnect client for remote access VPN. Anyconnect is the replacement for the old Cisco VPN client and supports SSL and IKEv2 IPsec. When it comes to SSL, the ASA offers two SSL VPN modes:
- Clientless WebVPN
- AnyConnect VPN
The clientless WebVPN method does not require a VPN client to be installed on the user’s computer. You just open your web browser, enter the IP address of the ASA and you will get access through a web portal. You only have limited access to a number of applications, for example:
- Internal websites (HTTP and HTTPS)
- Web applications
- Windows file shares
- Email servers (POP3, IMAP, SMTP)
- Microsoft Outlook Web Access
There is no full network access when you use clientless WebVPN.
Anyconnect VPN offers full network access. The remote user will use the anyconnect client to connect to the ASA and will receive an IP address from a VPN pool, allowing full access to the network.
In this lesson we will use clientless WebVPN only for the installation of the anyconnect VPN client. The remote user will open a web browser, enters the IP address of the ASA and then it will automatically download the anyconnect VPN client and establishes the connection. Here’s the topology that we will use:

Above we have the ASA firewall with two security zones: inside and outside. The remote user is located somewhere on the outside and wants remote access with the Anyconnect VPN client. R1 on the left side will only be used so that we can test if the remote user has access to the network. Let’s take a look at the configuration!
ASA Configuration
The remote user will be able to download the anyconnect VPN client from the ASA so we need to store it somewhere. Each operating system has a different installation file and we need to have them on the flash memory of the ASA:
ASA1# show flash:
--#--  --length--  -----date/time------  path
   10  8192        Dec 02 2014 19:09:34  log
   18  8192        Dec 02 2014 19:09:44  crypto_archive
  106  25088760    Aug 04 2014 13:59:20  asdm-731.bin
  109  27113472    Aug 25 2014 13:10:56  asa915-k8.bin
  112  31522773    Aug 09 2014 15:01:52  anyconnect-win-3.1.03103-k9.pkg
  113  9993060     Aug 09 2014 15:06:50  anyconnect-linux-3.1.03103-k9.pkg
  114  11293375    Aug 09 2014 15:08:34  anyconnect-macosx-i386-3.1.03103-k9.pkg

255426560 bytes total (149487616 bytes free)
There is a different PKG file for each operating system. Above you can see that I have one for Windows, Linux and Mac OS X. If you don’t have them already, make sure you copy them to the flash memory of the ASA.
Our next step is to enable clientless WebVPN:
ASA1(config)# webvpnNow we specify which anyconnect PKG files we want to use:
ASA1(config-webvpn)# anyconnect image flash:/anyconnect-win-3.1.03103-k9.pkgI’m only specifying the anyconnect client for Windows but if you want to support Linux or Mac OS X users, make sure to add them here. Now we can enable client WebVPN on the outside interface:
ASA1(config-webvpn)# enable outside
INFO: WebVPN and DTLS are enabled on 'OUTSIDE'.
This enables WebVPN on the outside interface. We also need to enable anyconnect:
ASA1(config-webvpn)# anyconnect enableWhen you have an inbound access-list on the outside interface then all your decrypted traffic from the SSL WebVPN has to match the inbound access-list. You can either create some permit statements for the decrypted traffic or you can just tell the ASA to let this traffic bypass the access-list:
ASA1(config)# sysopt connection permit-vpnWhen remote users connect to our WebVPN they have to use HTTPS. The following option is not required but useful, whenever someone accesses the ASA through HTTP then they will be redirected to HTTPS:
ASA1(config)# http redirect OUTSIDE 80The ASA will assign IP addresses to all remote users that connect with the anyconnect VPN client. We’ll configure a pool with IP addresses for this:
ASA1(config)# ip local pool VPN_POOL 192.168.10.100-192.168.10.200 mask 255.255.255.0Remote users will get an IP address from the pool above, we’ll use IP address range 192.168.10.100 – 200.
By default all traffic will be sent through the tunnel once the remote user is connected. If you want to allow remote users to access the Internet once they are connected then you need to configure split tunneling. We will configure an access-list that specifies what networks we want to reach through the tunnel:
ASA1(config)# access-list SPLIT_TUNNEL standard permit 192.168.1.0 255.255.255.0This means that the SSL VPN tunnel will only be used to reach the 192.168.1.0 /24 network. Now we can configure the anyconnect group policy:
ASA1(config)# group-policy ANYCONNECT_POLICY internal
ASA1(config)# group-policy ANYCONNECT_POLICY attributes
ASA1(config-group-policy)# vpn-tunnel-protocol ssl-client ssl-clientless
ASA1(config-group-policy)# split-tunnel-policy tunnelspecified
ASA1(config-group-policy)# split-tunnel-network-list value SPLIT_TUNNEL
ASA1(config-group-policy)# dns-server value 8.8.8.8
ASA1(config-group-policy)# webvpn
ASA1(config-group-webvpn)# anyconnect keep-installer installed
ASA1(config-group-webvpn)# anyconnect ask none default anyconnect
ASA1(config-group-webvpn)# anyconnect dpd-interval client 30
ASA1(config-group-webvpn)# exit
There’s quite some stuff in the group policy, let me break it down for you:
- The group policy is called “ANYCONNECT_POLICY” and it’s an internal group policy which means that we configure it locally on the ASA. An external group policy could be on a RADIUS server.
- The VPN tunnel protocol is ssl-client (for anyconnect) and also ssl-clientless (clientless SSL VPN).
- Split tunneling has been enabled and we refer to the access-list “SPLIT_TUNNEL” that we just created.
- The DNS server 8.8.8.8 will be assigned to remote VPN users.
- Normally when the remote VPN user terminates the session, the anyconnect installer will be uninstalled. The anyconnect keep-installer installed command leaves it installed on the user’s computer.
- The anyconnect ask command specifies how the anyconnect client will be installed on the user’s computer. The none default anyconnect part tells the ASA not to ask the user if he/she wants to use WebVPN or anyconnect but just starts the download of the anyconnect client automatically.
- The anyconnect dpd-interval command is used for Dead Peer Detection. The remote user’s anyconnect client will check every 30 seconds if the ASA is still responding or not. You can also use dpd-interval gateway so that the ASA checks if the remote user is still responding.
After the group policy configuration we have to create a tunnel group which binds the group policy and VPN pool together:
ASA1(config)# tunnel-group MY_TUNNEL type remote-access
ASA1(config)# tunnel-group MY_TUNNEL general-attributes
ASA1(config-tunnel-general)# default-group-policy ANYCONNECT_POLICY
ASA1(config-tunnel-general)# address-pool VPN_POOL
ASA1(config-tunnel-general)# exit
When the remote user connects, the ASA will show a group name to the remote user, we can specify the group name like this:
ASA1(config)# tunnel-group MY_TUNNEL webvpn-attributes
ASA1(config-tunnel-webvpn)# group-alias SSL_USERS enable
You will see that when the remote user connects, the ASA will show the group name “SSL_USERS”. If you have multiple tunnel groups then your remote users should be able to select a certain tunnel group:
ASA1(config)# webvpn
ASA1(config-webvpn)# tunnel-group-list enable
Now we can create a user account:
ASA1(config)# username SSL_USER password MY_PASSWORDWe need to tell the ASA that this user account is allowed to access the network:
ASA1(config)# username SSL_USER attributes
ASA1(config-username)# service-type remote-access
Everything is now in place on the ASA. We can use the client to connect to the ASA and install the anyconnect client.
Client Configuration
I will use a Windows 7 client with Internet Explorer for this. Start the browser and enter the IP address of the ASA as the URL. If you use HTTP, you will be redirected to HTTPS:
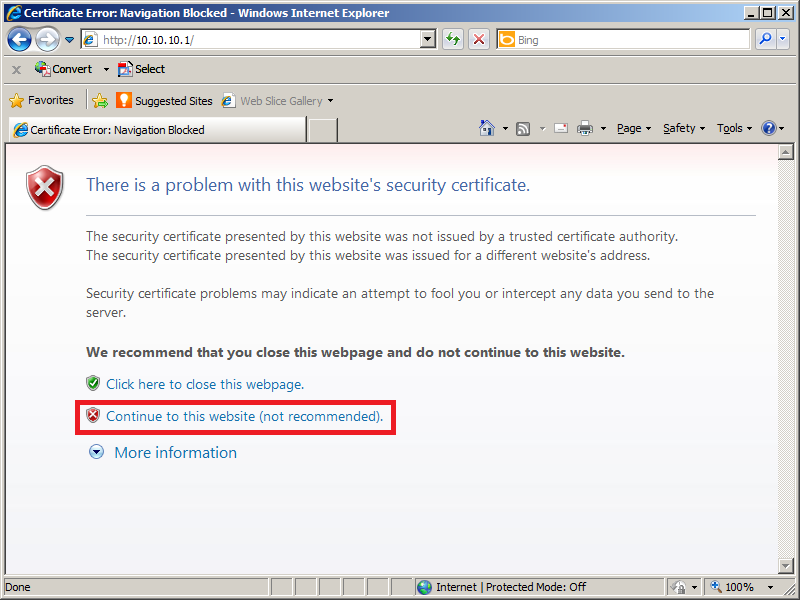
The ASA is using a self-signed certificate that is not recognized by the browser so that’s why you see this error. Click continue and you will see the following screen:

Now you can authenticate yourself. Enter the username and password that we created earlier. The group name is the group alias that we created. Once you are authenticated you will see this:
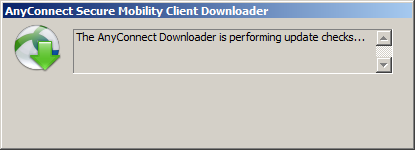
The client tries to download the Anyconnect automatically, this is because of the anyconnect ask none default anyconnect command that we used. Since we are using a self-signed certificate you will get the following error message:
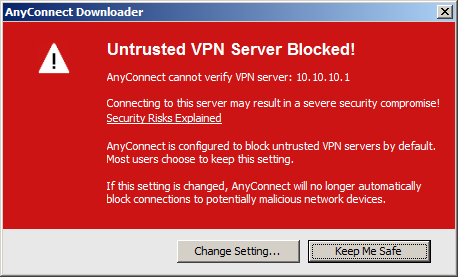
You need to click on the Change Setting button and you will see this:
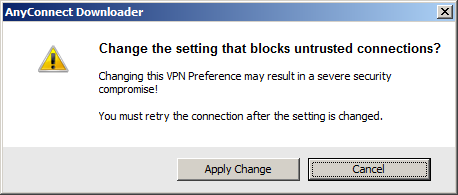
Click on the Apply Change button and you will see this:
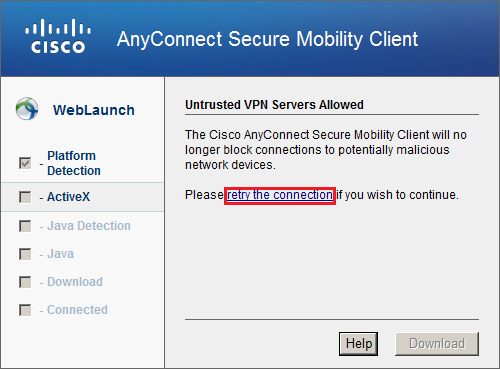
Click on the retry the connection link and you will see this:
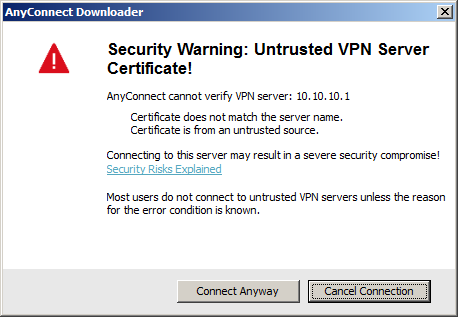
We get one more warning that the certificate cannot be verified. Click on Connect Anyway and the download will finally start:
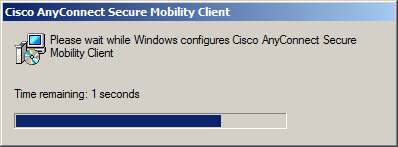
Once it is completed you will see this:
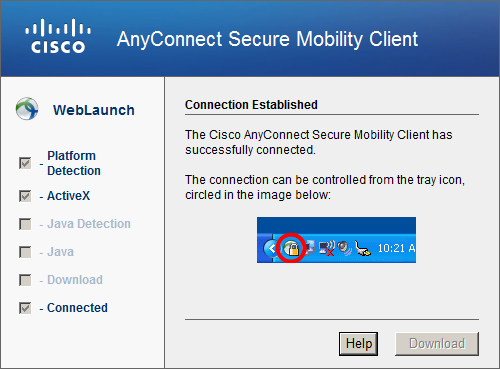
The Anyconnect client has been installed and the connection has been established. If you look in the Windows taskbar then you will find a small icon:
![]()
Click on it and it will open the Anyconnect client, here’s what it looks like:
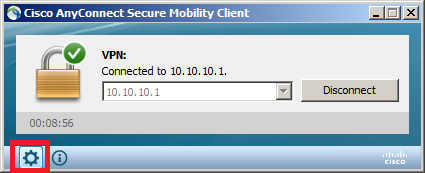
It is connected and if you want to see some details you need to click on the little “gear” icon, it will give you a nice overview of the connection:
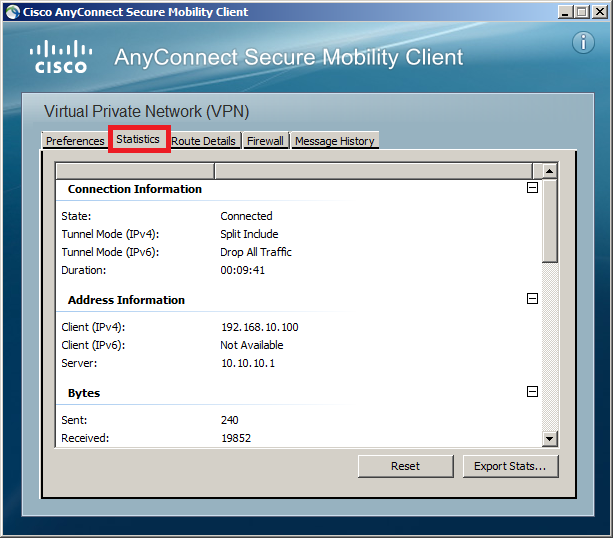
This shows you the IP address that the client has received and some statistics about how much bytes were sent/received. This is looking good but it’s important to verify a couple of things before we end this lesson…
Verification
Client Verification
First we’ll generate some traffic on the client, see if it can reach R1 on the inside network:
C:UsersVPN>ping 192.168.1.1

Pinging 192.168.1.1 with 32 bytes of data:
Reply from 192.168.1.1: bytes=32 time=2ms TTL=255
Reply from 192.168.1.1: bytes=32 time=2ms TTL=255
Reply from 192.168.1.1: bytes=32 time=2ms TTL=255
Reply from 192.168.1.1: bytes=32 time=2ms TTL=255

Ping statistics for 192.168.1.1:
    Packets: Sent = 4, Received = 4, Lost = 0 (0% loss),
Approximate round trip times in milli-seconds:
    Minimum = 2ms, Maximum = 2ms, Average = 2ms
That’s looking good, let’s use ipconfig to see what IP address it has received:
Hi Rene,
For this part here -
The DNS server 8.8.8.8 will be assigned to remote VPN users.
When connected to the VPN, If the users are trying to access Internal Corporate machines via DNS name, should we provide an Internal DNS server address rather than 8.8.8.8
Thanks
Rob
Hi Rob,
That would work yes, there are also some other solutions. Take a look at this Cisco post:
https://www.cisco.com/c/en/us/support/docs/security/anyconnect-secure-mobility-client/116016-technote-AnyConnect-00.html
Rene
Rene
Which ASA model does your configuration examples apply to? Would you give some thought to doing a video similar to the one about choosing routers and switches but topic would be choosing firewalls.
Thanks
Hi Donald,
I used the ASA 5510 for most of these examples. The big difference between the ASA 5505 and all the other models is that it’s the only firewall that has 4 switchports.
The 5510 only has L3 interfaces, it doesn’t have switchports. The ASA 5506 that replaces the 5505 also doesn’t have switchports anymore.
A video for the different firewalls might be a good idea, for labs the ASA 5510 with security plus license is probably the best choice for now.
Rene
Rene
I was asking because Cisco Packet Tracer 6.2 has a 5505 under it’s Security device category.
I will add an ASA 5510 to the physical lab after I pass the CCNA exam. I have to keep reminding myself to not spend a lot of time for now on things that are not going to be on the CCNA exam. It is easy to get distracted by topics not on the exam.
Thanks for your response