In a previous lesson, I explained how to install APIC-EM and some of its basics. In this lesson, we’ll take a look at the path trace ACL analysis tool which is one of the topics on the blueprint of CCNA R&S.
I will use the following physical topology for this example:

I used this to build the following logical topology:
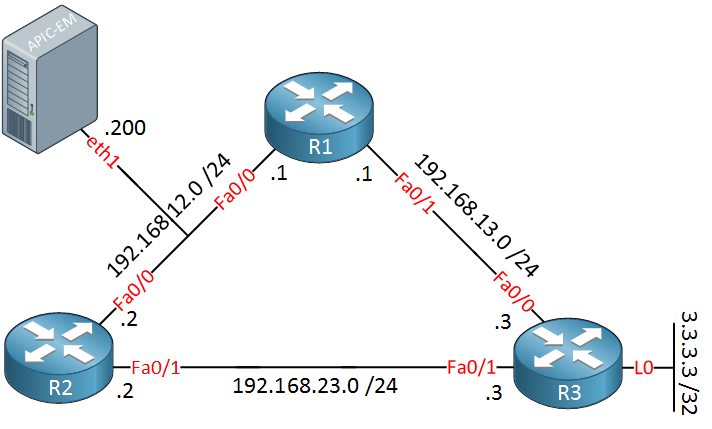
The routers above are running OSPF. Let’s see if we can trace some traffic.
Configurations
Want to take a look for yourself? Here you will find the startup configuration of each device.
R1
hostname R1
!
enable password Cisco123
!
ip domain name NETWORKLESSONS.LOCAL
!
username admin password 0 Cisco123
!
interface FastEthernet0/0
 ip address 192.168.12.1 255.255.255.0
!
interface FastEthernet0/1
 ip address 192.168.13.1 255.255.255.0
!
router ospf 1
 network 192.168.12.0 0.0.0.255 area 0
 network 192.168.13.0 0.0.0.255 area 0
!
snmp-server community readonly RO
snmp-server community readwrite RW
!
line vty 5 9
 login local
 transport input ssh
!
end
R2
hostname R2
!
enable password Cisco123
!
ip domain name NETWORKLESSONS.LOCAL
username admin password 0 Cisco123
!
interface FastEthernet0/0
 ip address 192.168.12.2 255.255.255.0
!
interface FastEthernet0/1
 ip address 192.168.23.2 255.255.255.0
!
router ospf 1
 network 192.168.12.0 0.0.0.255 area 0
 network 192.168.23.0 0.0.0.255 area 0
!
ip access-list extended NO_SSH
 deny   tcp host 192.168.12.1 any eq 22
 permit ip any any
!
snmp-server community readonly RO
snmp-server community readwrite RW
!
line vty 5 9
 login local
 transport input ssh
!
end
R3
hostname R3
!
enable password Cisco123
!
ip domain name NETWORKLESSONS.LOCAL
username admin password 0 Cisco123
!
interface Loopback0
 ip address 3.3.3.3 255.255.255.255
!
interface FastEthernet0/0
 ip address 192.168.13.3 255.255.255.0
!
interface FastEthernet0/1
 ip address 192.168.23.3 255.255.255.0
!
router ospf 1
 network 3.3.3.3 0.0.0.0 area 0
 network 192.168.13.0 0.0.0.255 area 0
 network 192.168.23.0 0.0.0.255 area 0
!
ip http server
!
snmp-server community readonly RO
snmp-server community readwrite RW
!
line vty 5 9
 login local
 transport input ssh
!
end
SW1
hostname SW1
!
enable password Cisco123
!
username admin password 0 Cisco123
!
ip domain-name NETWORKLESSONS.LOCAL
!
interface FastEthernet0/1
 switchport access vlan 12
 switchport mode access
 spanning-tree portfast
!
interface FastEthernet0/2
 switchport access vlan 12
 switchport mode access
 spanning-tree portfast
!
interface FastEthernet0/3
 switchport access vlan 13
 switchport mode access
 spanning-tree portfast
!
interface FastEthernet0/11
 switchport access vlan 12
 switchport mode access
 spanning-tree portfast
!
interface FastEthernet0/12
 switchport access vlan 12
 switchport mode access
 spanning-tree portfast
!
interface FastEthernet0/24
 switchport trunk encapsulation dot1q
 switchport mode trunk
 ip access-group R1_R3_HTTP in
!
interface Vlan12
 ip address 192.168.12.100 255.255.255.0
!
ip default-gateway 192.168.12.1
ip classless
!
ip access-list extended R1_R3_HTTP
 deny   tcp host 192.168.13.1 host 3.3.3.3 eq www
 permit ip any any
!
snmp-server community readonly RO
snmp-server community readwrite RW
!
line vty 5 9
 login local
 transport input ssh
line vty 10 15
 login
!
end
SW2
hostname SW2
!
enable password Cisco123
!
username admin password 0 Cisco123
!
ip domain-name NETWORKLESSONS.LOCAL
!
interface FastEthernet0/1
switchport access vlan 13
switchport mode access
spanning-tree portfast
!
interface FastEthernet0/2
switchport access vlan 23
switchport mode access
spanning-tree portfast
!
interface FastEthernet0/3
switchport access vlan 23
switchport mode access
spanning-tree portfast
!
interface FastEthernet0/10
switchport access vlan 12
switchport mode access
spanning-tree portfast
!
interface FastEthernet0/12
switchport access vlan 12
switchport mode access
spanning-tree portfast
!
interface FastEthernet0/24
switchport trunk encapsulation dot1q
switchport mode trunk
!
interface Vlan12
ip address 192.168.12.101 255.255.255.0
!
ip default-gateway 192.168.12.1
!
snmp-server community readonly RO
snmp-server community readwrite RW
!
line vty 5 9
login local
transport input ssh
line vty 10 15
login
!
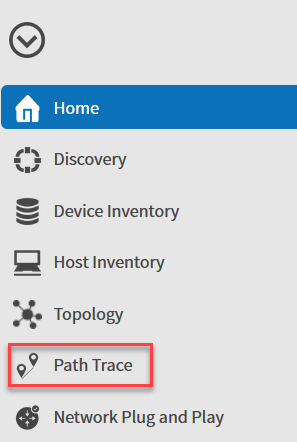
endIn the menu on the left side, select Path Trace:
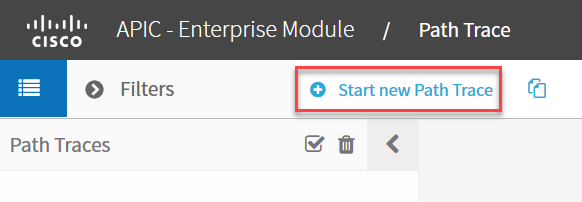
Select “Start new Path Trace”:
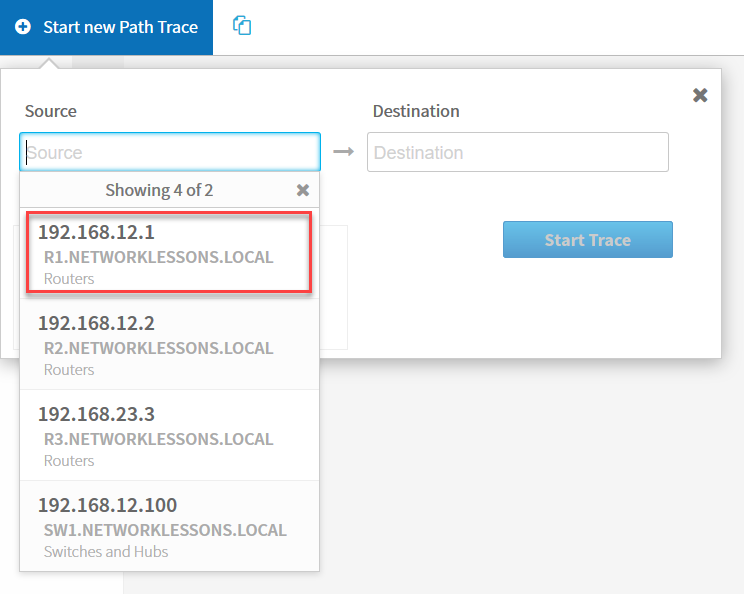
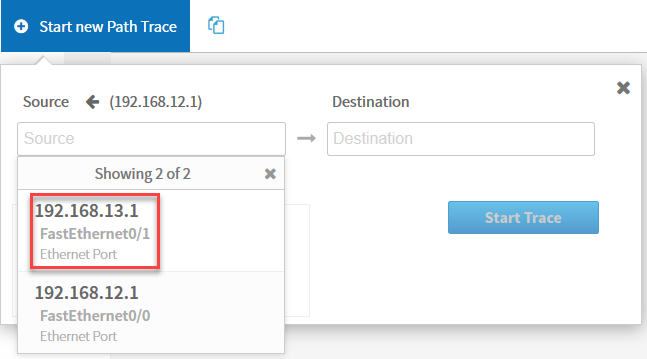
Now we can enter a source and destination. Let’s select R1 as the source:
Once you select the device, you can select one of its interfaces. Let’s pick FastEthernet 0/1:
For the destination, we will use R3 and its loopback interface. We will select options and choose TCP as our protocol with destination port 80. For the source port, I’ll pick 50001. Make sure you select ACL trace:
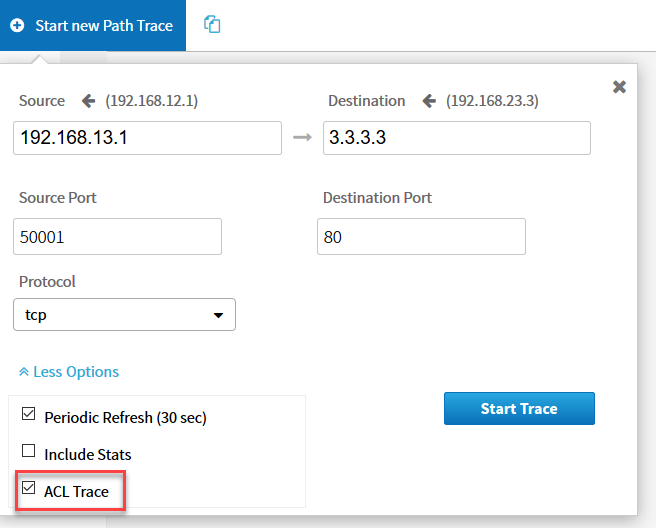
Click on Start Trace and APIC-EM will do its magic. You will see the following screen:
This is really Beautiful Tool.
Thanks Rene!
This is really sweet and informative, since I deal with ACLs consistently at work. Thanks again for the great work.