Lesson Contents
OSPF used to only support plain text and MD5 authentication but since IOS 15.4(1)T, OSPF also supports HMAC-SHA (Hash Message Authentication Code Secure Hash Algorithm). Besides the new algorithm, the way you configure authentication has also changed. OSPF now uses key chains like RIP and EIGRP.
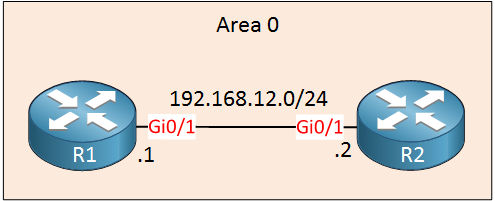
To demonstrate HMAC-SHA authentication, we will use these two routers:
Configuration
Let’s start by enabling OSPF on both routers:
R1(config)#router ospf 1
R1(config-router)#network 192.168.12.0 0.0.0.255 area 0R2(config)#router ospf 1
R2(config-router)#network 192.168.12.0 0.0.0.255 area 0Now we can focus on authentication.
R1
First, we have to create a key chain. The name of the key chain is only locally significant so pick whatever you like. The key ID has to be the same on both routers. I’ll name it R1 and use key 1:
R1(config)#key chain R1
R1(config-keychain)#key 1
In the key chain configuration, there are two things we have to do. First, we have to tell the router that we want to use a different cryptographic algorithm:
R1(config-keychain-key)#cryptographic-algorithm ?
  hmac-sha-1    HMAC-SHA-1 authentication algorithm
  hmac-sha-256  HMAC-SHA-256 authentication algorithm
  hmac-sha-384  HMAC-SHA-384 authentication algorithm
  hmac-sha-512  HMAC-SHA-512 authentication algorithm
  md5           MD5 authentication algorithm
As you can see above, we can choose one of the HMAC-SHA options. MD5 is also supported for this new key chain method. Let’s use the most secure HMAC-SHA options:
R1(config-keychain-key)#cryptographic-algorithm hmac-sha-512The other thing we have to configure is the key string, the password that we want to use:
R1(config-keychain-key)#key-string R1_R2_PASSWORDThe only thing left to do now is to enable authentication. This can only be done on the interface, you can’t enable it for the entire area using this method:
R1(config)#interface GigabitEthernet 0/1
R1(config-if)#ip ospf authentication key-chain R1
Let’s do the same thing on R2:
R2
R2(config)#key chain R2
R2(config-keychain)#key 1
R2(config-keychain-key)#cryptographic-algorithm hmac-sha-512
R2(config-keychain-key)#key-string R1_R2_PASSWORD

R2(config)#interface GigabitEthernet 0/1
R2(config-if)#ip ospf authentication key-chain R2
That’s all we have to configure.
Verification
Let’s verify our work. First, I’ll check if authentication is enabled or not:
R1#show ip ospf interface GigabitEthernet 0/1 | begin auth
  Cryptographic authentication enabled
Sending SA: Key 1, Algorithm HMAC-SHA-512 - key chain R1R2#show ip ospf interface GigabitEthernet 0/1 | begin auth
Cryptographic authentication enabled
Sending SA: Key 1, Algorithm HMAC-SHA-512 - key chain R2As you can see above, authentication is enabled using HMAC-SHA-512. Let’s make sure our two routers are neighbors:
R1#show ip ospf neighbor

Neighbor ID     Pri   State           Dead Time   Address         Interface
192.168.12.2 1 FULL/DR 00:00:31 192.168.12.2 GigabitEthernet0/1R2#show ip ospf neighbor
Neighbor ID Pri State Dead Time Address Interface
192.168.12.1 1 FULL/BDR 00:00:33 192.168.12.1 GigabitEthernet0/1Which seems to be the case. That’s all there is to it.
Configurations
Want to take a look for yourself? Here you will find the final configuration of each device.
Hi Arun,
That’s an error yes, thanks for reporting it. I just fixed it.
Rene
Hello Rene,
It looks like there is also fat finger issue. See below
That is a typo yes, I’ll fix it. Thanks!
Rene
Hello Azat
Yes, that should be 192.168.12.2 and not .1. However, the OSPF process will interpret this as the network address of 192.168.12.0 because of the wildcard mask. If you look at the config after this command, you will indeed see the following:
network 192.168.12.0 0.0.0.255 area 0But for completeness, I will let Rene know to clarify the command.
I hope this has been helpful!
Laz