Lesson Contents
in this lesson, you will learn how to configure the different types of policing on Cisco IOS routers:
- Single rate, two-color
- Single rate, three-color
- Dual rate, three-color
If you have no idea what the difference is between the different policing types then you should start with my QoS Traffic Policing Explained lesson. Having said that, let’s configure some routers. I’ll use the following topology for this:
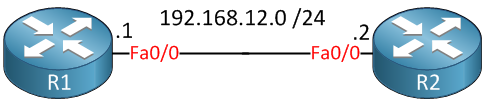
We don’t need anything fancy to demonstrate policing. I will use two routers for this: R1 will generate some ICMP traffic, and R2 will do the policing.
Let’s start with the first policer.
Single Rate Two-Color Policing
Configuration is done using the MQC (Modular QoS Command-Line Interface). First, we need to create a class-map to “classify” our traffic:
R2(config)#class-map ICMP
R2(config-cmap)#match protocol icmp
To keep it simple, I will use NBAR to match ICMP traffic. Now, we can create a policy-map:
R2(config)#policy-map SINGLE-RATE-TWO-COLOR
R2(config-pmap)#class ICMP
R2(config-pmap-c)#police 128000
R2(config-pmap-c-police)#conform-action transmit
R2(config-pmap-c-police)#exceed-action drop
The policy-map is called “SINGLE-RATE-TWO-COLOR”, and we configure policing for 128000 bps (128 Kbps) under the class-map. When the traffic rate is below 128 Kbps the conform-action is to transmit the packet, when it exceeds 128 Kbps, we will drop the packet.
Above I first configured the police CIR rate and then I configured the “actions” in the “policer configuration”. You can also configure everything on one single line, then it will look like this:
R2(config-pmap-c)#police 128000 conform-action transmit exceed-action dropBoth options achieve the same so it doesn’t matter which one you use. For readability reasons, I selected the first option.
Let’s activate the policer on the interface, and we’ll see if it works:
R2(config)#interface FastEthernet 0/0
R2(config-if)#service-policy input SINGLE-RATE-TWO-COLOR
You need to use the service-policy command to activate the policer on the interface.
Time to generate some traffic on R1:
R1#ping 192.168.12.2 repeat 999999
Type escape sequence to abort.
Sending 999999, 100-byte ICMP Echos to 192.168.12.2, timeout is 2 seconds:
!!!!!!!!!!!!!!!!!!!!!!!!!!!!!!!!!!!!!!!!!!!!!!!!.!!!!!!!!!!!!!!!!!!!!!
!!!!!!!!!!!!!!!!!!!!!!!!!!!!.!!!!!!!!!!!!!!!!!!!!!!!!!!!!!!!!!!!!!!!!!
!!!!!!!!!!!!!!!!!!!!!!!!!!!!!!!!!!!!!!!!!!!!!!!!!!!!!!!!.!!!!!!!!!!!!!
You can already see some of the packets don’t make it to their destination. Let’s see what R2 thinks about all these pings:
R2#show policy-map interface FastEthernet 0/0
 FastEthernet0/0

  Service-policy input: SINGLE-RATE-TWO-COLOR

    Class-map: ICMP (match-all)
      1603 packets, 314382 bytes
      5 minute offered rate 18000 bps, drop rate 0 bps
      Match: protocol icmp
      police:
          cir 128000 bps, bc 4000 bytes
        conformed 1499 packets, 199686 bytes; actions:
          transmit
        exceeded 104 packets, 114696 bytes; actions:
          drop
        conformed 10000 bps, exceed 0 bps

    Class-map: class-default (match-any)
      0 packets, 0 bytes
      5 minute offered rate 0 bps, drop rate 0 bps
      Match: any
Above, you can see that the policer is doing its job. The configured CIR rate is 128000 bps (128 Kbps), and the bc is set to 4000 bytes. If you don’t configure the bc yourself, then Cisco IOS will automatically select a value based on the CIR rate. You can see that most of the packets were transmitted (conformed) while some of them got dropped (exceeded).
If you understand the theory about policing, then the configuration and verification aren’t too bad, right? Let’s move on to the next policer.
Single Rate Three-Color Policing
If you understand the previous configuration, then this one will be easy. I’ll use the same class-map:
It is a good post. In your example, pir is cir + Be, right ? what is pir meaning ? why do you choose pir as 256000 ?
Hi David,
Did you see this post?
https://networklessons.com/quality-of-service/qos-traffic-policing-explained
This is where I explained the PIR. Let me know if it’s helpful ok?
Rene
Rene,
Great article. I can see you applied policy-map on R2 in the inbound direction.
What if we need to ping from R2 to R1 how can we then apply a policy map?
Do we need another policy-map with the same configs?
Hamood
Hi Hamood,
Policing can be applied in- or outbound. I applied it inbound on R2 so that we can police whatever we receive from R1. You could also apply it outbound on R2, this would police any traffic from traffic (behind R2) headed towards R1.
You can use the same policy-map in- and outbound.
Rene
Rene, great article, thanks for sharing your knowledge.
In the ISP world, if I have 25mb download and 1mb upload contract rate, will they be policing my traffic inbound on their premise? What about when I run a speed test, the results are coming from my gateway doing any policing or from the isp side?
Thanks,
Jose