Lesson Contents
What if you could deploy a fully functional Cisco SD-WAN lab in less than 20 minutes without the trouble of manual configurations? I’ll show you how in this lesson.
In the Cisco SD-WAN EVE-NG Lab Installation lesson, we installed an entire Cisco SD-WAN lab from scratch. We had to do everything:
- Add all required images.
- Install and configure the controllers.
- Generate and install device certificates everywhere.
- Install device licenses.
- Onboard the routers.
- Etc.
This is a good exercise to learn and understand how everything works, but it is time-consuming and easy to make errors. It’s OK to do this once, but you don’t want to do this every time you mess up your lab or want to try a new version.
Cisco CML officially supports Cisco SD-WAN since version 2.7, and it includes all the SD-WAN images you need. They also released the SD-WAN Lab Deployment Tool, which creates the entire lab for you in CML. It adds and configures controllers, cEdge routers, all device certificates, etc. You don’t even need a Cisco CCO account for the device licenses.
This is a great option for building your own Cisco SD-WAN lab. Starting the lab with the controllers takes about ~10 minutes, and adding one or more cEdge routers takes ~5 minutes. This is the best option for building your own SD-WAN lab in your home lab if you don’t want to spend time creating the lab but want to spend your time configuring templates, VPNs, routing, policies, etc.
In this lesson, I’ll walk you through how to use the deployment tool to build an SD-WAN lab.
Configuration
I’ll use Ubuntu 22.04 on Windows Subsystem for Linux (WSL) for this.
Let’s create and open a new folder.
$ mkdir csdwan
$ cd csdwan/
We’ll create a new Python virtual environment to install packages:
$ python3 -m venv venvLet’s activate the virtual environment:
$ source venv/bin/activateWe’ll upgrade Python’s package manager PIP:
$ pip install --upgrade pip setuptools
Requirement already satisfied: pip in ./venv/lib/python3.10/site-packages (22.0.2)
Collecting pip
  Using cached pip-25.0.1-py3-none-any.whl (1.8 MB)
Requirement already satisfied: setuptools in ./venv/lib/python3.10/site-packages (59.6.0)
Collecting setuptools
  Using cached setuptools-78.1.0-py3-none-any.whl (1.3 MB)
Installing collected packages: setuptools, pip
  Attempting uninstall: setuptools
    Found existing installation: setuptools 59.6.0
    Uninstalling setuptools-59.6.0:
      Successfully uninstalled setuptools-59.6.0
  Attempting uninstall: pip
    Found existing installation: pip 22.0.2
    Uninstalling pip-22.0.2:
      Successfully uninstalled pip-22.0.2
Successfully installed pip-25.0.1 setuptools-78.1.0
Now we can install the deployment tool:
$ pip install --upgrade catalyst-sdwan-lab
Collecting catalyst-sdwan-lab
  Using cached catalyst_sdwan_lab-2.0.15-py3-none-any.whl.metadata (36 kB)
Collecting catalystwan<0.34.0,>=0.33.10 (from catalyst-sdwan-lab)
  Using cached catalystwan-0.33.11-py3-none-any.whl.metadata (14 kB)
Collecting cisco-sdwan<2.0,>=1.24 (from catalyst-sdwan-lab)
  Using cached cisco_sdwan-1.25-py3-none-any.whl.metadata (92 kB)

[output omitted]

xlrd-1.2.0 xlsxwriter-3.2.2 xlwt-1.3.0 xmltodict-0.12.0 yamllint-1.37.0 yang.connector-25.3 yarl-1.19.0
There are quite a few packages to install, so this can take a few minutes. Once it’s ready, you can check if the deployment tool works with this command:
$ sdwan-lab --version
SD-WAN Lab, version 2.0.15
The deployment tool needs to know how to reach Cisco CML. Using environment variables, we need to specify some items, such as the Cisco CML IP address, username, and password. You can do this one by one on the CLI, but it’s easier to define them in a file. I’ll create one:
$ vim cml-settings.shHere, we add all required environment variables:
export CML_IP='10.65.90.20'
export CML_USER='admin'
export CML_PASSWORD='Cisco123'
export MANAGER_IP='10.65.90.101'
export MANAGER_USER='sdwan'
export MANAGER_PASSWORD='2ajG$I2?8k'
export MANAGER_MASK='/24'
export MANAGER_GATEWAY='10.65.90.254'
export LAB_NAME='sdwan'
The “CML” items are required to reach Cisco CML. The “MANAGER” items are for the Cisco Catalyst SD-WAN Manager. You need to add an IP address in the same subnet as Cisco CML, and some other items.
To activate these environment variables, we can source the file:
$ source cml-settings.shThis command won’t produce any output, but it will load the environment variables. You can check this by using the printenv command:
$ printenv | grep -e CML -e MANAGER -e LAB
CML_IP=10.65.90.20
MANAGER_USER=sdwan
MANAGER_GATEWAY=10.65.90.254
CML_USER=admin
CML_PASSWORD=Cisco123
CML_VERIFY_CERT=False
MANAGER_MASK=/24
MANAGER_PASSWORD=2ajG$I2?8k
LAB_NAME=sdwan
MANAGER_IP=10.65.90.101
Above, we see our CLI knows about all the environment variables. The tool should now work. First, we should check what available software versions Cisco CML supports:
$ sdwan-lab setup --list
Setup task done
Available Software Versions:
- cat-sdwan-manager: ['20.15.1']
- cat-sdwan-controller: ['20.15.1']
- cat-sdwan-validator: ['20.15.1']
- cat-sdwan-edge: ['17.15.01a']
I’m running Cisco CML 2.8, and these are the current versions it supports.
Now, we can start a lab. This is all we have to do:
$ sdwan-lab deploy 20.15.1
Deploy task done
#############################################
Lab is deployed.
CML URL: https://10.65.90.20
SD-WAN Manager URL: https://10.65.90.101:443
Use the username/password set with the script for CML and SD-WAN Manager login.
All other nodes use default username/password.
#############################################
This will take a while, and you might see several Waiting for SD-WAN Manager API (attempt X)... messages. I saw up to 12, and it took about ~10 minutes on an Intel(R) Core(TM) Ultra 9 285K to complete. While it’s starting and configuring the controllers, it’s a good moment to look at the topology in Cisco CML:
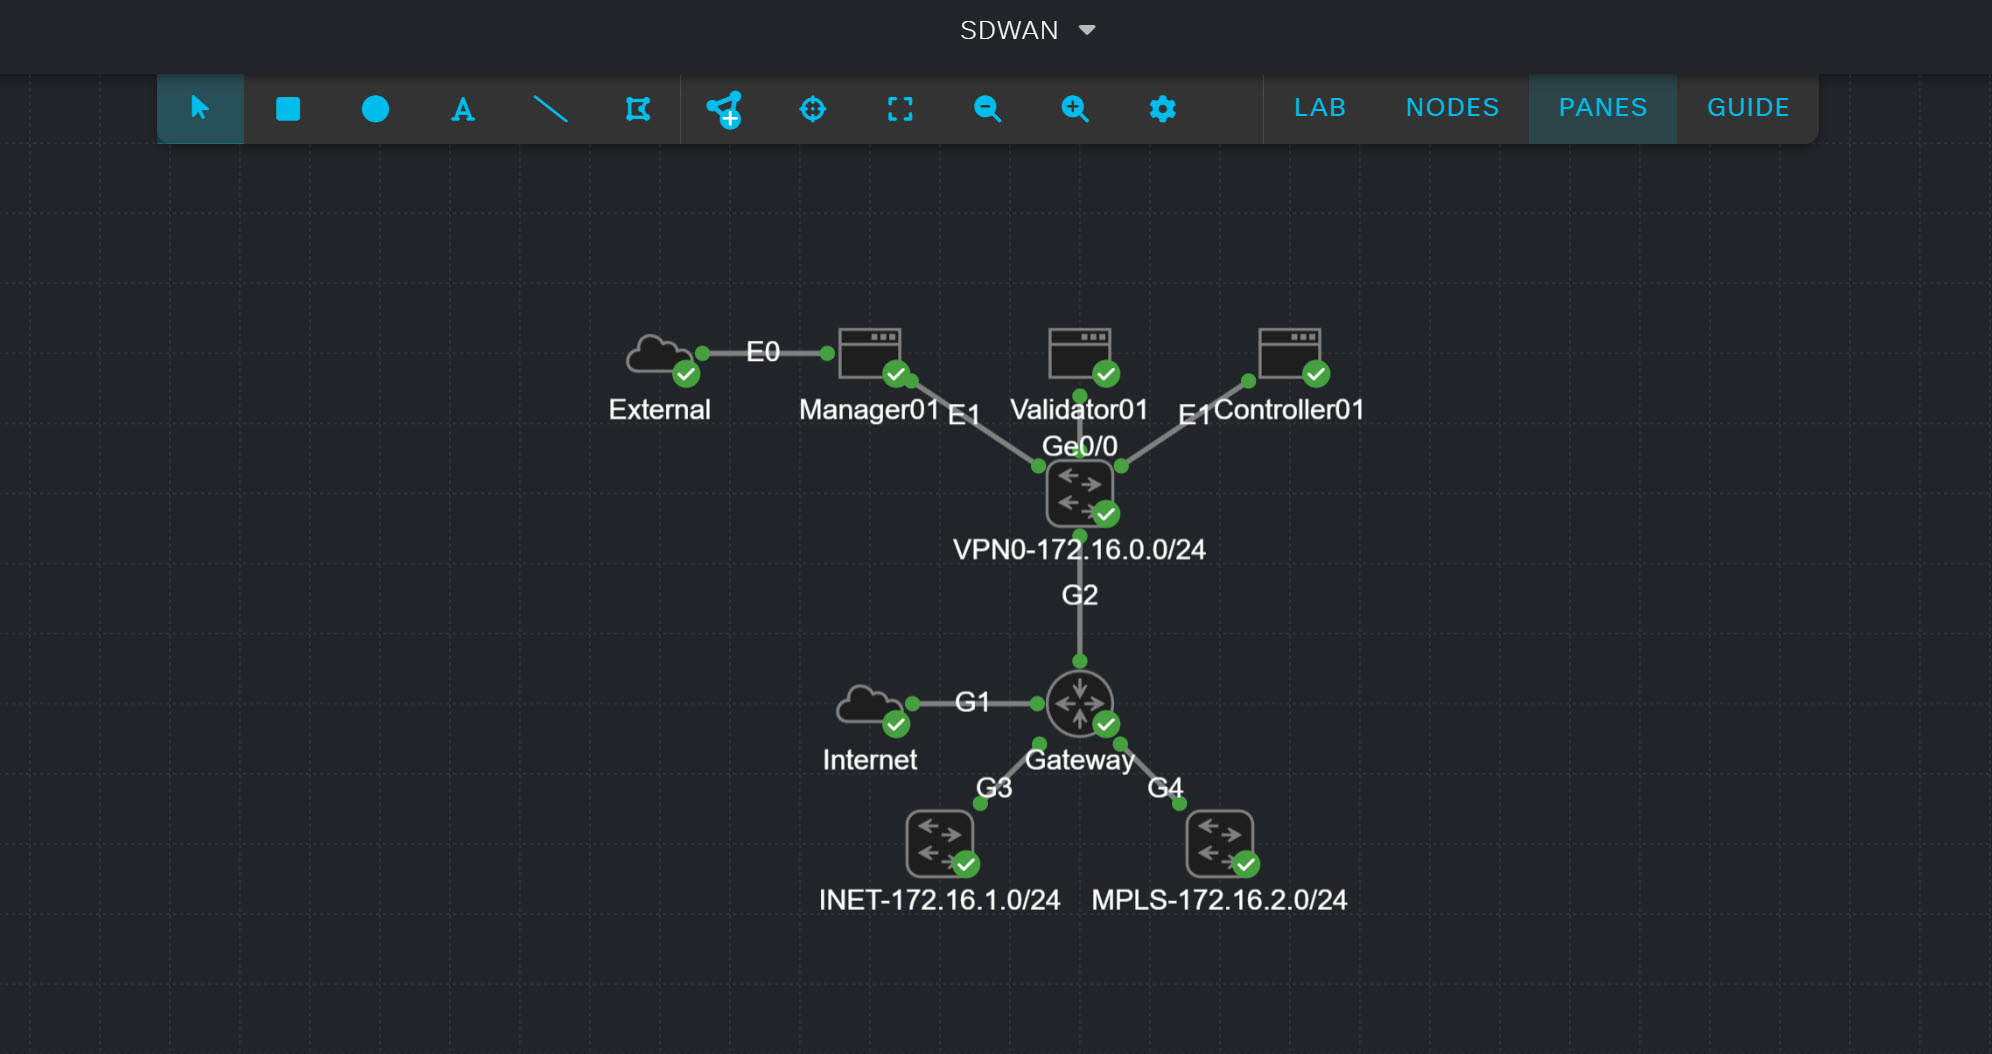
Here’s what we see:
- External: This bridge is connected to Manager01 so that you can access the GUI directly.
- Controllers:
- Manager01
- Validator01
- Controller01
- VPN0: Unmanaged Switch to connect the controllers and Gateway.
- Gateway: a router to mimic two WAN interfaces (INET and MPLS).
- Internet: external connector so devices can reach networks outside of Cisco CML.
- INET-172.16.1.0/24: Unmanaged switch to connect devices to INET WAN.
- MPLS-172.16.2.0/24: Unmanaged switch to connect devices to MPLS WAN.
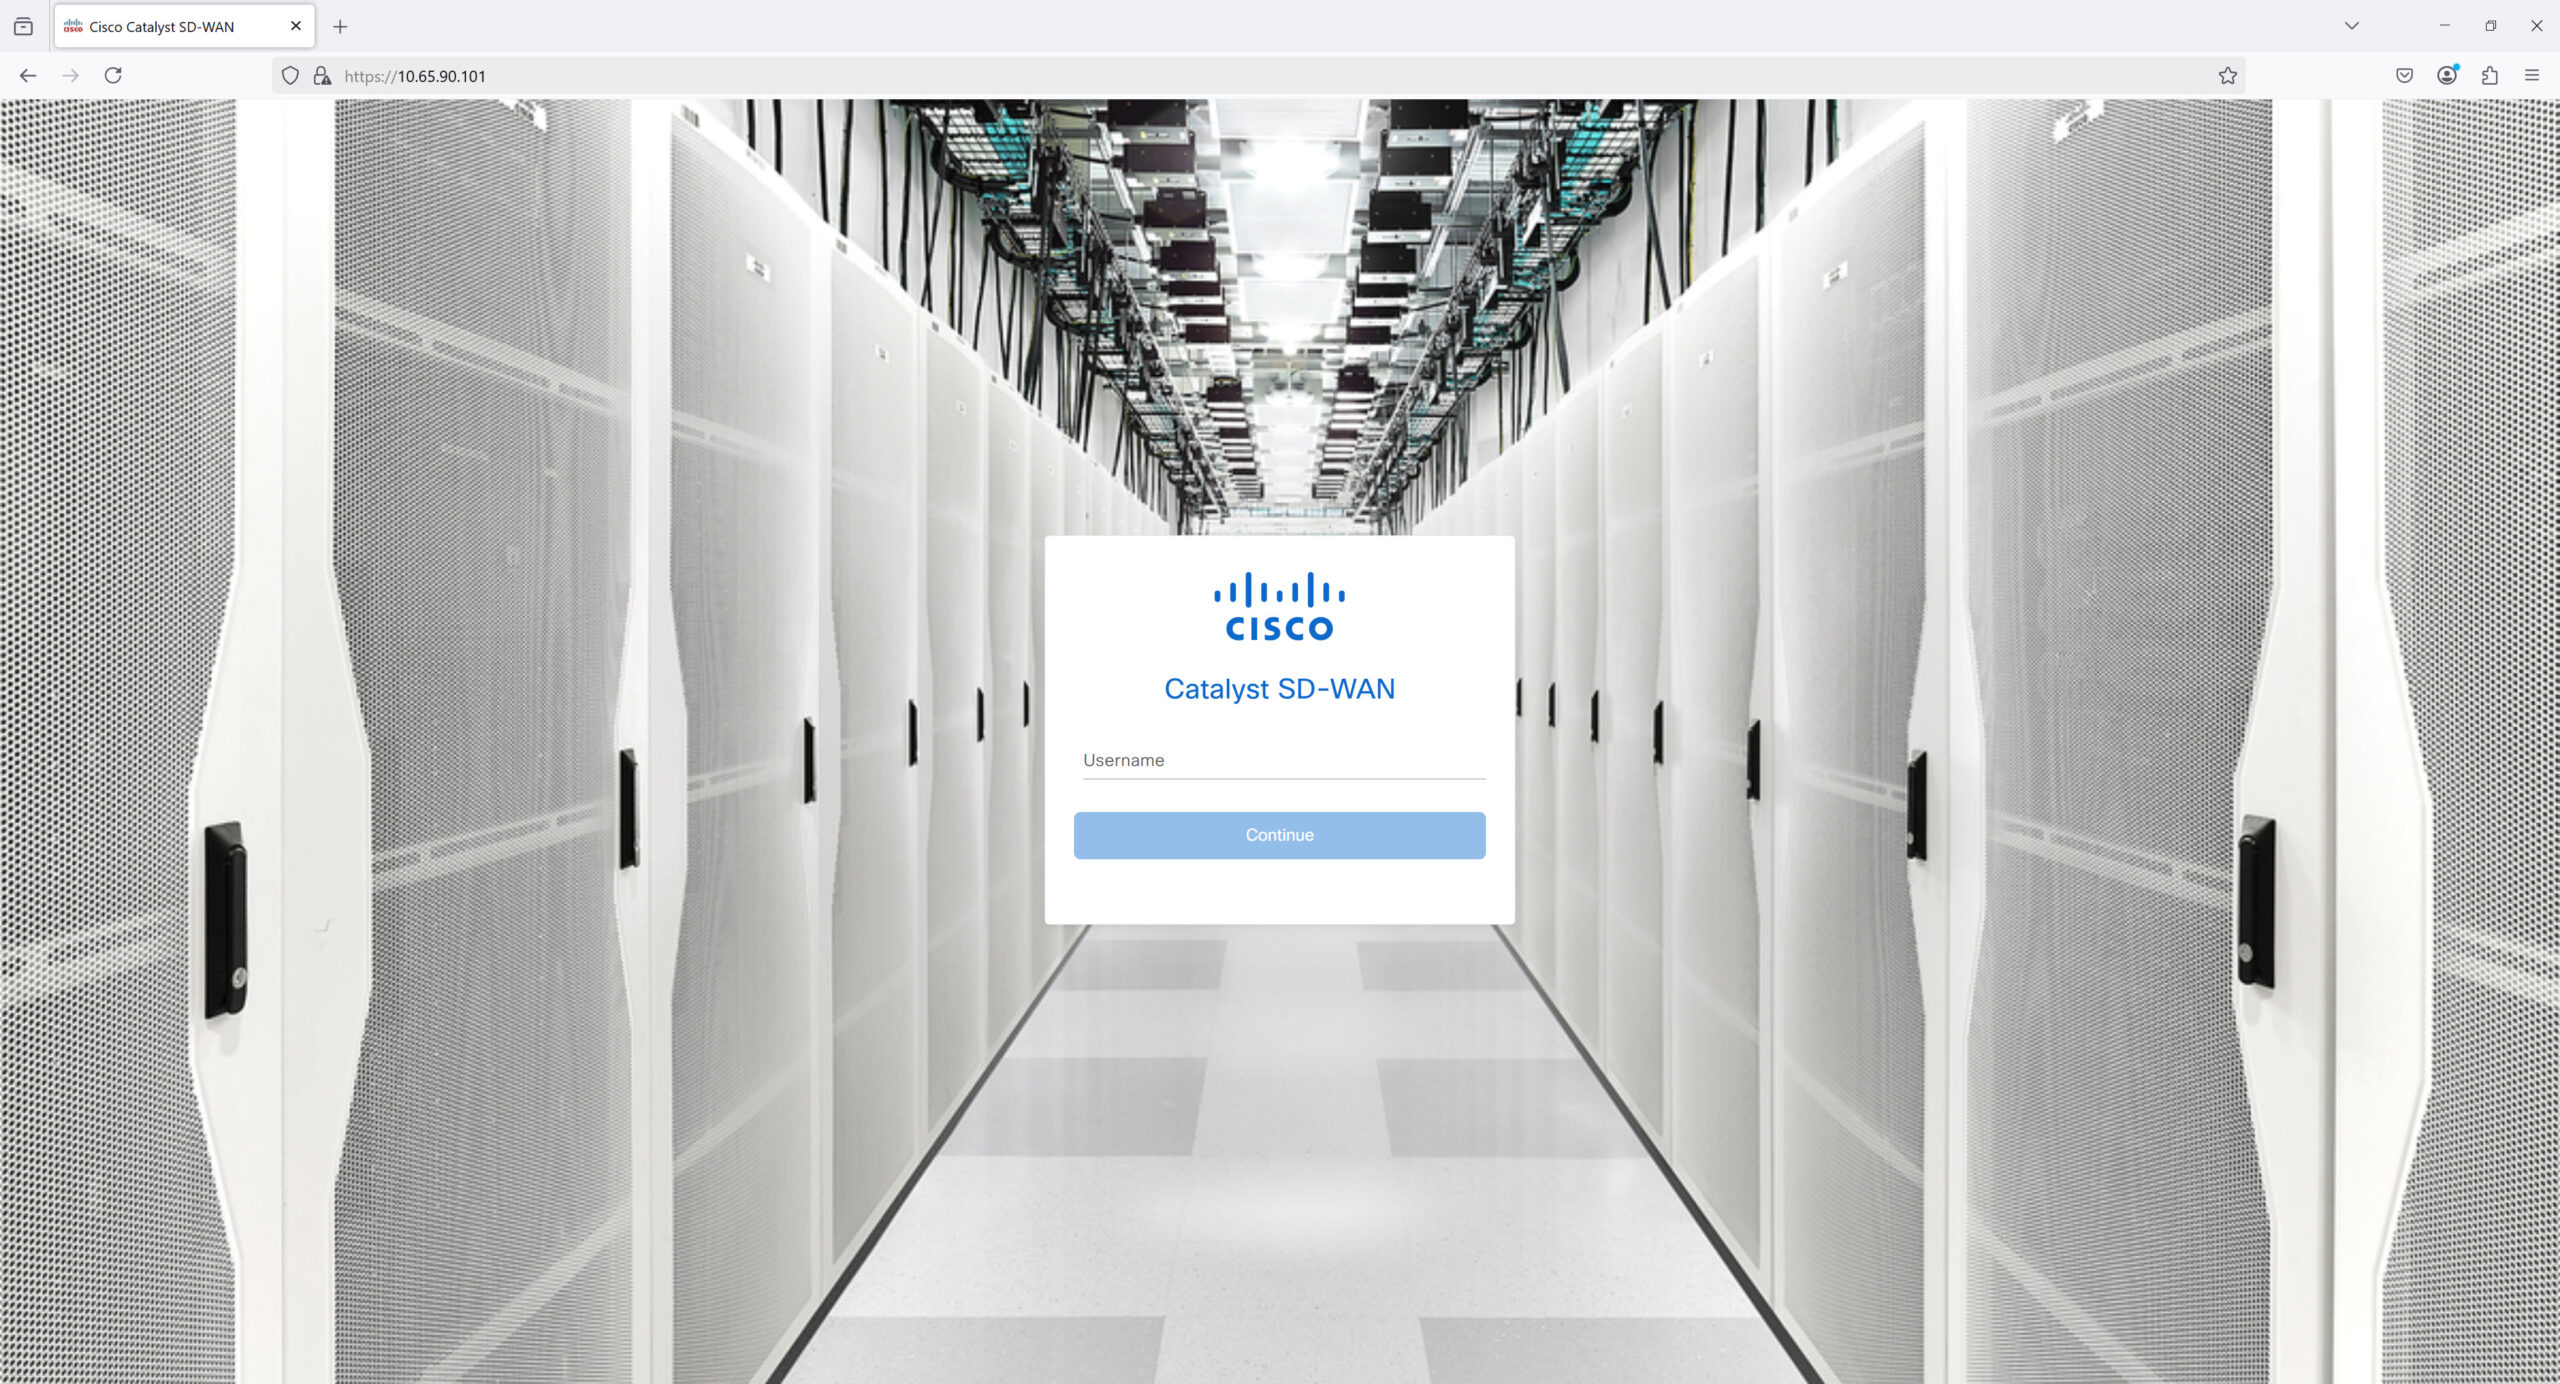
Once everything is started, you can access the controller from a web browser. Use the IP address and credentials that you set with the environment variables:
$ printenv | grep MANAGER
MANAGER_USER=sdwan
MANAGER_GATEWAY=10.65.90.254
MANAGER_MASK=/24
MANAGER_PASSWORD=2ajG$I2?8k
MANAGER_IP=10.65.90.101
You’ll see the following login screen:
From the monitor page, we can see that the controllers are all up and running:
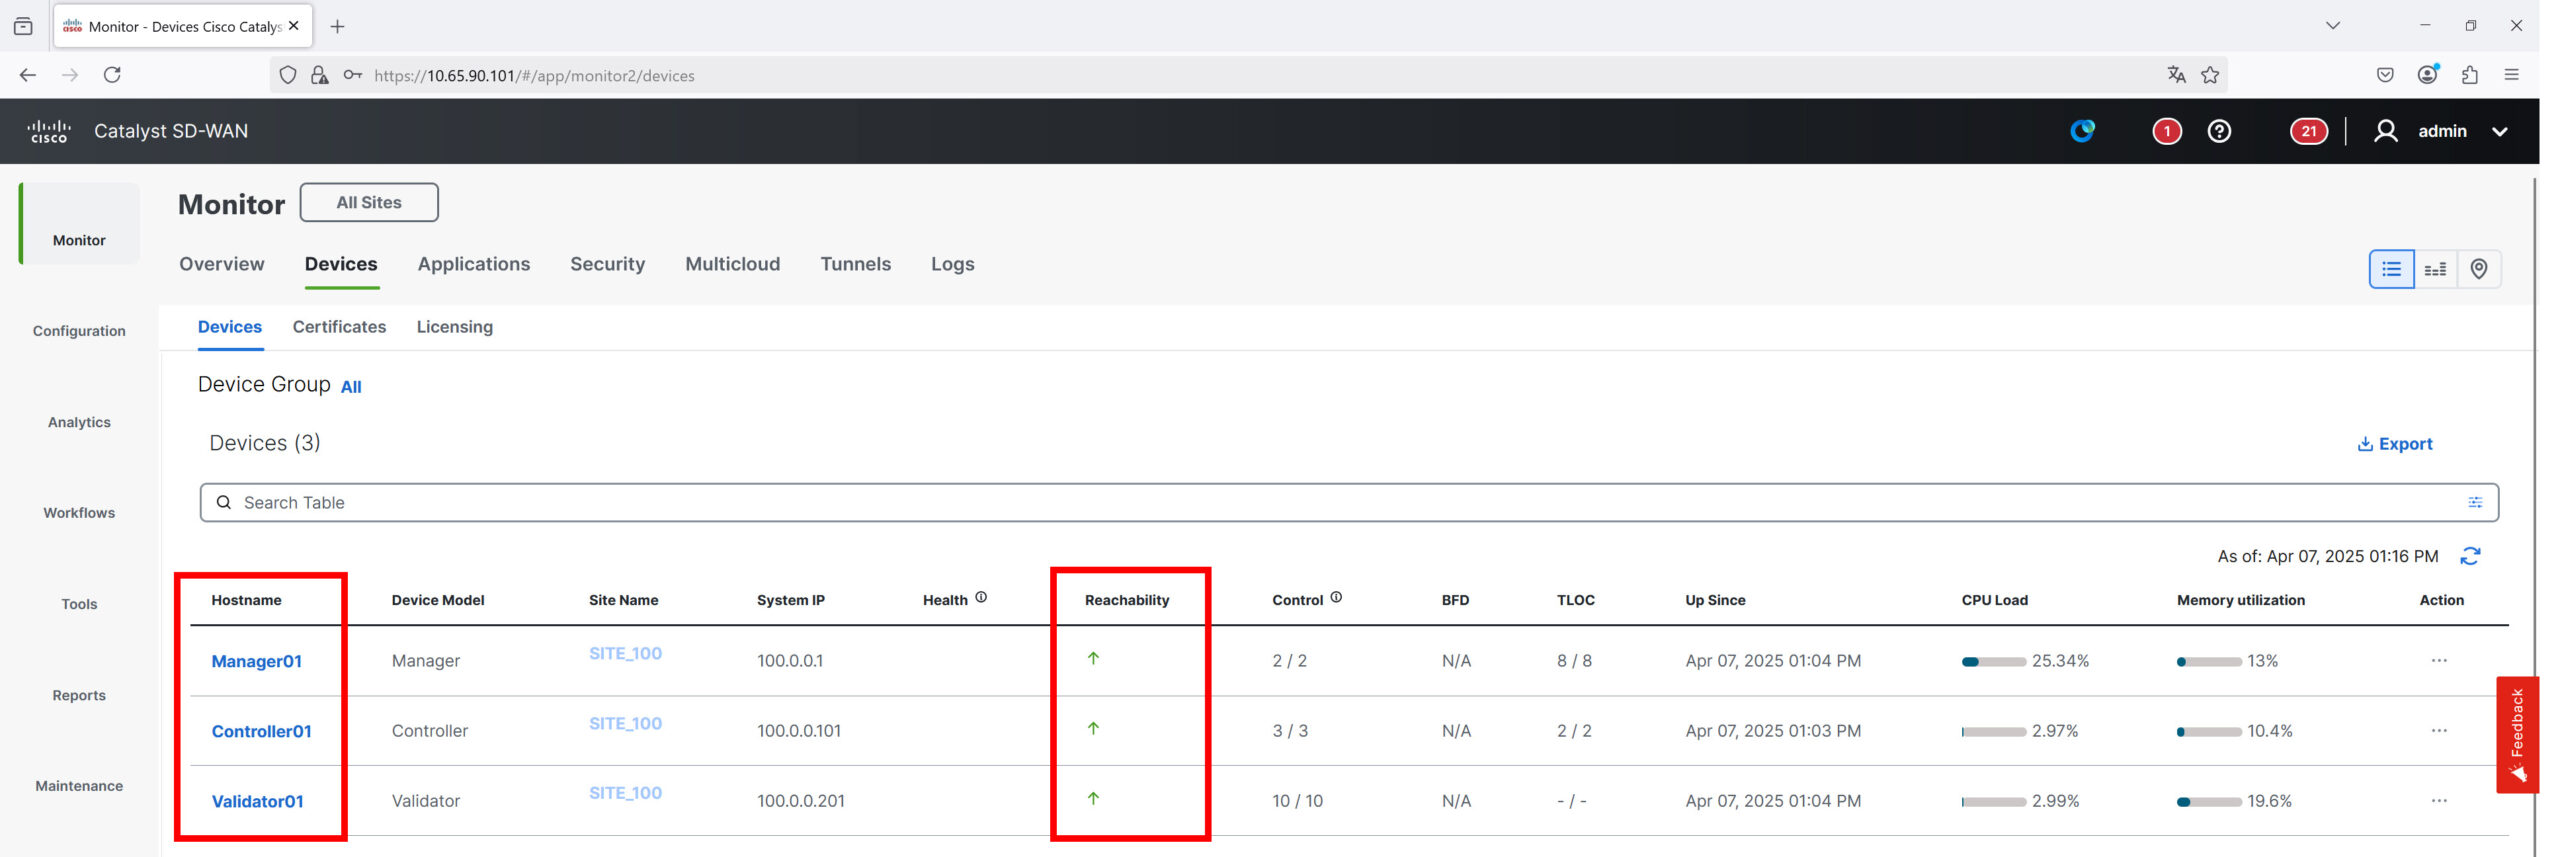
This is looking good. The controllers are all working.
cEdge Routers
It’s time to add some routers. The deployment tool only supports cEdge routers. Although Cisco CML has vEdge images, the deployment tool no longer supports it.
Here’s the sdwan-lab command one more time so you can see the available software versions:
$ sdwan-lab setup --list
Setup task done
Available Software Versions:
- cat-sdwan-manager: ['20.15.1']
- cat-sdwan-controller: ['20.15.1']
- cat-sdwan-validator: ['20.15.1']
- cat-sdwan-edge: ['17.15.01a']
Here’s how you can add four routers:
Wow! What an amazing tool. Thanks, Rene!
I know it require CML installed and CML license loaded, but does it require license for the SD-WAN devices in the lab? I had CML licence before but it expired. I didn’t try the lab because I heard that running the SD-WAN devices requires device license. If it doesn’t then it’s worth to buy CML license another time.
Hello Martin
It looks like you won’t need a specific license to use the SD-WAN feature for CML, you can use the Personal version. However you will require the use of the PNP portal which needs a smart account, which I believe you can get for free. I haven’t tried it myself, but you can take a look at this ΄Cisco community post for more information:
https://community.cisco.com/t5/cisco-modeling-labs-discussions/cml-2-7-sd-wan-license-needed/td-p/5126815
I hope this has been helpful!
Laz
You won’t need any device licenses or a smart account if you use this installer for CML. It saves a lot of trouble.
Thank you for continuing to upload premium content throughout the years.