Lesson Contents
Cisco SD-WAN uses OMP in the overlay network for routing information, but within a site, it’s possible that you need OSPF (or BGP) to advertise routes with non-SD-WAN devices. In this lesson, I’ll explain how to configure OSPF on a vEdge router.
Configuration
This is the topology:
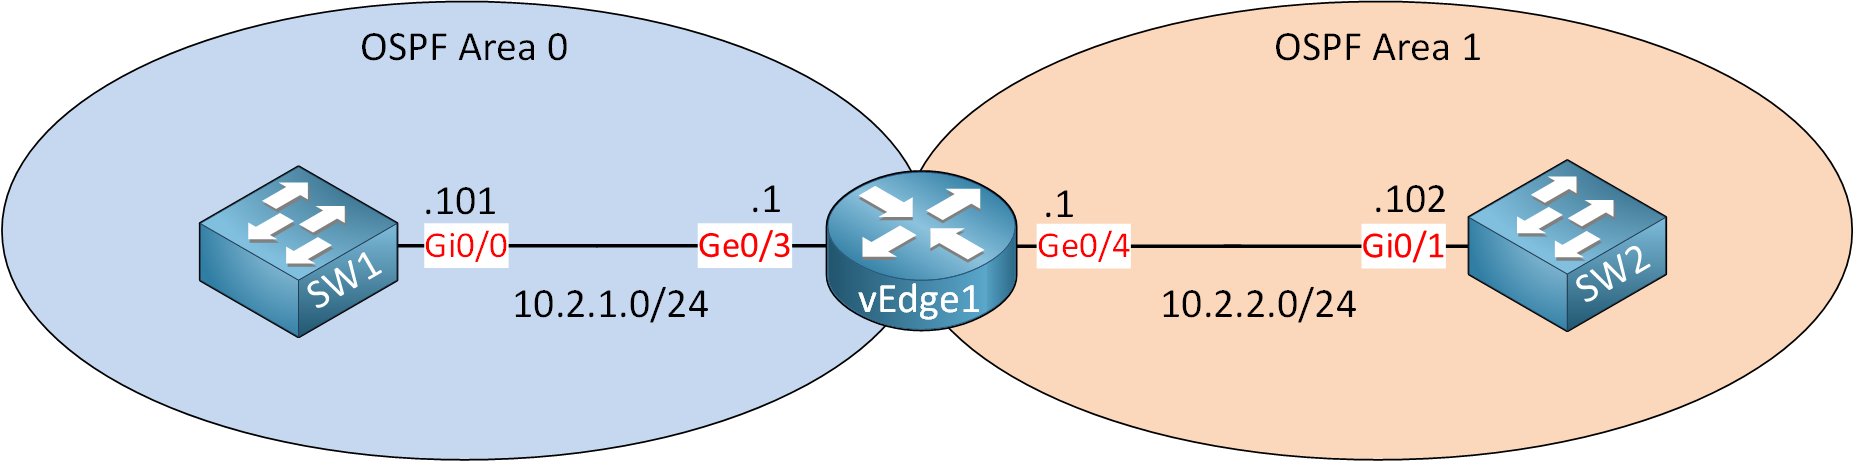
The two switches and the vEdge router are within a single site. SW1 and SW2 are Cisco IOS switches. I preconfigured these two with OSPF. Next, we’ll configure the vEdge1 router using device and feature templates. I’m using Cisco SD-WAN version 19.3.0.
Configurations
Want to take a look for yourself? Here you will find the startup configuration of each device.
vEdge1
system
 host-name               vEdge1
 system-ip               172.16.1.1
 site-id                 2
 sp-organization-name    nwl-lab-sdwan
 organization-name       nwl-lab-sdwan
 vbond 10.1.0.2
!
omp
 no shutdown
 graceful-restart
 advertise connected
 advertise static
!
vpn 0
 interface ge0/0
  ip address 10.65.91.1/24
  tunnel-interface
   encapsulation ipsec
   color biz-internet
   allow-service all
  !
  no shutdown
 !
 interface ge0/1
  ip address 10.65.92.1/24
  tunnel-interface
   encapsulation ipsec
   color public-internet
   allow-service all
  !
  no shutdown
 !
 ip route 10.1.0.0/24 10.65.91.100
!
vpn 10
 interface ge0/3
  ip address 10.2.1.1/24
  no shutdown
 !
 interface ge0/4
  ip address 10.2.2.1/24
  no shutdown
 !
 omp
  advertise connected
 !
!
vpn 512
 interface eth0
  shutdown
SW1
hostname SW1
!
ip cef
!
interface Loopback0
 ip address 11.11.11.11 255.255.255.255
!
interface GigabitEthernet0/0
 no switchport
 ip address 10.2.1.101 255.255.255.0
!
router ospf 1
 network 10.2.1.0 0.0.0.255 area 0
 network 11.11.11.11 0.0.0.0 area 0
!
end
SW2
hostname SW2
!
ip cef
!
interface Loopback0
 ip address 22.22.22.22 255.255.255.255
!
interface GigabitEthernet0/1
 no switchport
 ip address 10.2.2.102 255.255.255.0
!
router ospf 1
 network 10.2.2.0 0.0.0.255 area 1
 network 22.22.22.22 0.0.0.0 area 1
!
end
OSPF Feature Template
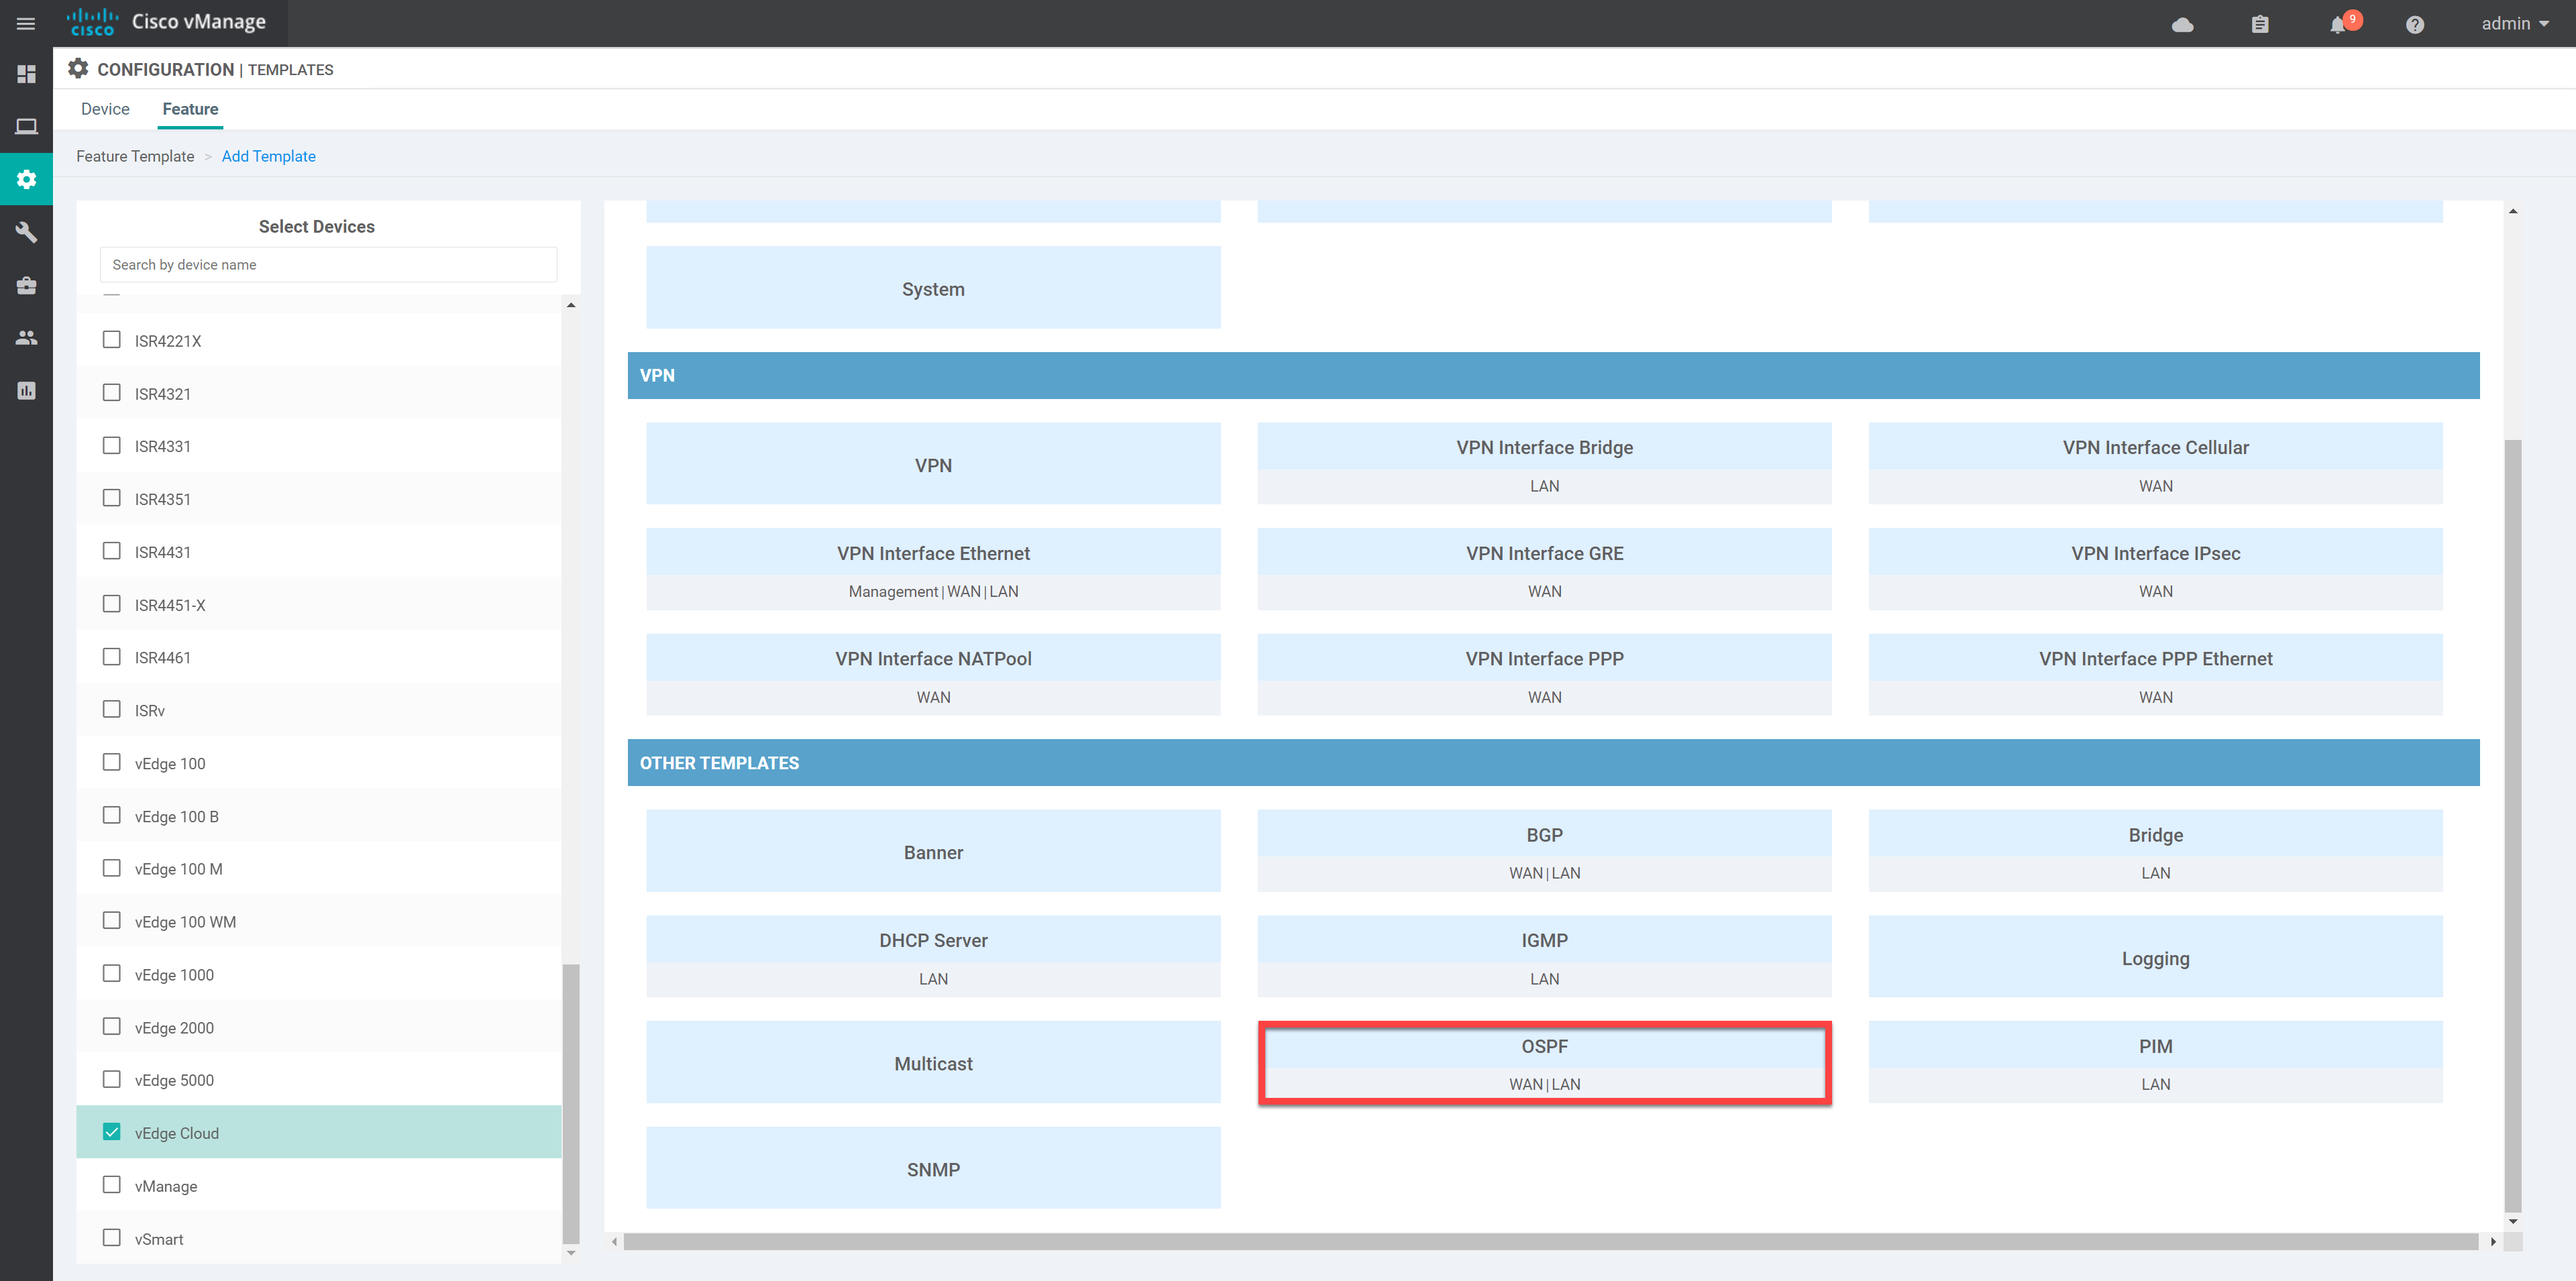
Go to Configuration > Templates > Feature > Add Template and select OSPF:
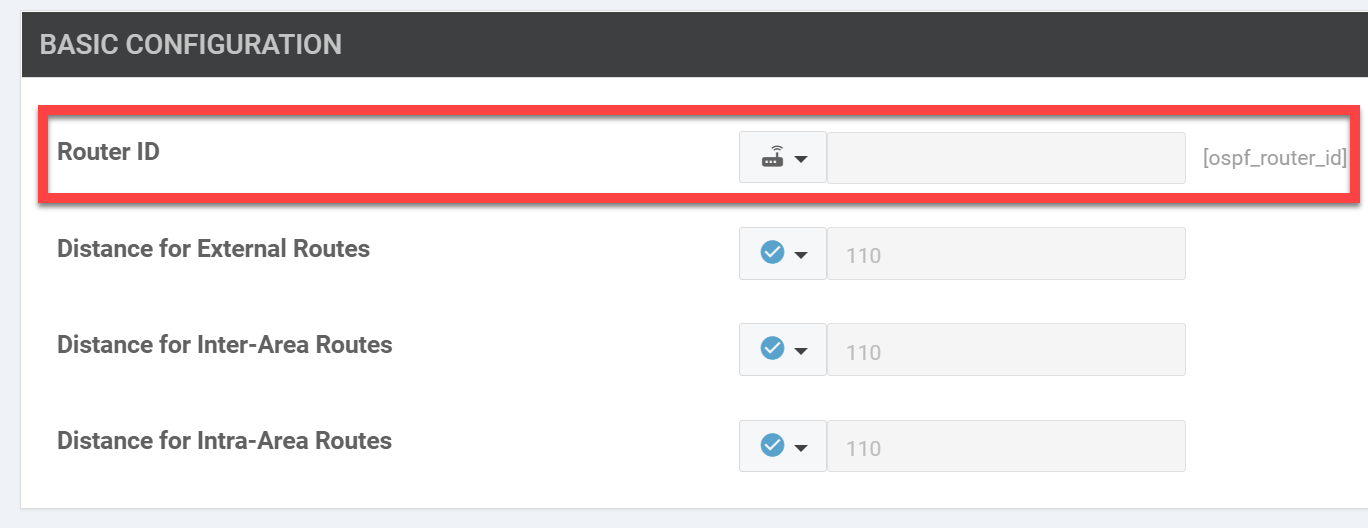
I’ll make a couple of changes here. First, we make the router ID device-specific:
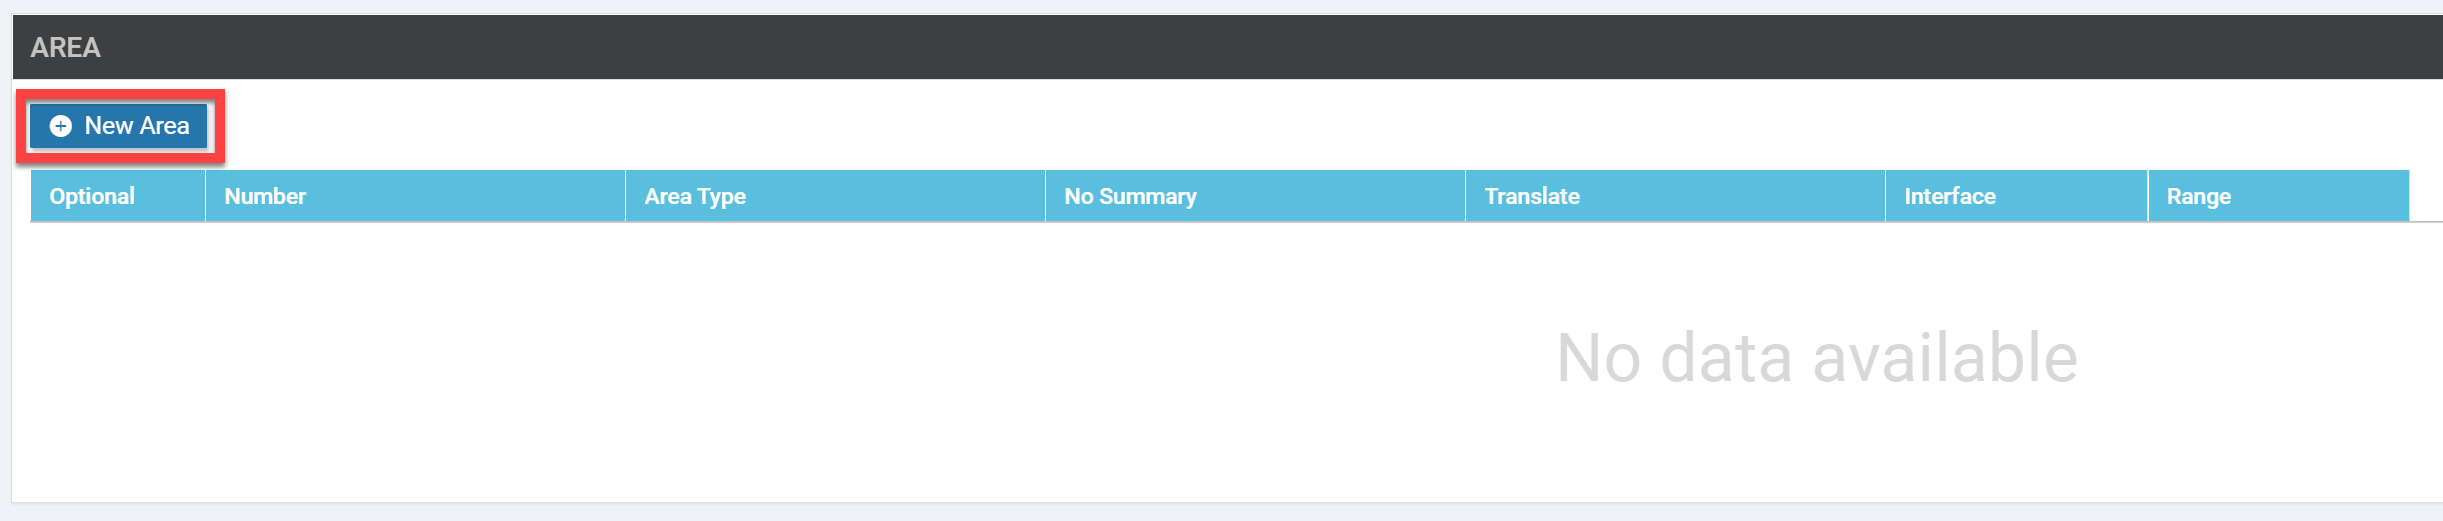
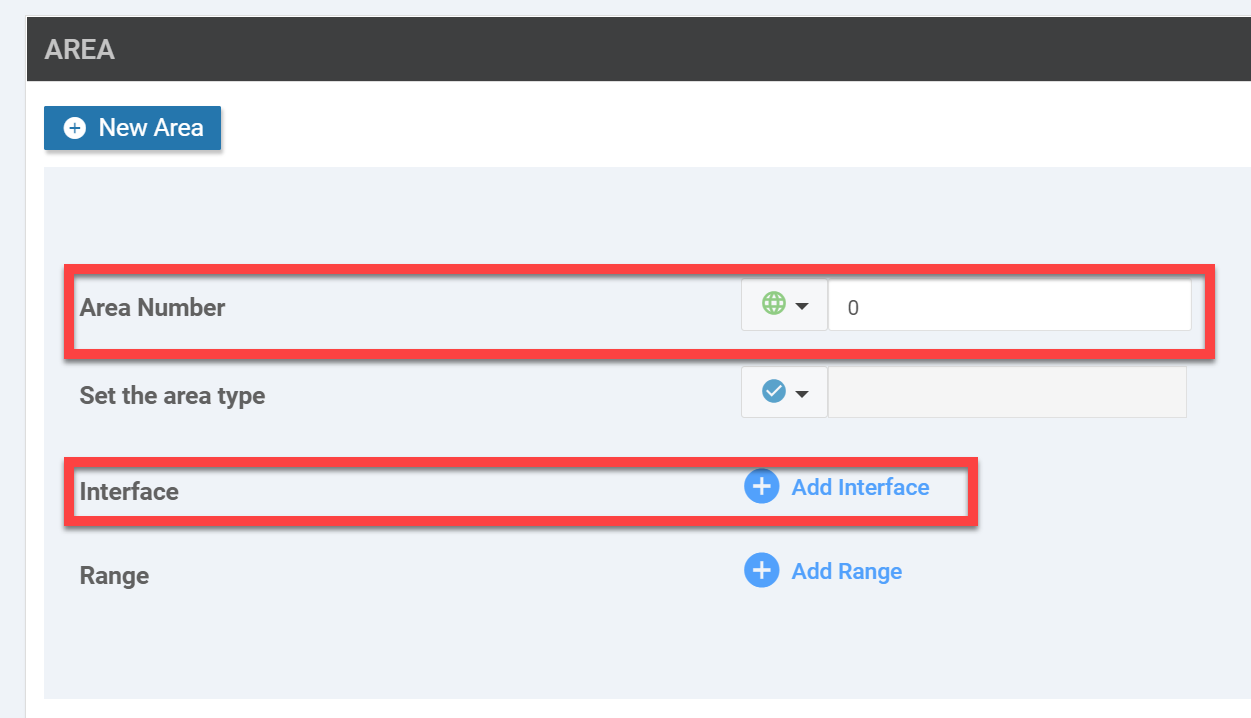
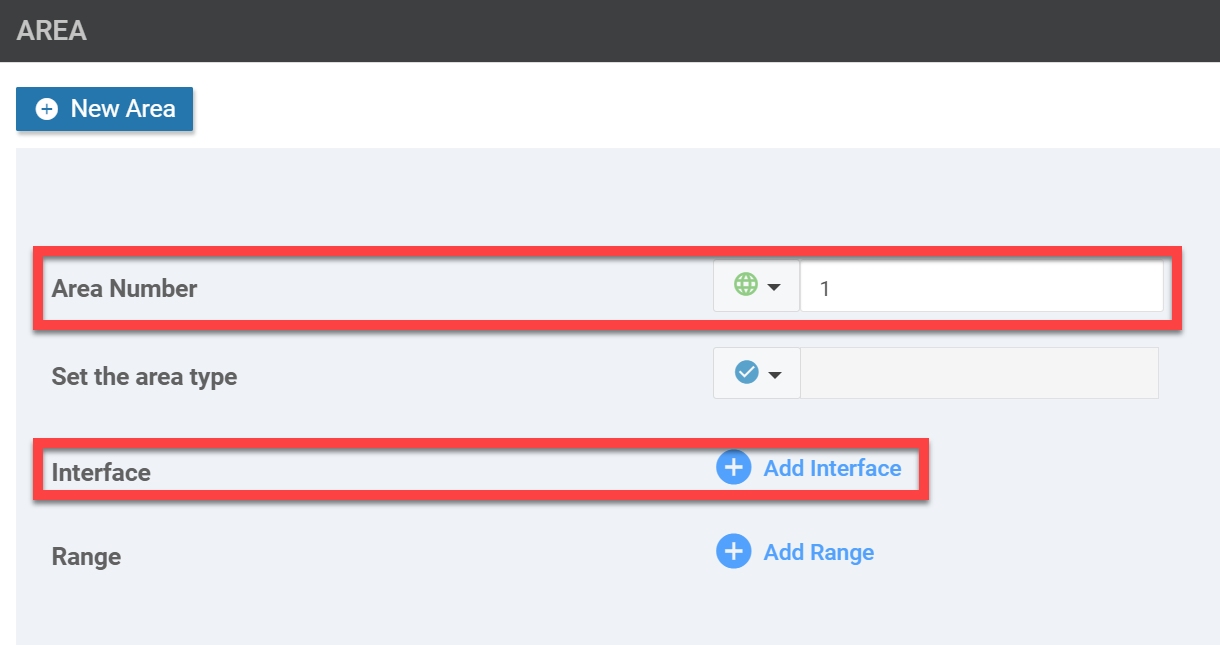
Next, we’ll configure the areas. Click on New Area:
We’ll start with area 0. Set the number and click on Add Interface:
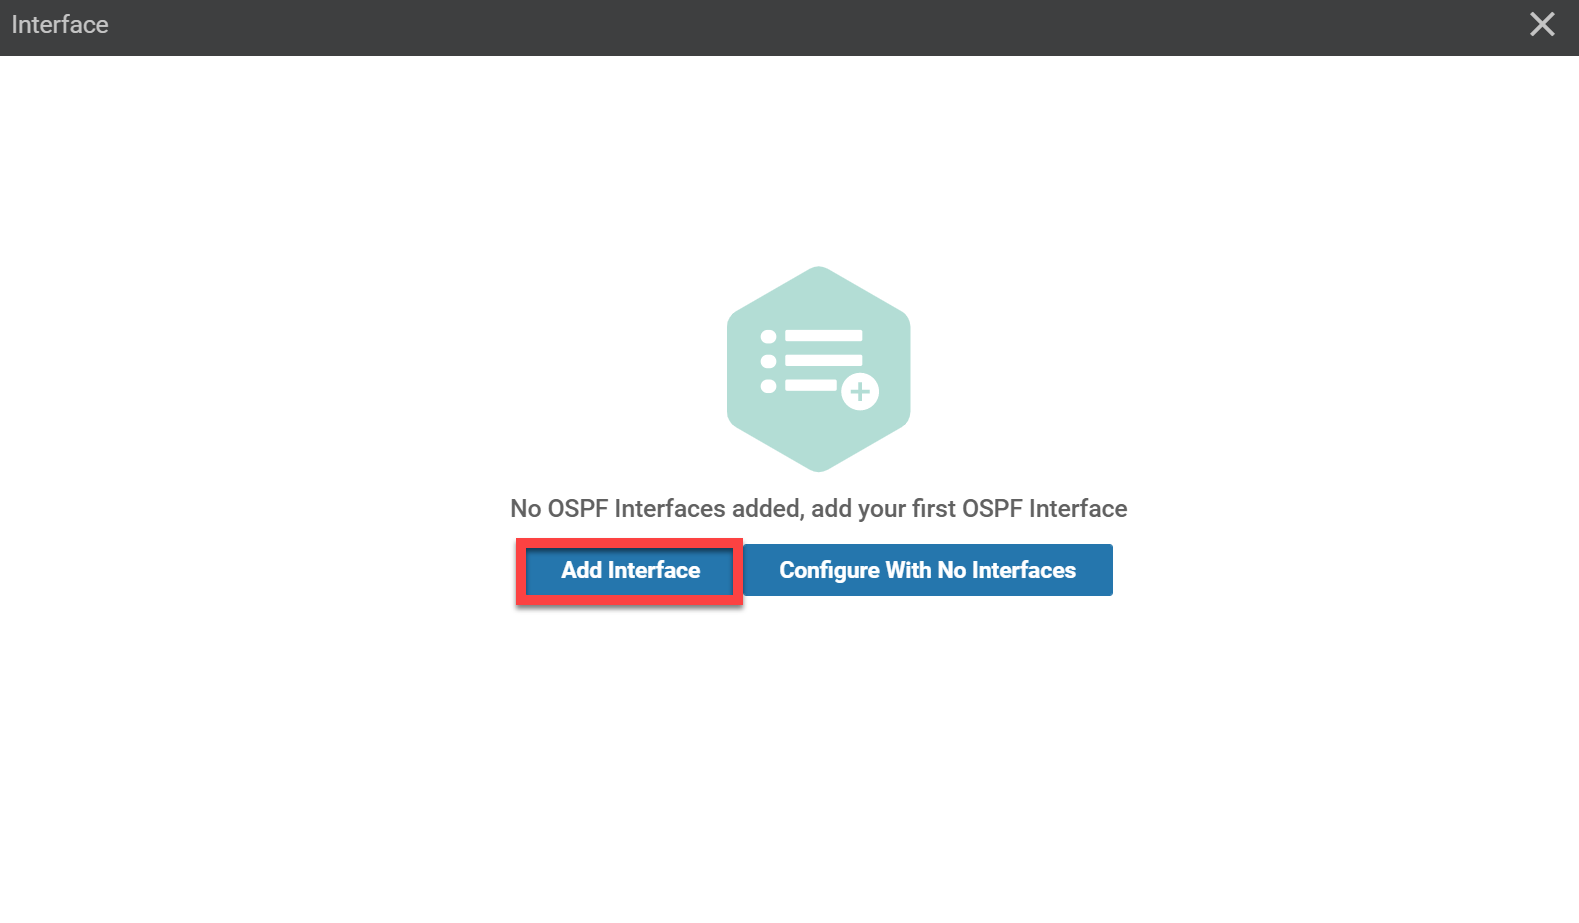
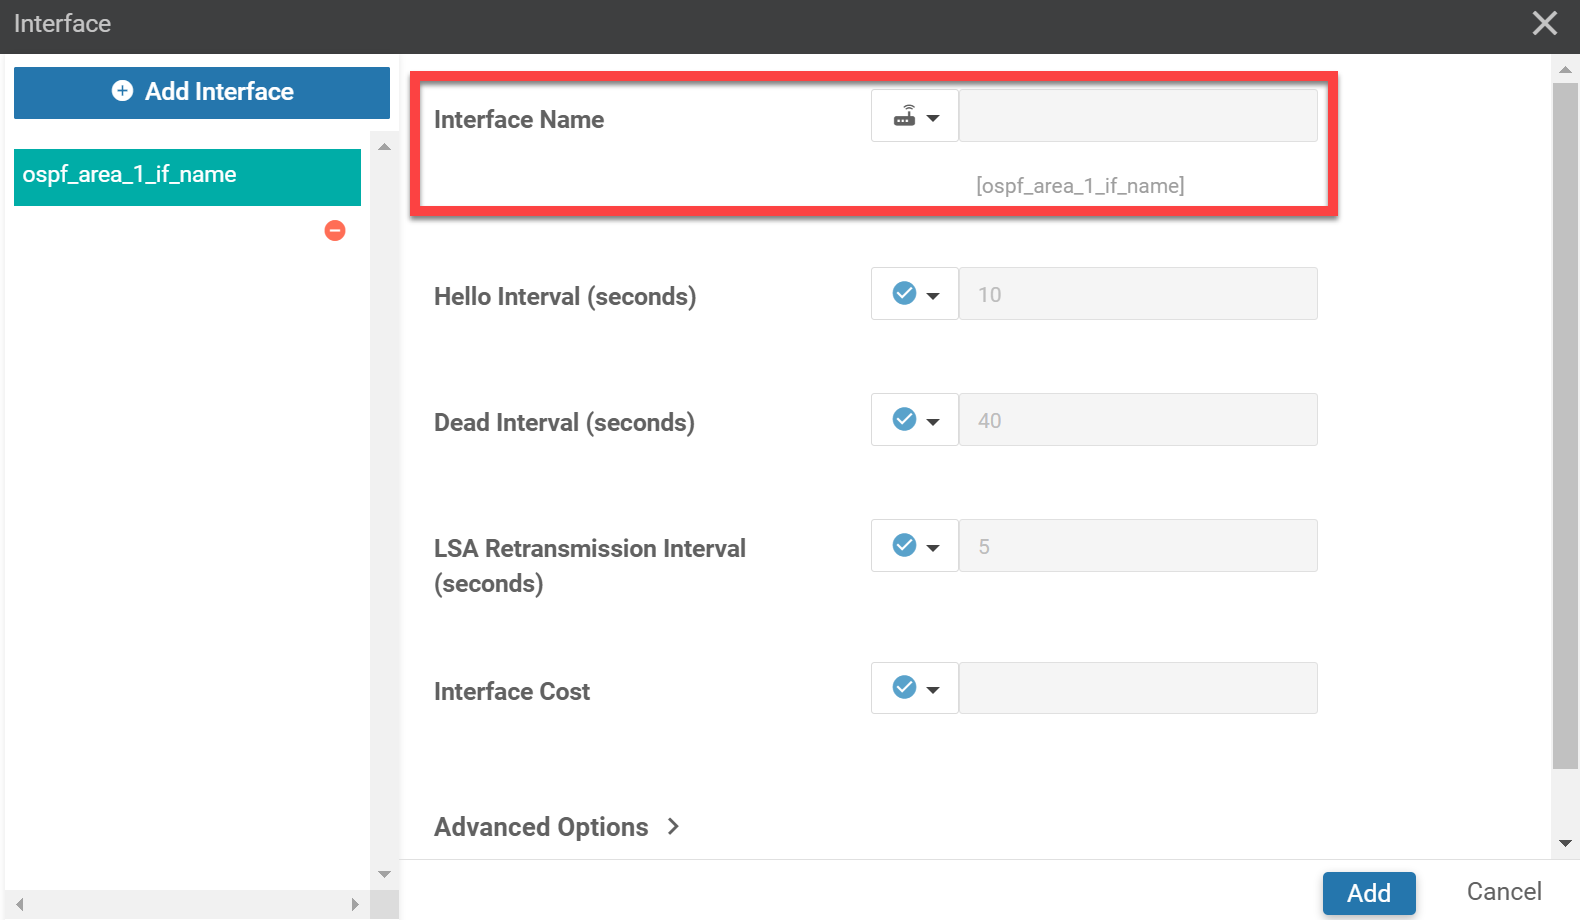
Once again, click on Add Interface:
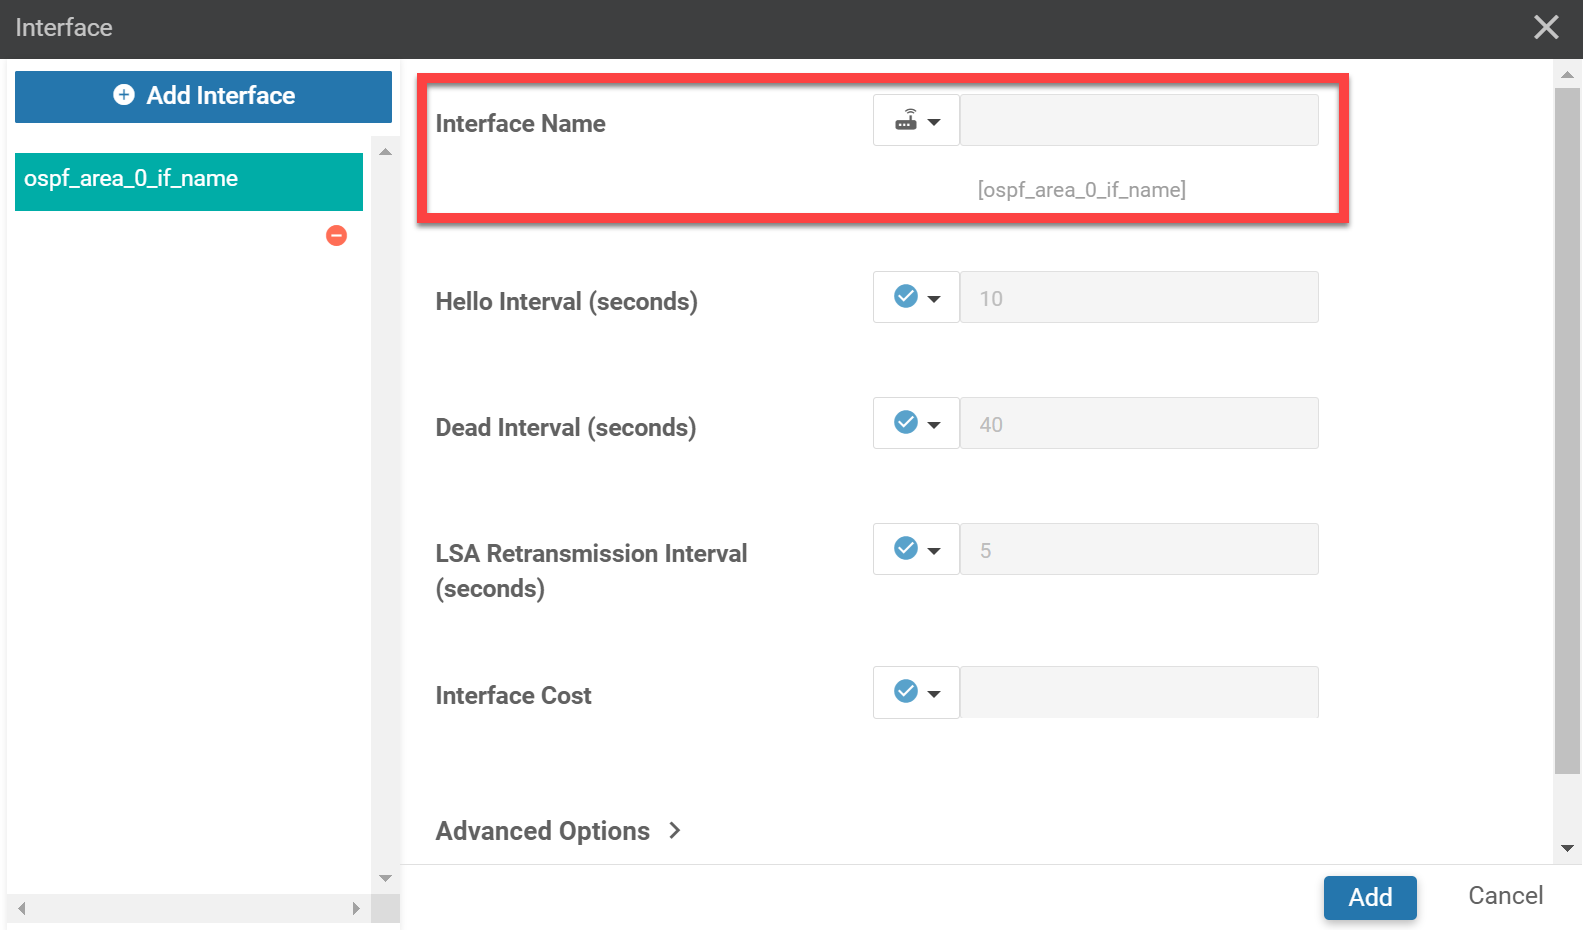
I’ll make the Interface Name device-specific:
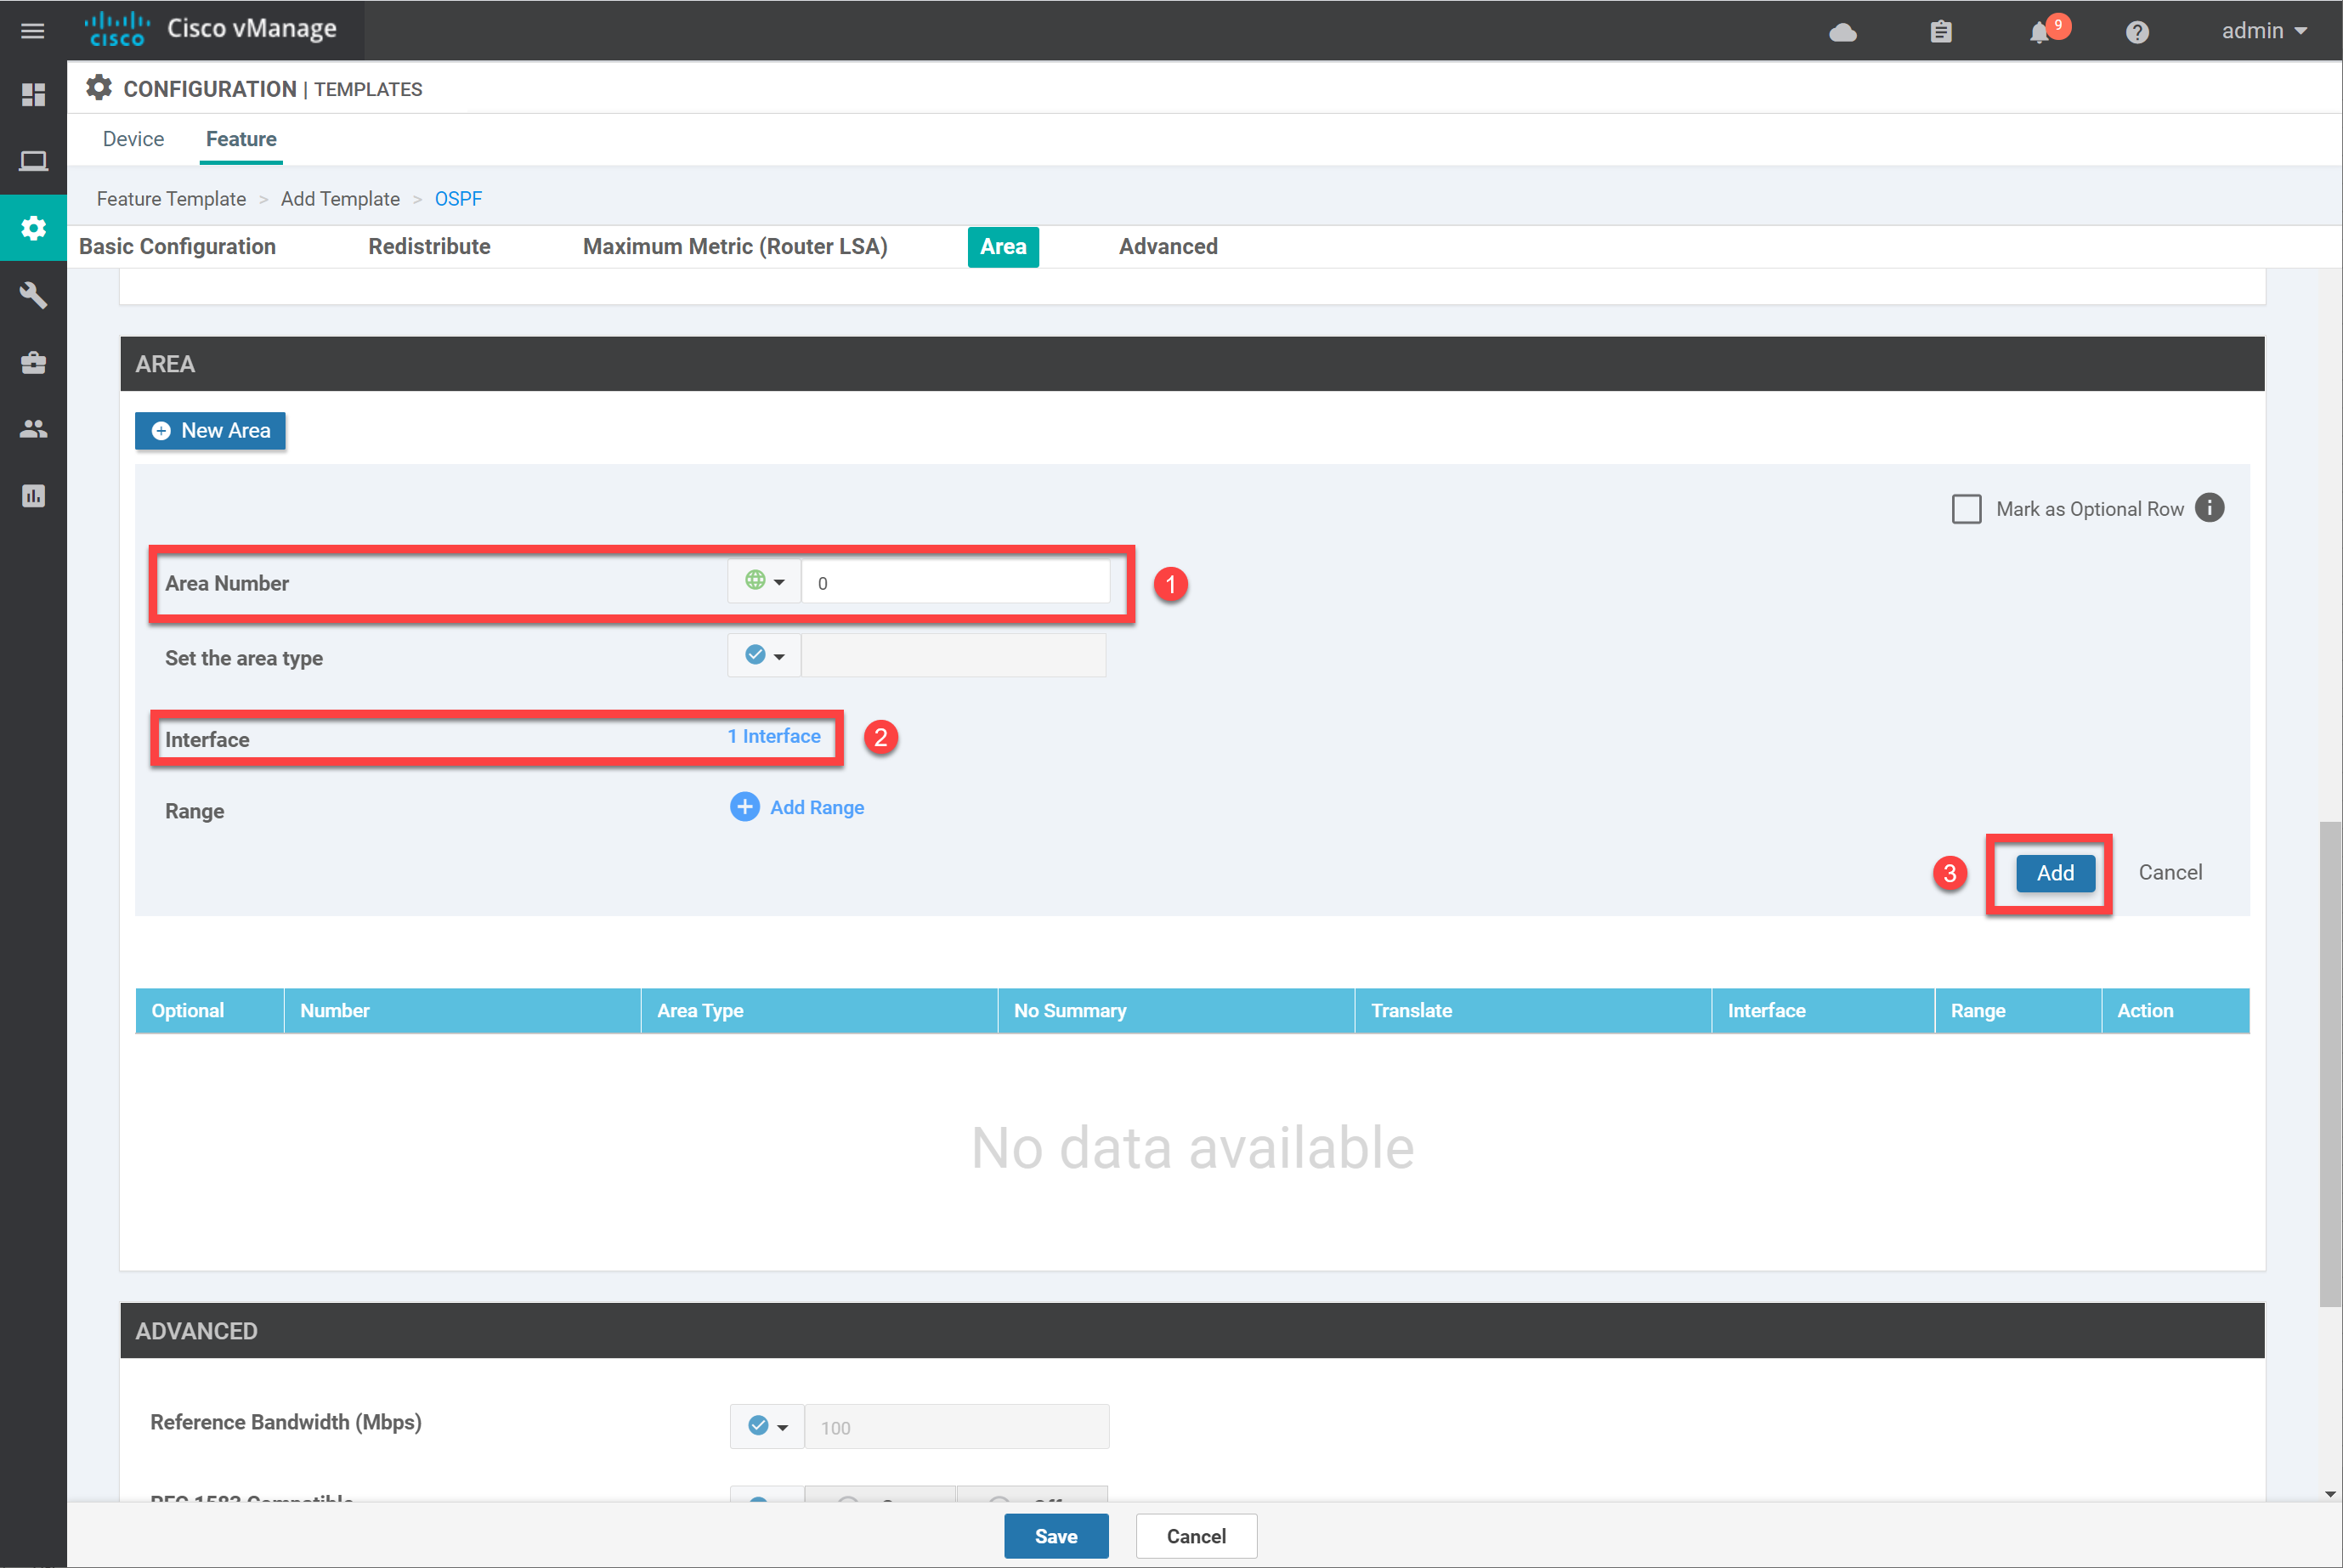
Click on Add to continue. In the Area overview, you see that we now have one interface attached to area 0. Click on Add:
You now see this overview:

Click again on New Area to create area 1. Specify the area number and click on Add Interface:
Once again, click on Add Interface:
I’ll change the Interface Name so that it is device-specific:
Click on Add one more time so that you see this overview:

Good. We now have two areas, each with an interface. That’s all we’ll configure for now. Click on Save to store the template.
Device Template
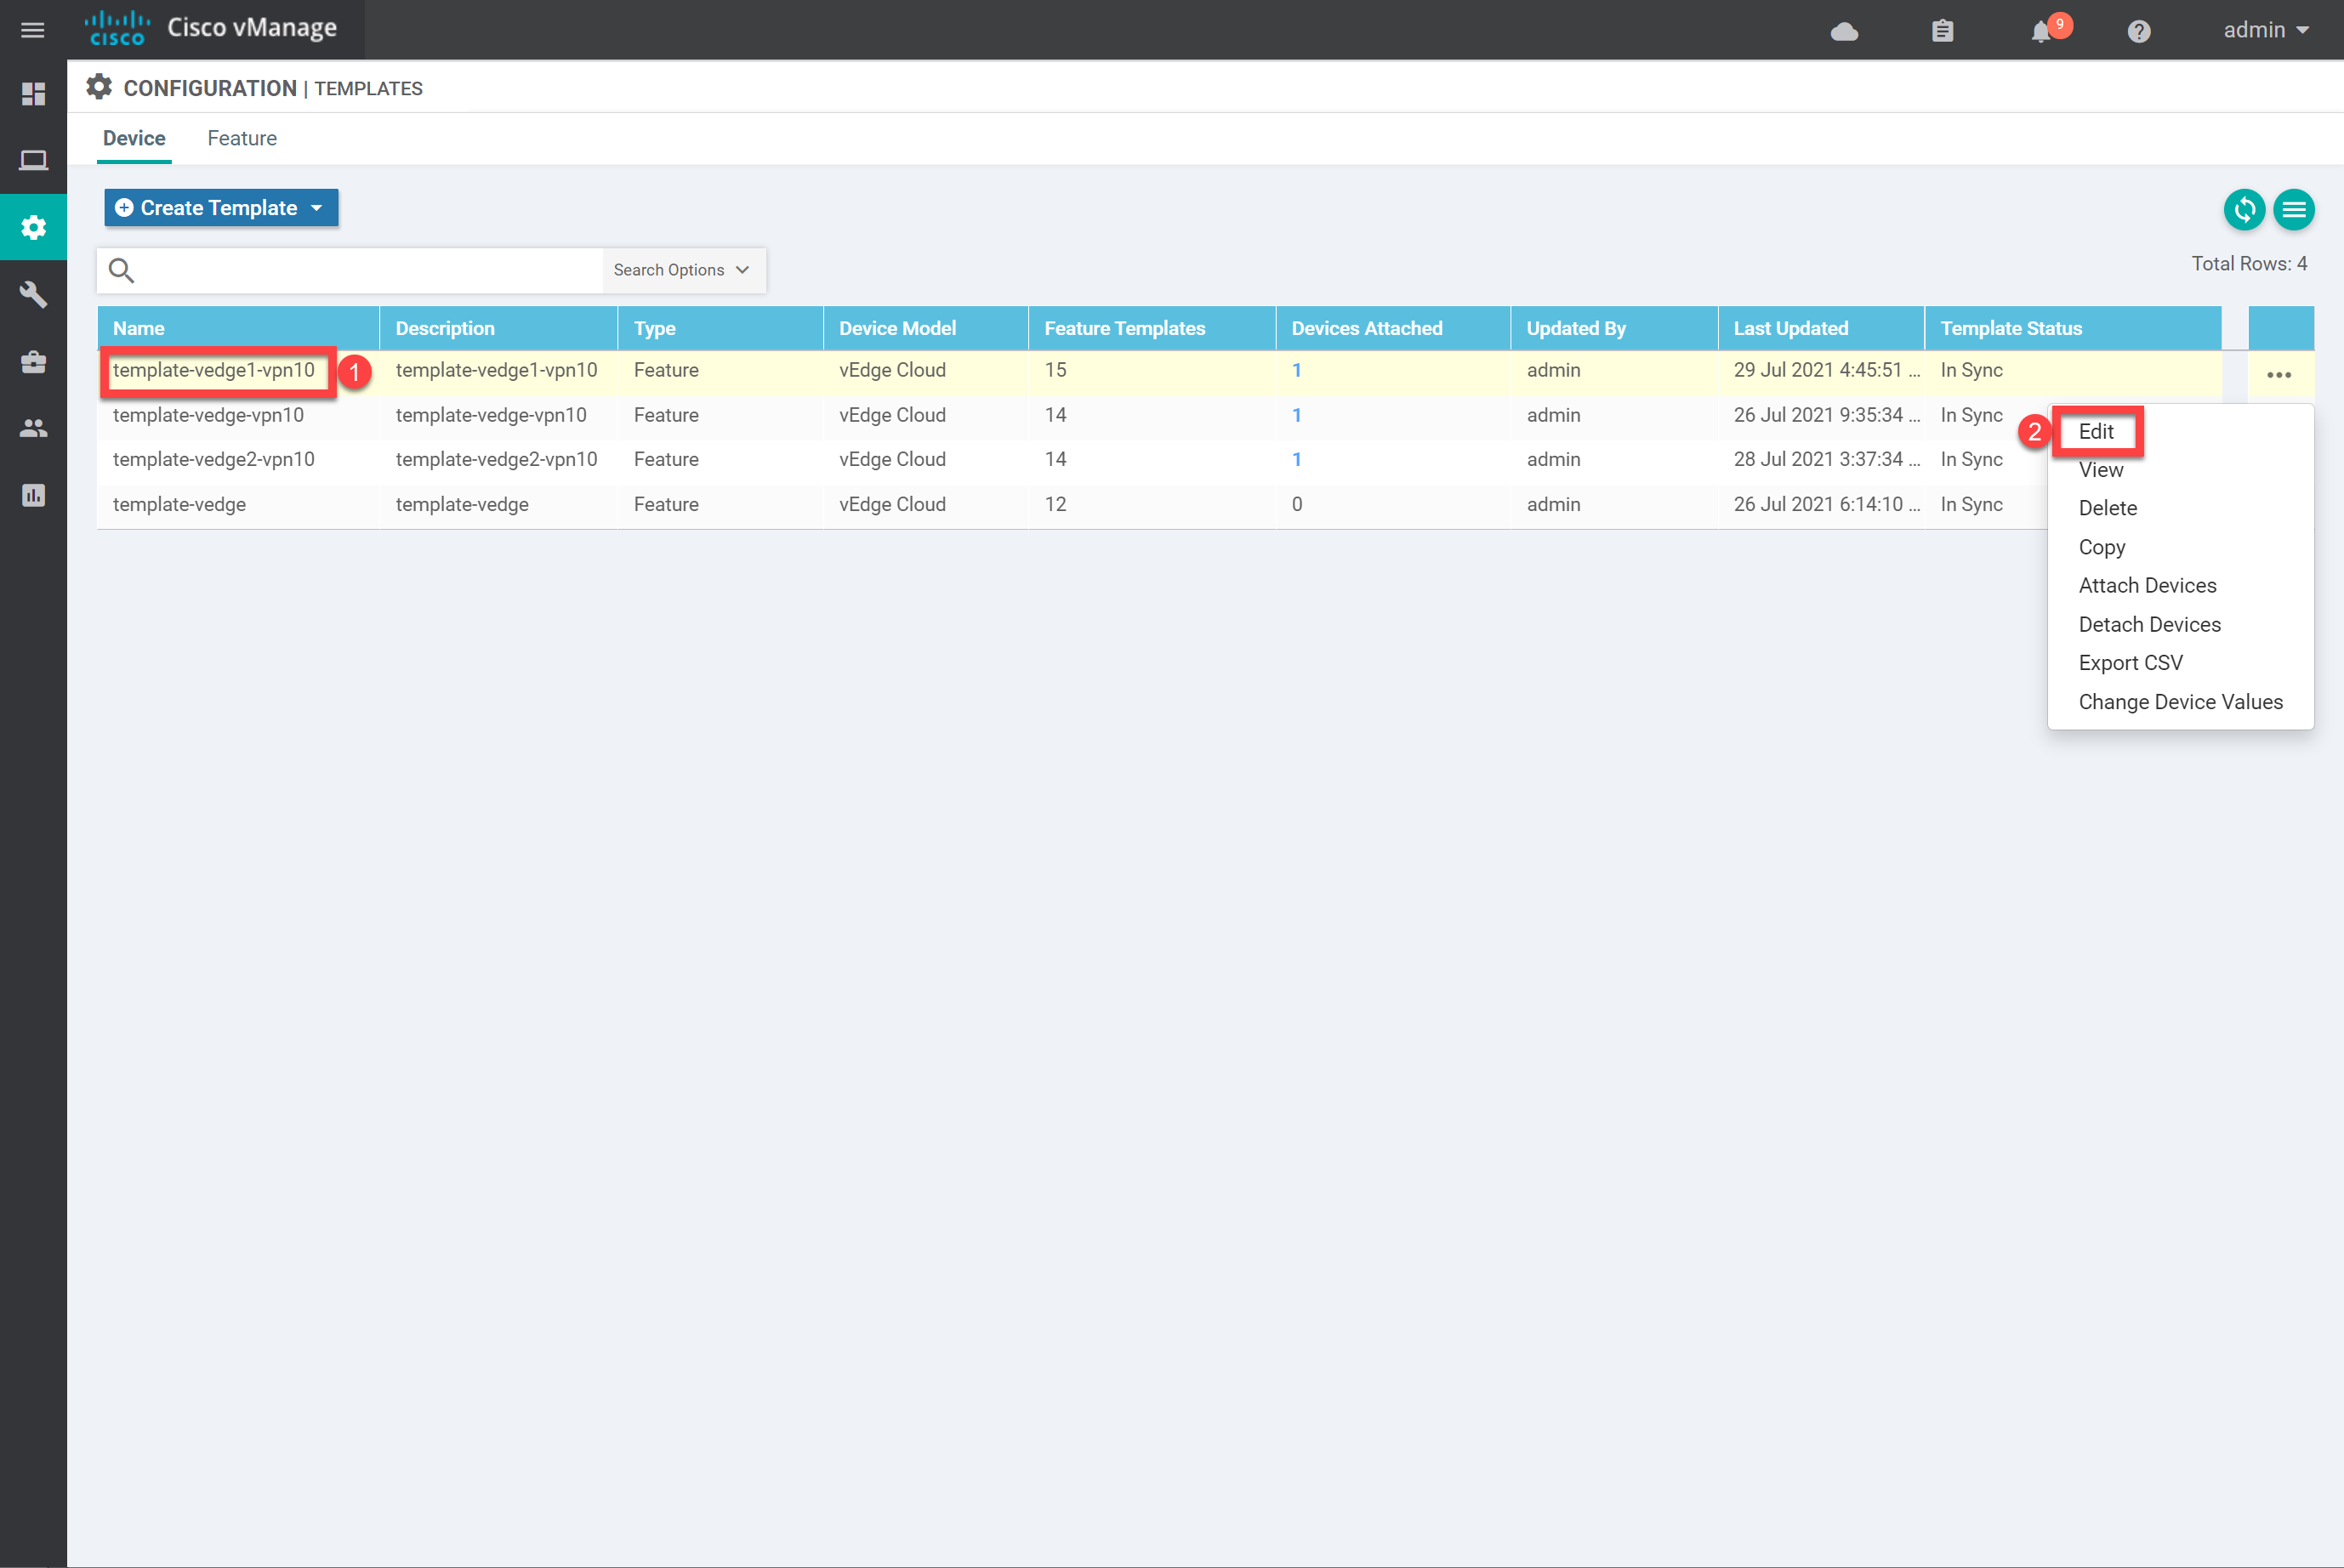
We can now attach the OSPF feature template to a device template. Go to Configuration > Templates > Device and edit the device template, which is attached to vEdge1:
Scroll down to Service VPN and select OSPF under Additional VPN Templates: