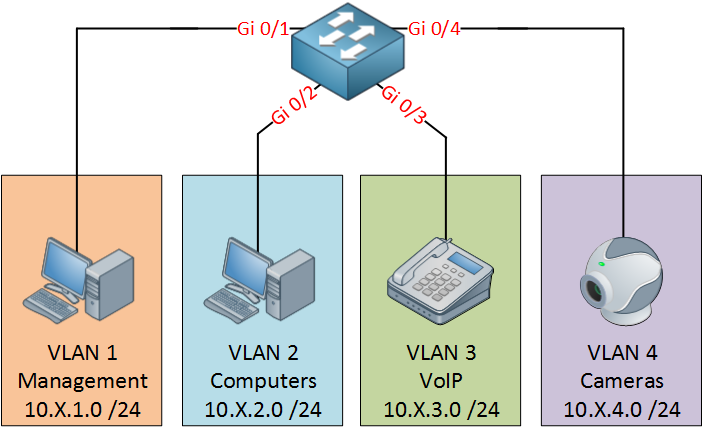
This lesson will show you how to configure VLANs on a Cisco Small Business series switch. In my example, I’m using an SG 300-10MP switch, but it will be similar to other SMB switches. In the example below we have a single switch connected to 4 devices, each device is in a different VLAN. To accomplish this we need to create those VLANs and assign the interfaces to the correct VLAN.
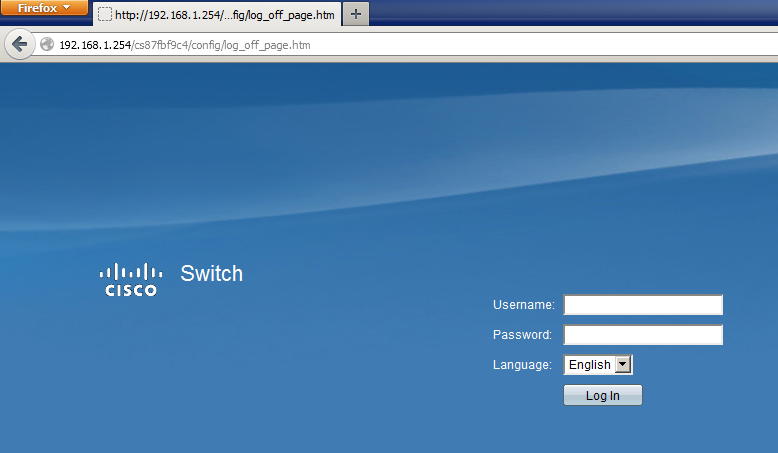
First, we need to login to the switch, the default IP address is 192.168.1.1. The default username is ‘cisco’, and the password is also ‘cisco’.
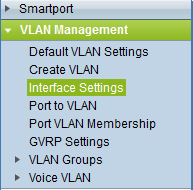
Once you are logged in, you need to select VLAN Management from the menu and then choose Create VLAN:
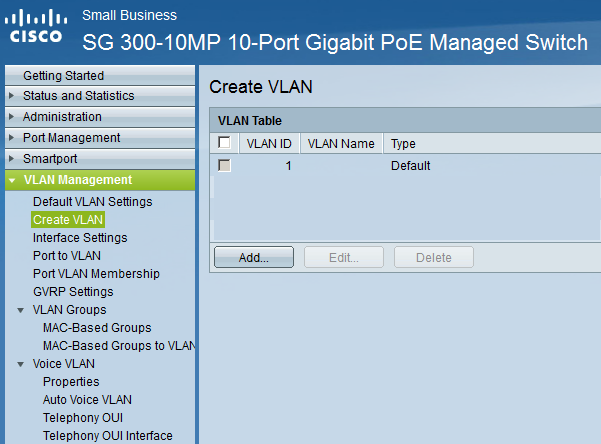
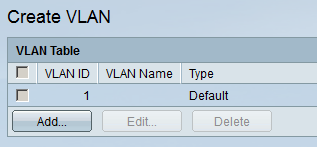
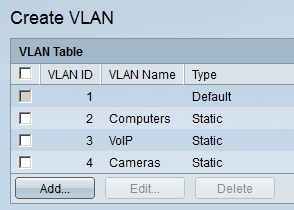
In this overview, you will see all VLANs that this switch has at the moment. So far, there is only VLAN 1 (management VLAN). Hit the Create VLAN button:
Add VLAN 2,3, and 4 and give them a descriptive name. Your overview will look like this:
The VLANs are now configured, but we still have to assign our interfaces to the correct VLAN. Select VLAN Management and then Interface Settings:
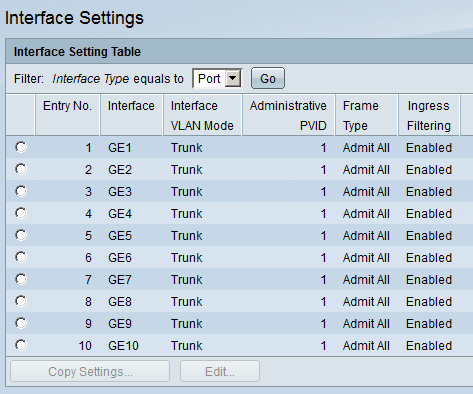
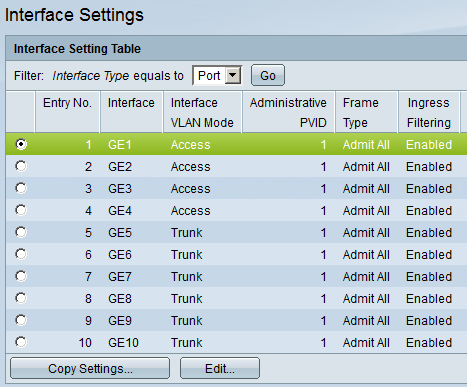
You will see the following overview with all interfaces on the switch. As you can see, by default, all interfaces are trunks. We want to make sure that the interfaces connected to the different devices are access ports and that they can only access their own VLAN. Select an interface, and click on Edit:
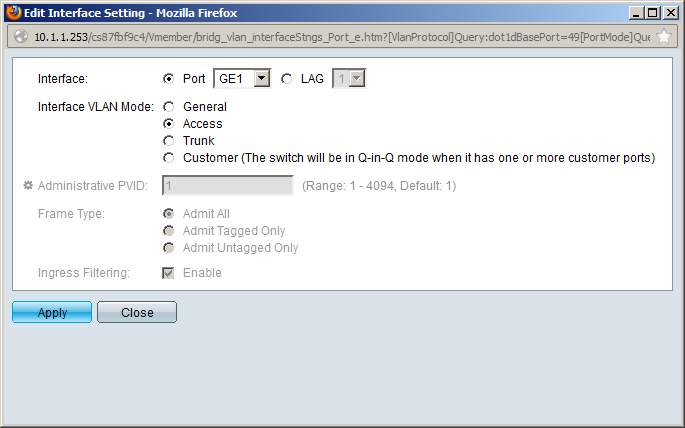
Here’s an example of the GE1 interface. For the interface VLAN Mode, select Access and click on Apply:
Do the same for interface GE2, GE3, and GE4, so your overview looks like this:
Interface GE1, GE2, GE3, and GE4 are now in access mode, but we still need to select the VLAN that they belong to. Do this by selecting VLAN Management from the menu and then choosing Port VLAN Membership:

You will see the following overview with the Port VLAN Membership overview:
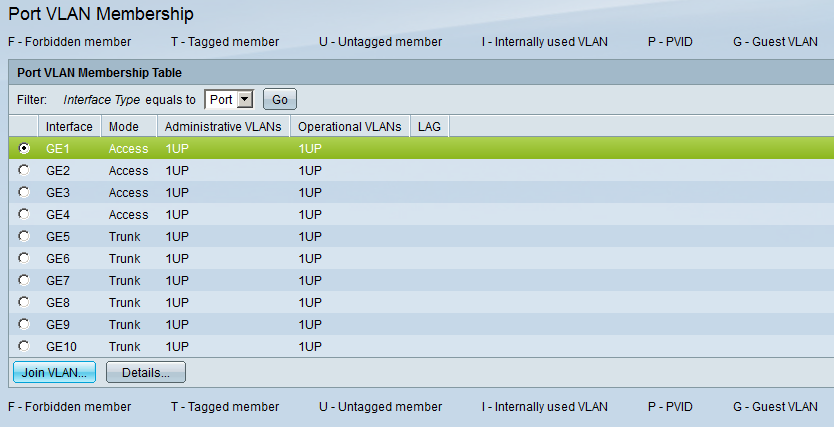
Select one of the interfaces and hit the Join VLAN button:
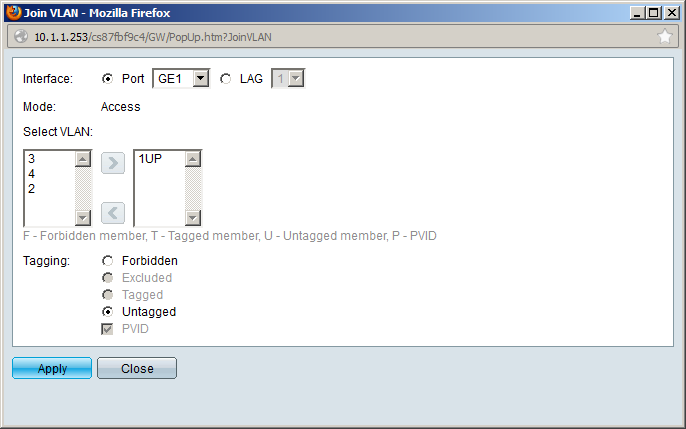
Make sure you select the correct VLAN for the interface and ensure that Tagging is set to Untagged. Configure GE2 for VLAN 2, GE3 for VLAN 3, and GE4 for VLAN 4. Once you are done, your overview will look like this:

Rene
I need a help on something… if in one port i want to connect 2 host. An Avaya Phone and a Computer, this is bc the avaya phones have an additional port to the desktop so the port will receive 2 mac addresses that will require 2 different vlans… do i need to configure trunk? Can you explain that as well?
Thankyou for the great guide you have provided. It helped me a lot to configure VLANs as i wanted. Tried out other guides ,didnt help . Yours was bang on target. Thank you !
Hi Esteban,
Technically you need a trunk if the phone supports VLANs. On the Cisco Catalyst switches we don’t configure a trunk but we use the voice VLAN…behind the scenes it is using 802.1Q trunking to seperate the two VLANs.
I’m not 100% sure if the SMB series switches support a voice VLAN but if so, look into that first. Otherwise you might be able to create a trunk yourself…
Rene
'Hi René, big thank you for this tutorial.
... Continue reading in our forumIt helped me started with the process which is great, but even though i followed it step by step, i got stuck at the ‘Port Vlan membership setting’.Actually, when i try to join my created vlan, there is only a blank window under the ‘select vlan’ part i cant see any of the vlan i created earlier in the process.
After redoing each step again, I thought that i missed something aside of your explanations, and wondered if maybe i shouldnt swith the system Mode to L3 and get further options activated first, like an IPV4 int
Hi Greg,
When you check the VLAN overview, do you see the VLANs that you created? Also in the port VLAN membership screen, do your interfaces show up as “access mode” ?
The switch that I used doesn’t support L3, only L2 so the only thing I could do was create VLANs and assign interfaces to those VLANs.
L3 mode is only required when you want routing between your VLANs. When this is the case, you will have to configure an IP address for each VLAN (which the hosts will use as default gateway). This is not something that should prevent you from assigning interfaces to VLANs though.
Rene