Lesson Contents
Cacti is an NMS (Network Management Software) that uses RRDTool‘s for data storage and graphing functionality. Cacti is web based and released under the GNU General Public License, which means that’s it 100% free. It runs on Windows, Linux, and Solaris. Running it on Linux allows you to have a good and free NMS solution. In this lesson, I’ll show you how to install cacti on a CentOS 6 server.
Prerequisites
First, we need to install apache to serve HTTP requests:
# yum install httpd httpd-develWe also require Mysql for the database:
# yum install mysql mysql-serverDon’t forget PHP:
# yum install php-mysql php-pear php-common php-gd php-devel php php-mbstring php-cli php-mysqlAnd SNMP support:
# yum install php-snmp# yum install net-snmp-utils p net-snmp-libs php-pear-Net-SMTPInstall RRDtool for good-looking graphs:
# yum install rrdtoolOnce you have installed everything, we can start the services:
# service httpd start
# service mysqld start
# service snmpd start
After reboot, you will have to start them again, so it’s better to change this, so these services always start at boot:
# chkconfig httpd on
# chkconfig mysqld on
# chkconfig snmpd on
You can install Cacti from a repository or compile it yourself. To save time, we’ll use the EPEL repository:
# wget http://download.fedoraproject.org/pub/epel/6/x86_64/epel-release-6-8.noarch.rpm
# rpm -ivh epel-release-6-8.noarch.rpm
Now we can install Cacti:
# yum install cactiApache, Mysql, and SNMP are now running, and Cacti has been installed. The next step will be configuring MySQL to prepare for Cacti:
MySQL configuration
Because we just installed MySQL, we still have to set a password for the MySQL server. We also have to create a new database for Cacti and create a new user account:
# mysqladmin -u root password MYPASSWORDThe MySQL server now has a password. Let’s login and create a database and user account:
# mysql -u root -p
Enter password: MYPASSWORD
Welcome to the MySQL monitor.  Commands end with ; or g.
Your MySQL connection id is 3
Server version: 5.1.69 Source distribution

Copyright (c) 2000, 2013, Oracle and/or its affiliates. All rights reserved.

Oracle is a registered trademark of Oracle Corporation and/or its
affiliates. Other names may be trademarks of their respective
owners.

Type 'help;' or 'h' for help. Type 'c' to clear the current input statement.

mysql> create database cacti;
Query OK, 1 row affected (0.01 sec)

mysql> grant all on cacti.* to cacti@localhost identified by 'MYPASSWORD';
Query OK, 0 rows affected (0.00 sec)

mysql> flush privileges;
Query OK, 0 rows affected (0.00 sec)

mysql> exit
Bye
We have a new database called ‘cacti’ and a username called ‘cacti’. The database is there, but it’s still empty. We’ll import a file from the Cacti installation into the database. First, we need to find out where it is located:
# rpm -ql cacti | grep cacti.sql
/usr/share/doc/cacti-0.8.8a/cacti.sql
In my case, it’s in the folder above. We’ll import this SQL file into the database:
# mysql -u cacti -p cacti < /usr/share/doc/cacti-0.8.8a/cacti.sql This will fill the database…now we need to edit the database configuration file of cacti so that it uses the correct database name and username:
# vi /etc/cacti/db.phpI’ll use vi as the text editor. Below you will find the part that we are looking for:
/* make sure these values refect your actual database/host/user/password */
$database_type = "mysql";
$database_default = "cacti";
$database_hostname = "localhost";
$database_username = "cacti";
$database_password = "cacti";
$database_port = "3306";
$database_ssl = false;
Make sure it reflects your database name and username/password. When you are done, save the file and exit vi. We still have to configure Apache…
Apache Configuration
We can change the Apache configuration to choose what IP addresses/subnets are allowed to connect. You can do this by editing the following file:
# vi /etc/httpd/conf.d/cacti.confThis is the part we are looking for:
<Directory /usr/share/cacti/>
        <IfModule mod_authz_core.c>
                # httpd 2.4
                Require host localhost
        </IfModule>
        <IfModule !mod_authz_core.c>
                # httpd 2.2
                Order deny,allow
                Deny from all
                Allow from localhost
        </IfModule>
</Directory>
I will change “Allow from localhost” to “Allow from all” so that I can access Cacti from any IP address:
Allow from allIf you are installing Cacti for a production environment, then it’s better to make things a little bit more secure by only selecting a specific range of IP addresses like this:
Allow from 192.168.1.0/24Once you are done, save your configuration and exit vi. Don’t forget to restart Apache:
# service httpd restartMySQL and Apache are now up and running. The last thing to do is enable a Cronjob. This allows Cacti to collect information from devices.
Configuring Cron
By default, Cron will collect data from devices every 5 minutes, but the cronjob is disabled by default. We’ll enable it ourselves:
# vi /etc/cron.d/cactiYou will find the line below:
#*/5 * * * * cacti /usr/bin/php /usr/share/cacti/poller.php > /dev/null 2>&1Remove the # so that it looks like this:
*/5 * * * * cacti /usr/bin/php /usr/share/cacti/poller.php > /dev/null 2>&1Save your changes and exit vi. We can now access the web installer!
Configuring Cacti
You can access the GUI from your web browser using http://YOUR-IP/cacti. It will look like this:
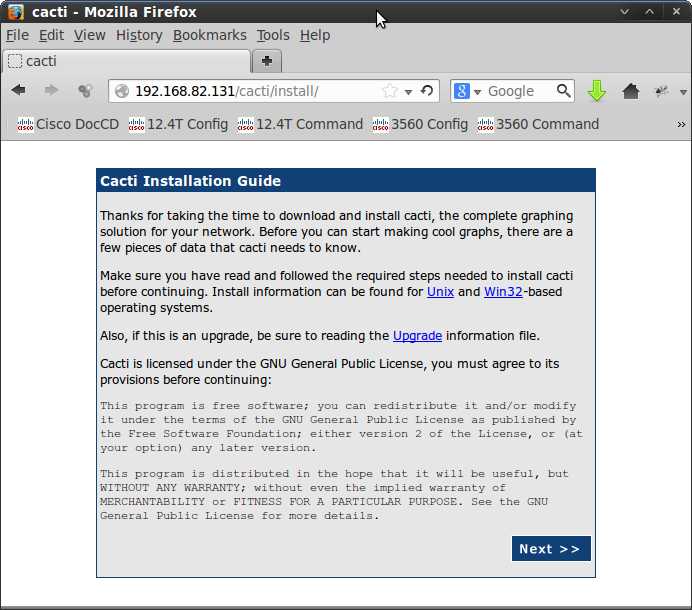
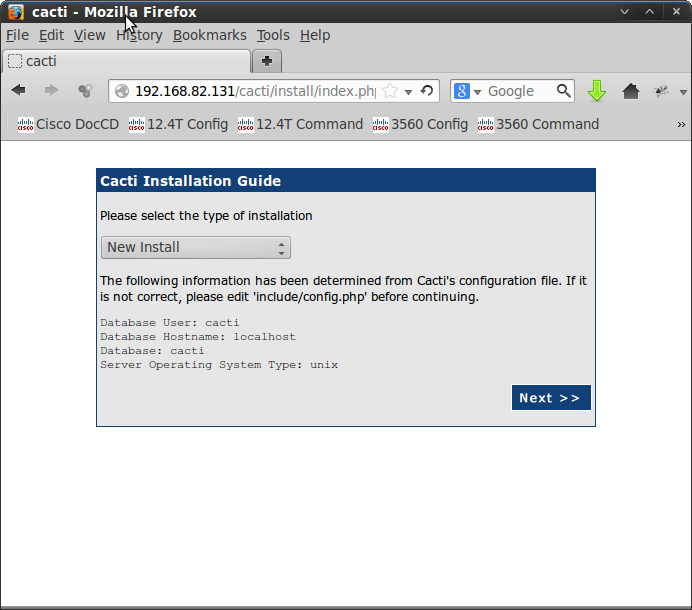
Click on Next and choose a new installation:
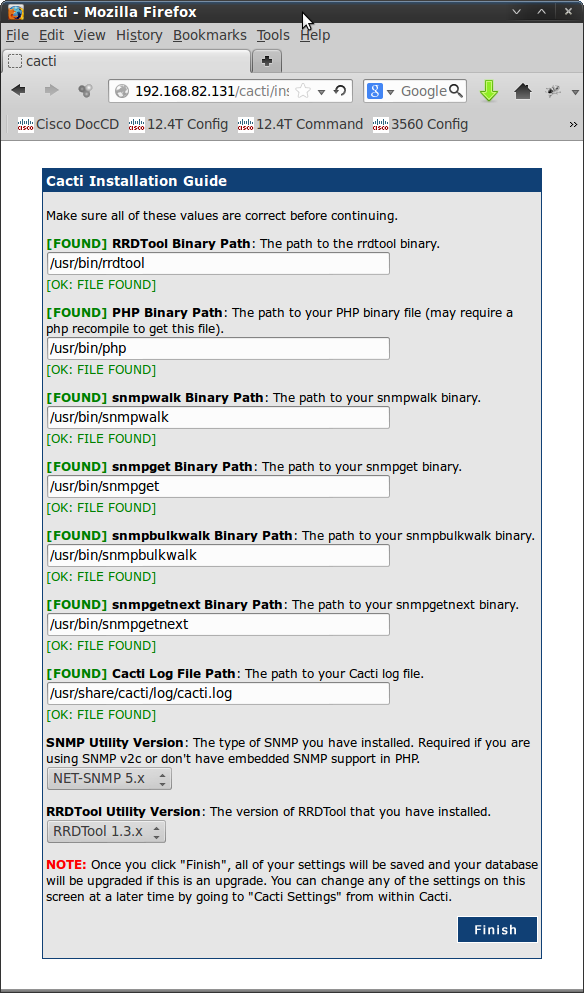
Cacti will show you an installation guide checklist. Everything should look good by now:
Just click on Finish, and you will be presented with the login screen:
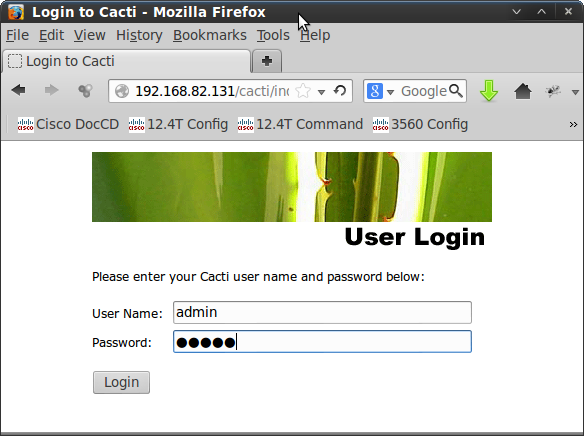
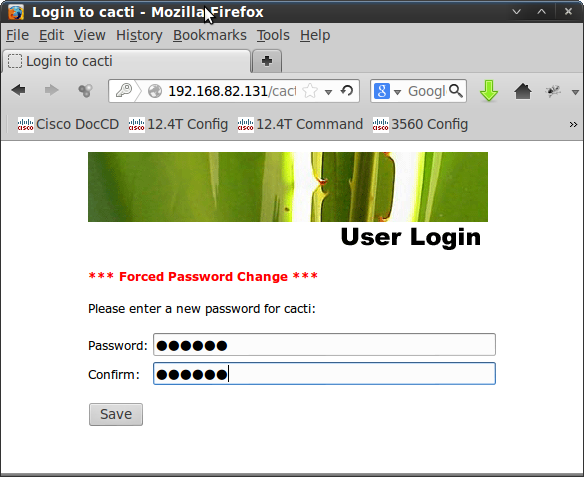
The default username and password are admin/admin. Hit the login button, and you will be prompted to change your password:
After changing the password and saving it, you will be rewarded with the main screen:
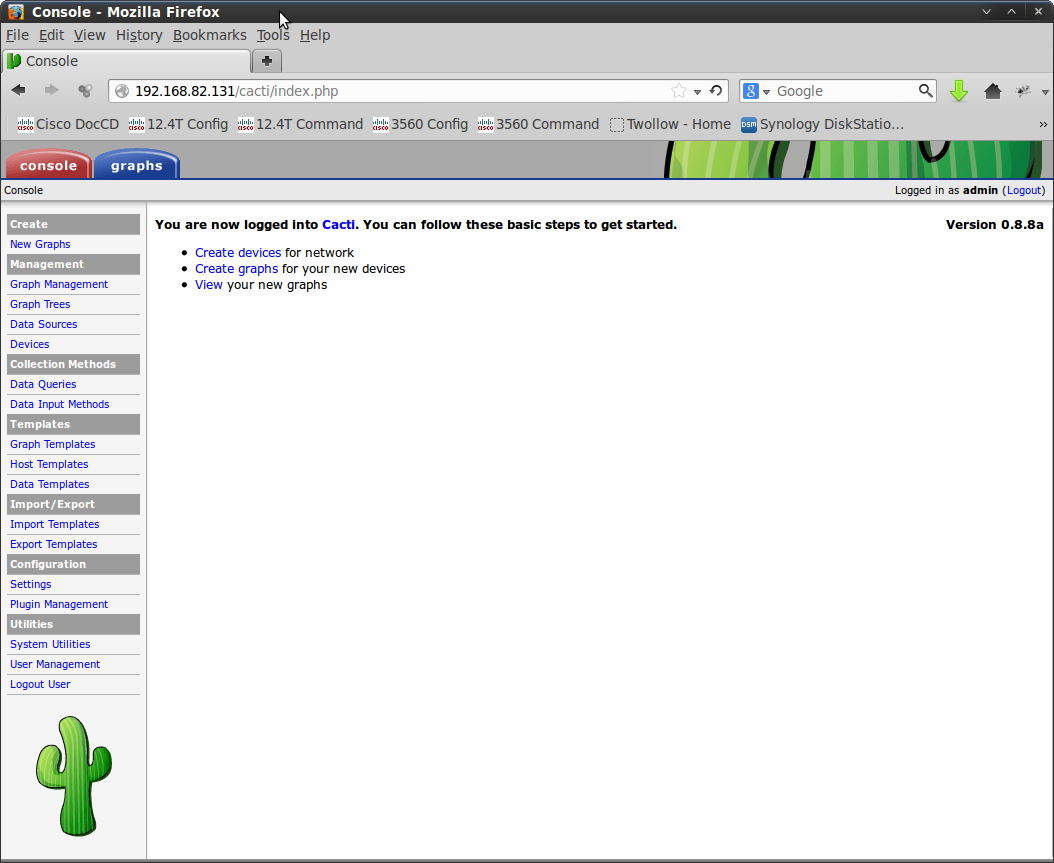
Cacti is now installed and ready to monitor! Add some devices and explore Cacti. I hope this lesson has been helpful to you in installing Cacti on your CentOS server.
This is great! Can you also create a guide how to setup weathermap. thanks a lot