Lesson Contents
In this lesson, you will learn how to configure Windows Server 2008 R2 so that Apple devices (iPhone/ iPad) are able to receive a certificate through the usage of SCEP and use it to authenticate themselves to the wireless network using EAP-TLS.
This means that our Apple devices require a client certificates from our windows server and they should trust the root CA so that they can authenticate the RADIUS server.
NDES (Network Device Enrollment Service) is the service on Server 2008 that lets enroll certificates to the Apple devices.
I’m going to assume that you have a running Active Directory, Certificate Authority, Network Policy Server, IIS and that you are able to authenticate wireless users running EAP-TLS.
If you don’t have this yet, please start with my PEAP and EAP-TLS on Server 2008 R2 lesson before you continue, since it covers the installation of server 2008 for EAP-TLS authentication from scratch. Having said that, let’s authenticate some Apple devices to our wireless network!
Installing NDES Role
The first thing we have to do is install the NDES role on our server. NDES (Network Device Enrollment Service) is Microsoft’s implementation of SCEP (Simple Certificate Enrollment Protocol) and is normally used to enroll X.509 certificates to devices that are unable to use a web browser to request a certificate but which require a certificate for authentication. Think about network devices like routers, switches and firewalls. SCEP can also be used for Apple devices and to easily enroll certificates to multiple devices.
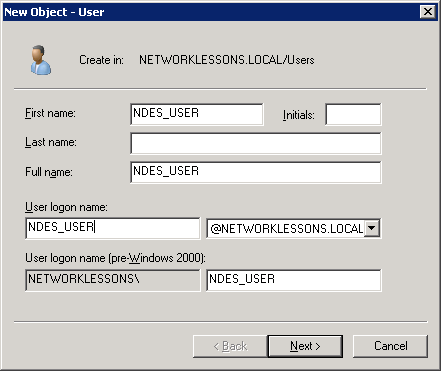
NDES requires an account that we use to enroll the certificates. It’s best to create a new user account for this so we will start with a new user called “NDES_USER”.
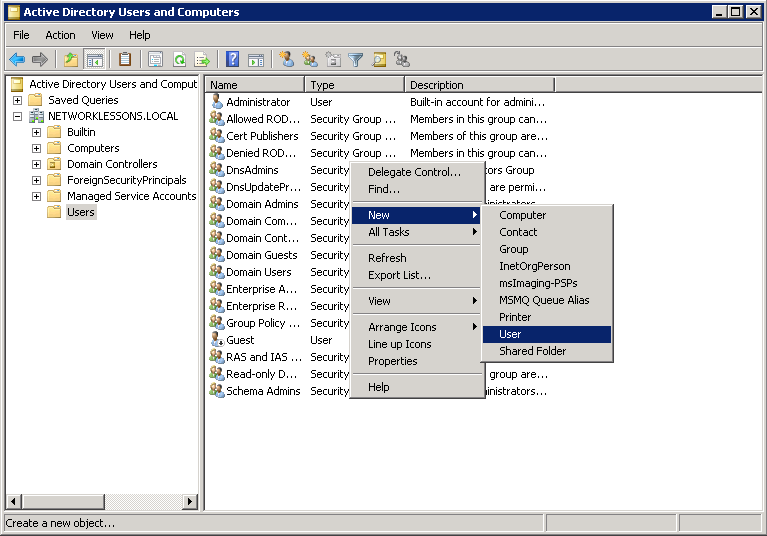
Click Start > All Programs > Administrative Tools > Active Directory Users and Computers

In the users folder, do a right mouse click and select New User.
We wil call the new user “NDES_USER“. Click Next to continue.
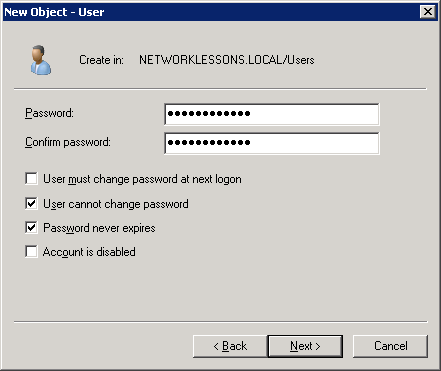
Enter a strong password and click Next to continue.
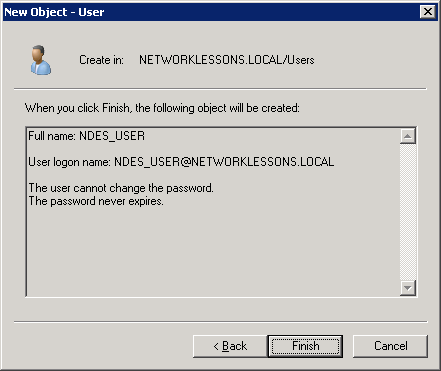
Finally click Finish to continue.
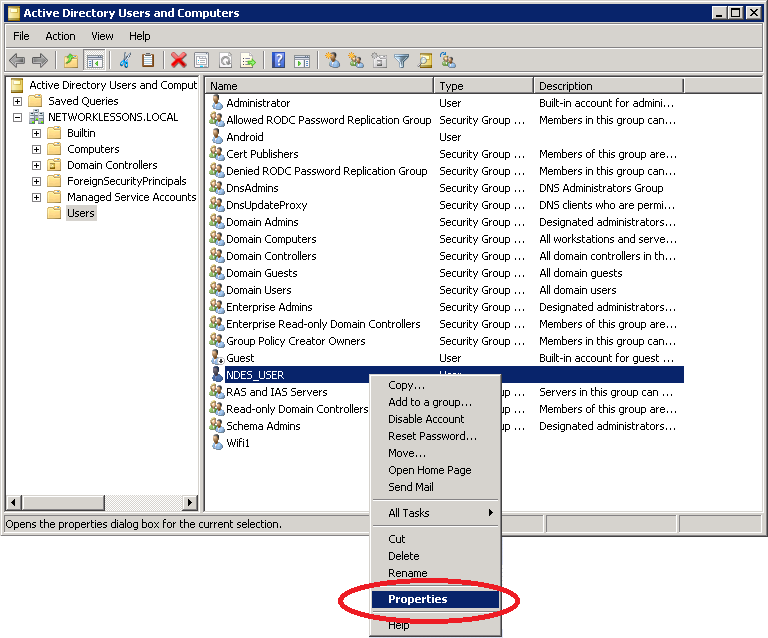
Our new NDES_USER has to be member of the IIS_IUSRS group in order to work with NDES. Click (right mouse button) on our new user account and select Properties.
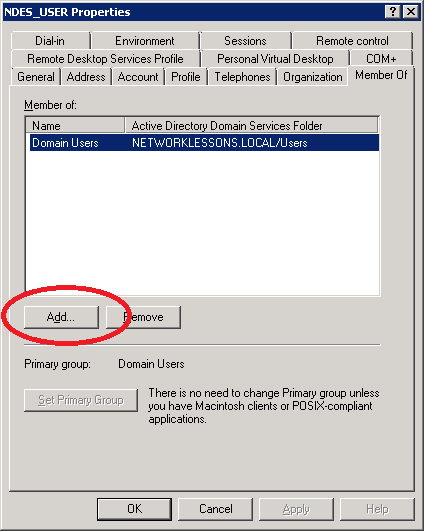
Select the Member of tab and click on Add.
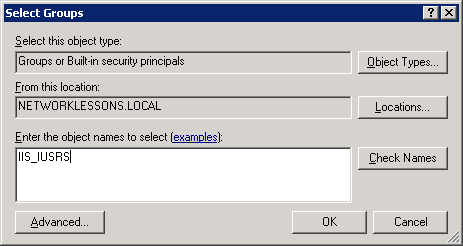
Type in the IIS_IUSRS group and click on OK.
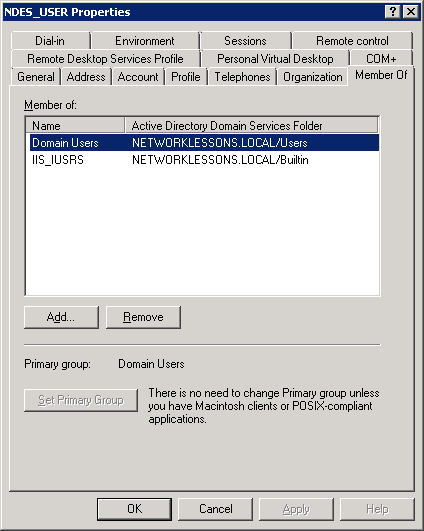
You will now see that the NDES_USER is member of the IIS_IUSRS group.
You can now close Active Directory since we’ll continue with the installation of NDES.
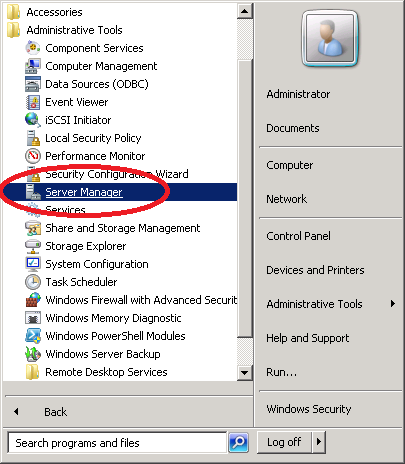
Click Start > All Programs > Administrative Tools > Server Manager
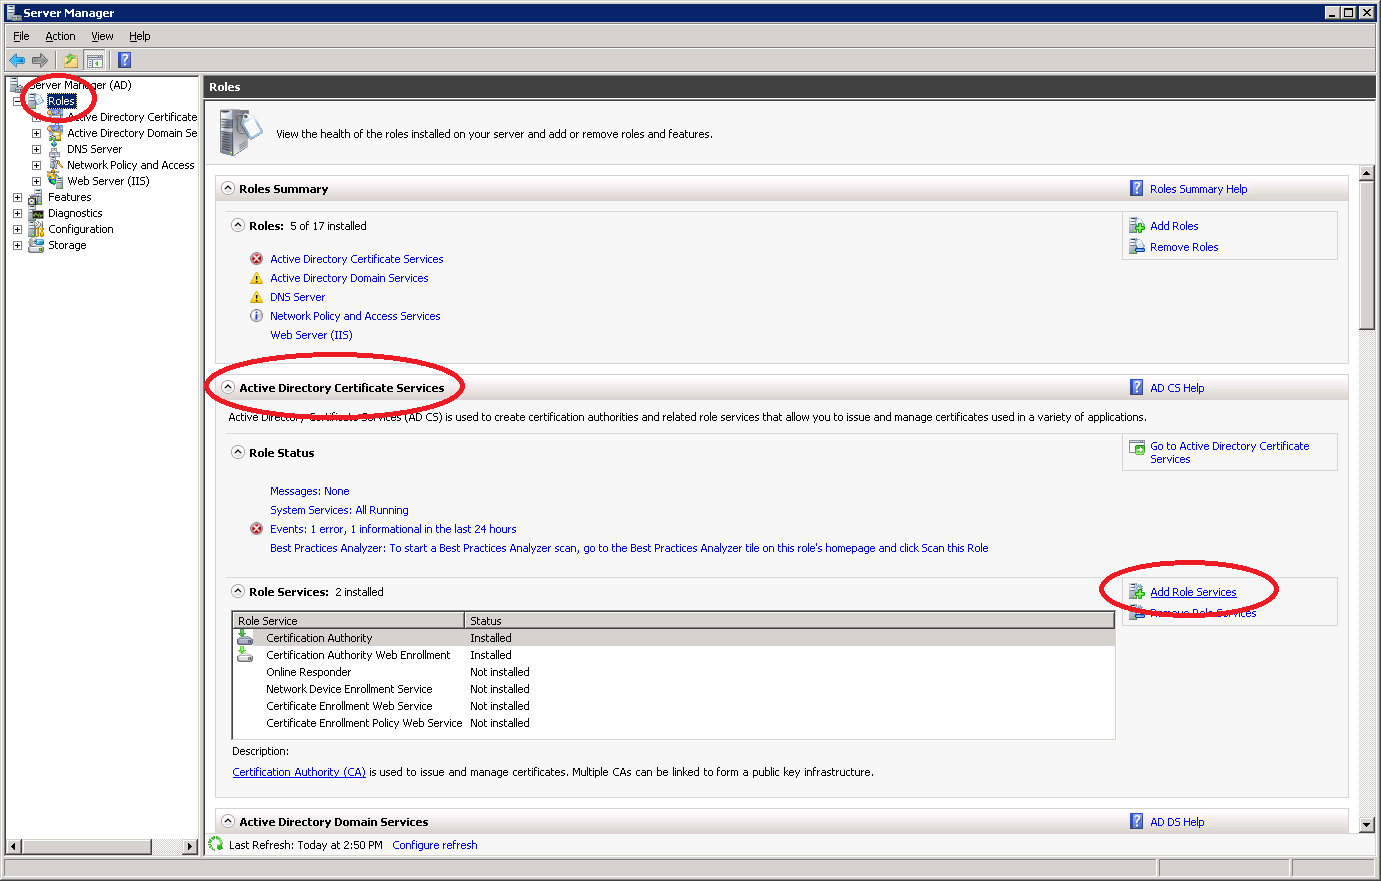
Click on Roles > Add Role Services
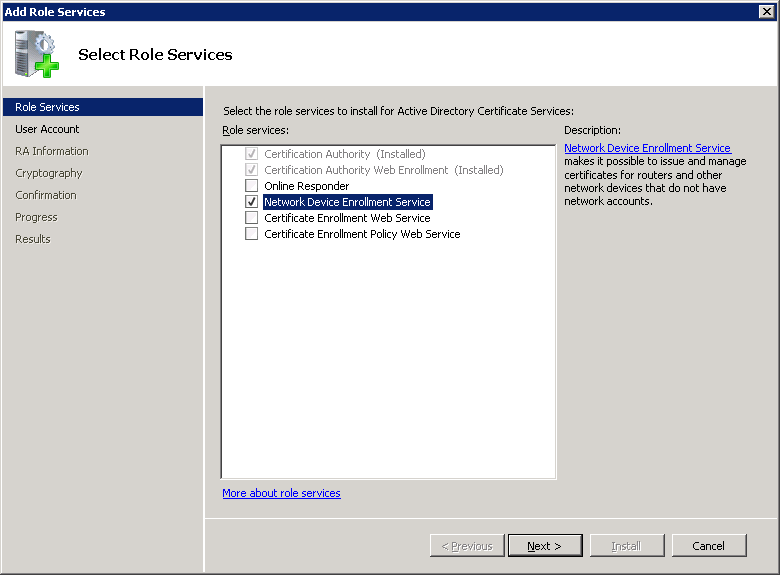
Select Network Device Enrollment Service and click Next to add the NDES role.
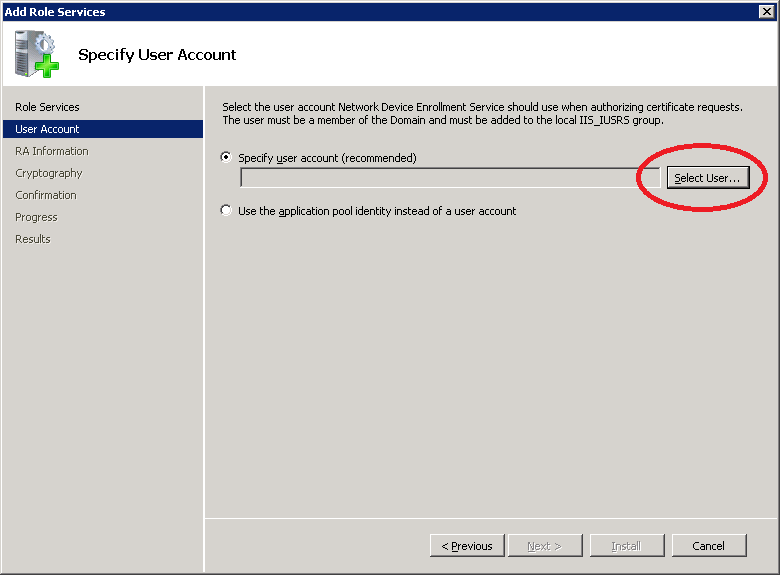
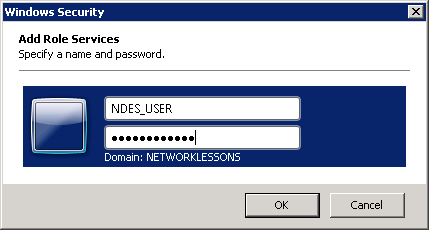
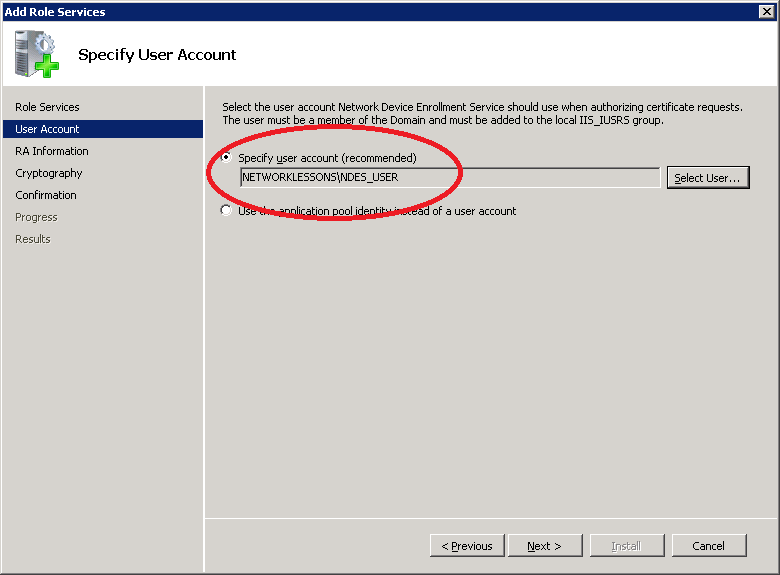
NDES will ask you for a user account to use. It tells you that the user accounts has to be a member of the IIS_IUSRS group. Click on the Select User button.
The wizard will prompt you to authenticate using the NDES account. Type in the NDES_USER username and the password that you configured. Click OK to continue.
When you correctly added your credentials you will see the user account. Click Next to continue.
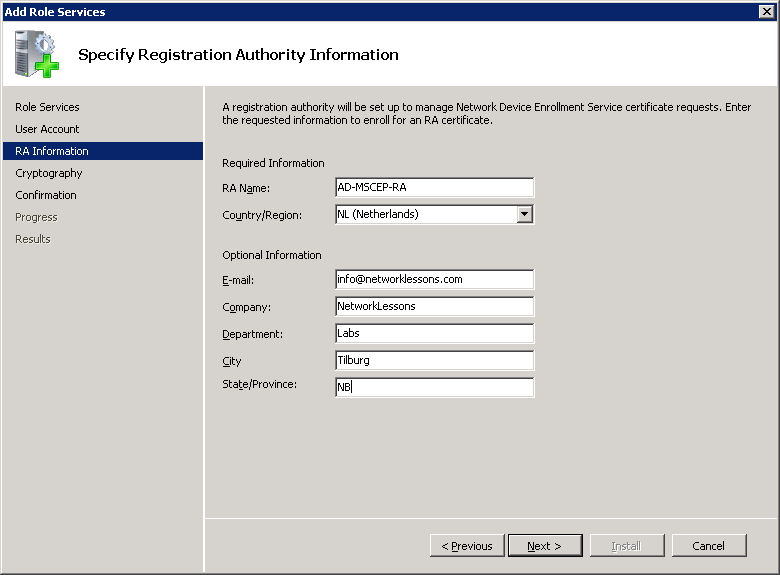
In the next screen we have to specify the Registration Authority information. By default the RA name will be “COMPUTERNAME-MSCEP-RA”. I left it at the default, entered the correct country and if you want you can enter some additional details like an e-mail address, company, etc. Click Next to continue.
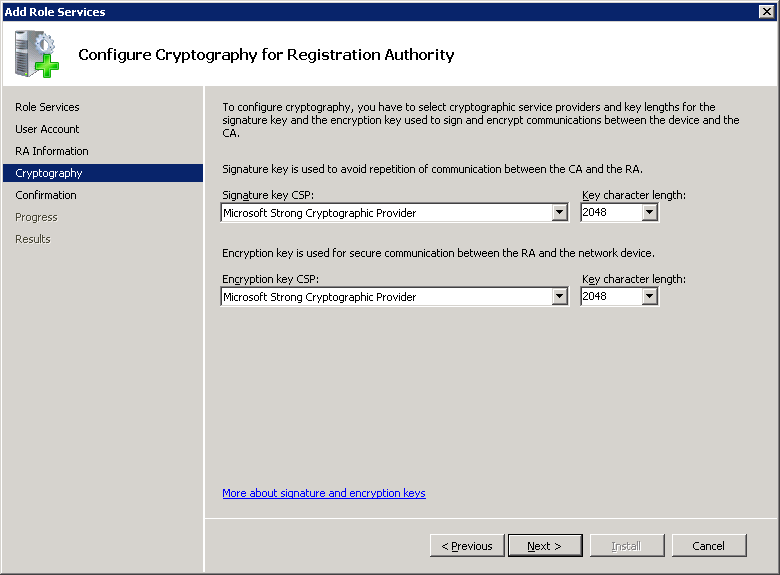
By default the Signature and Encryption keys are 2048 bit. I have left them at the default, click Next to continue.
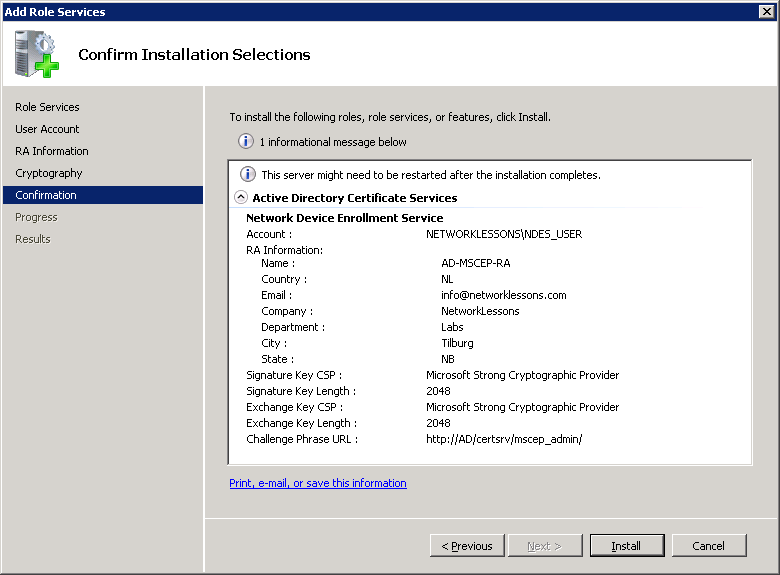
The wizard will show you a nice overview, select Install to continue.
And you will see a nice progress screen for a few minutes…
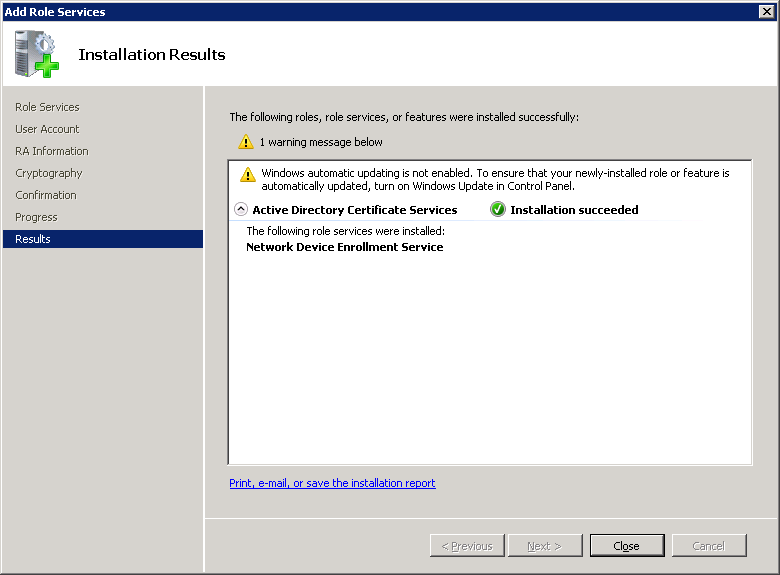
Finally you will see the results of the installation wizard. Click Close to continue.
NDES is now up and running, we still have to configure a certificate template so the server knows what kind of certificate we have to enroll when an Apple device requests one.
Configure Certificate Authority for SCEP
NDES / SCEP by default uses the IPSEC (Offline Request) template when you enroll a certificate. Since we want a certificate for EAP-TLS wireless authentication we’ll have to create a new template and tell the certificate authority to use the new template. To do this, we’ll create a custom template and configure it for client authentication.
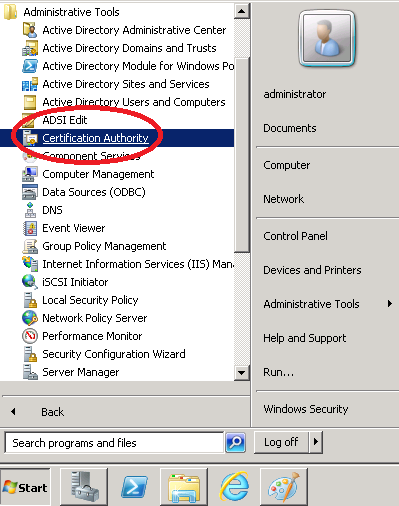
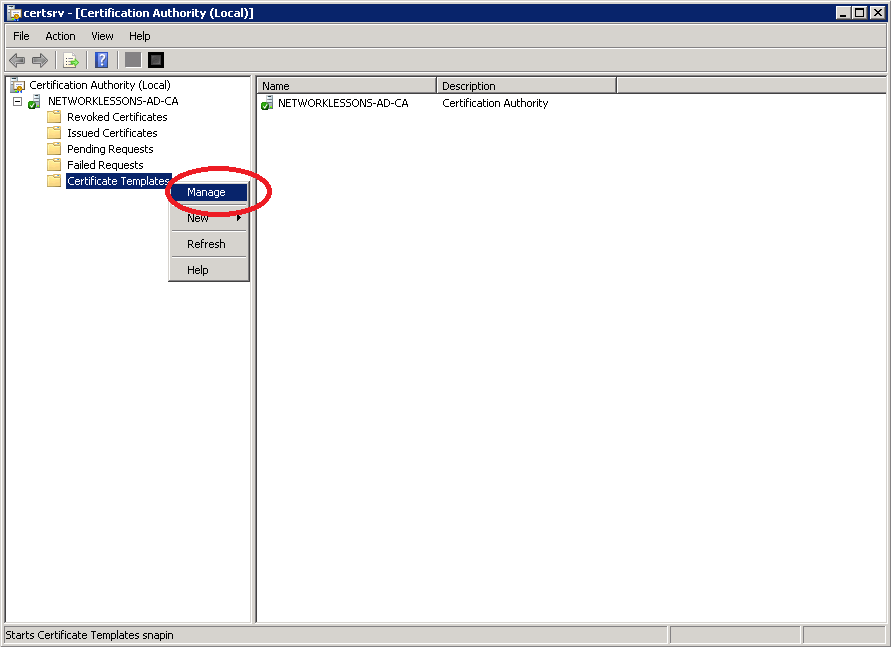
Go to Start > All Programs > Administrative Tools > Certificate Authority.
Go to the Certificate Templates, right click on it and select Manage.
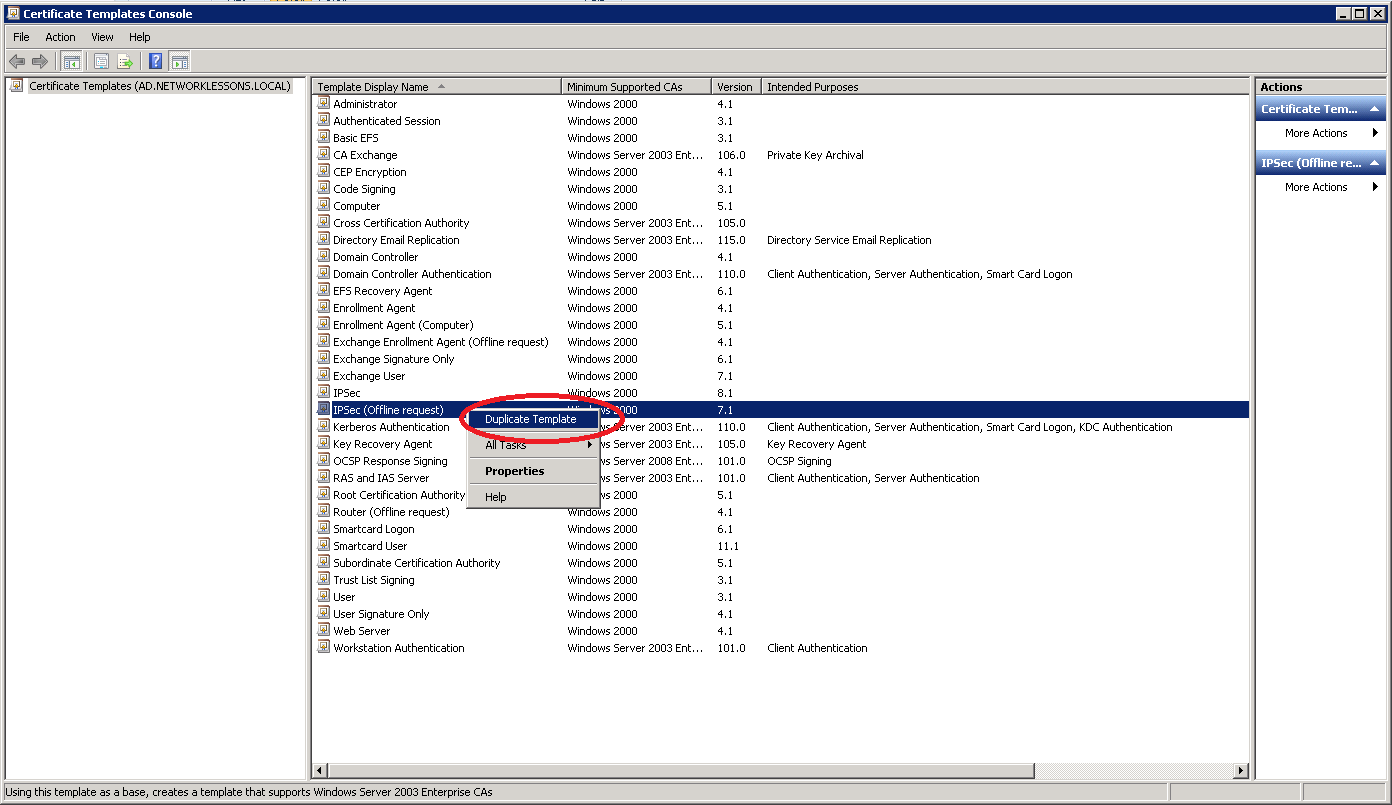
The IPSEC (Offline request) template that SCEP uses by default will be fine. We’ll use it as a template and edit it.
Select IPSec (Offline request), right mouse click and select Duplicate Template.
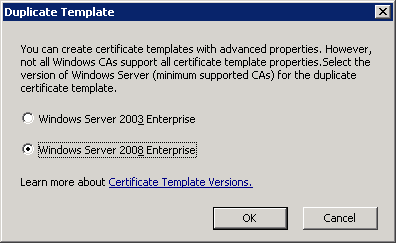
I only have Windows Server 2008 machines so I’m selecting Windows Server 2008 Enterprise. Click OK to continue.
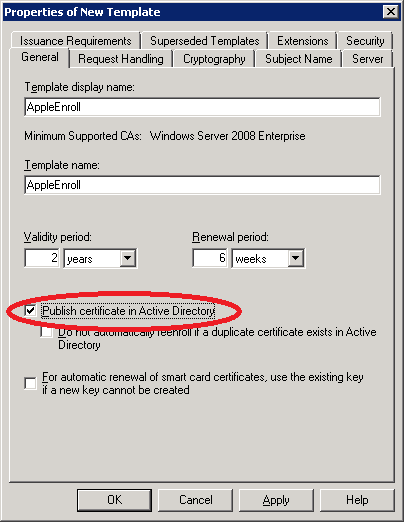
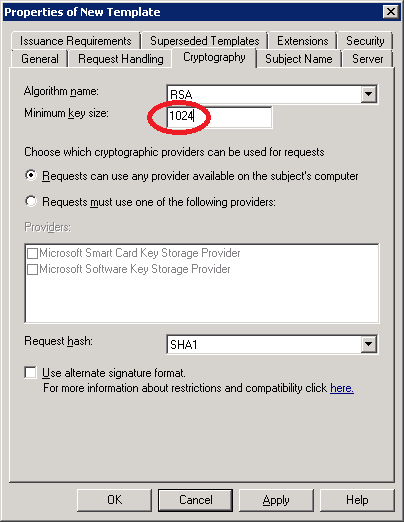
You will see the properties of the new template. I will call the new template AppleEnroll. Select the publish certificate in Active Directory.
The next step is optional. Select the Cryptography tab and set the Minimum key size at 1024. In a production environment it’s probably better to leave it at 2048 but it helps to speed up the certificate generation on the mobile devices a little bit.
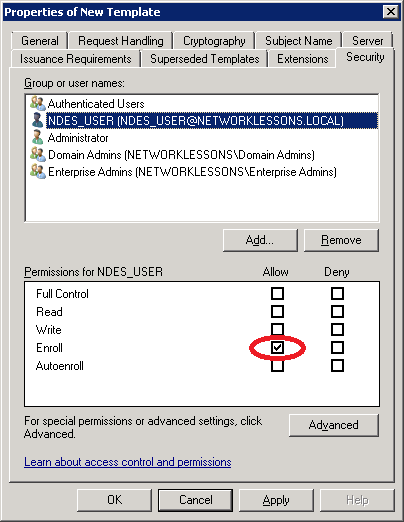
Select the Security tab and make sure the NDES_USER has enroll permissions.
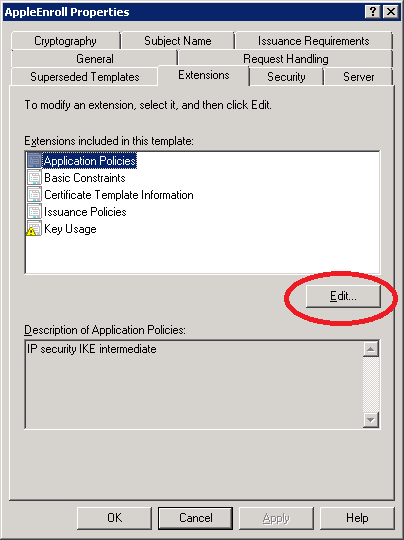
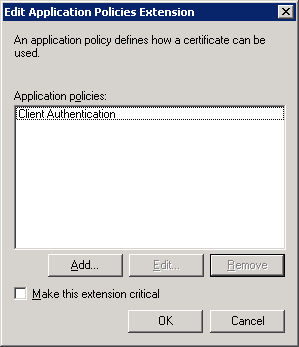
Select the Extensions tab, select Application Policies and take a look at the Application Policies. We copied the IPSEC (Offline request) template and it’s meant for IPSEC. We’ll change it so this template can be used for client authentication. Click on Edit.
Right now we only have the IP security IKE intermediate Application policy. Click Add and select Client Authentication.
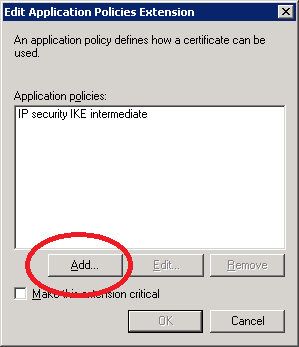
This template can now be used for IPSEC and Client authentication. We don’t need IPSEC so select IP security IKE intermediate and click on Remove. Click OK to continue.
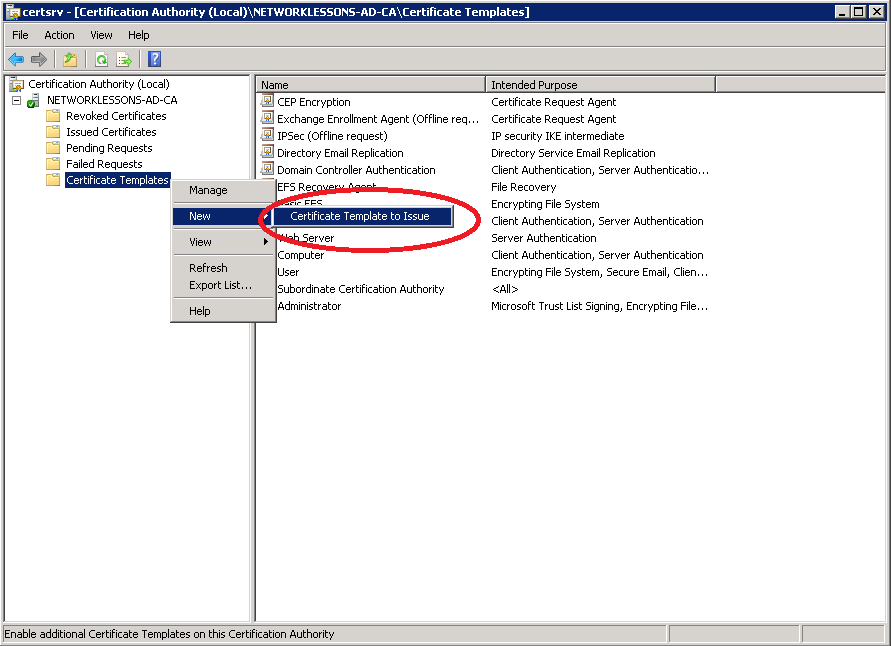
Our custom “AppleEnroll” certificate is now ready but we still have to enable it in the Certificate Authority. Click (right mouse button) on Certificate Templates and select New > Certificate Template to Issue.
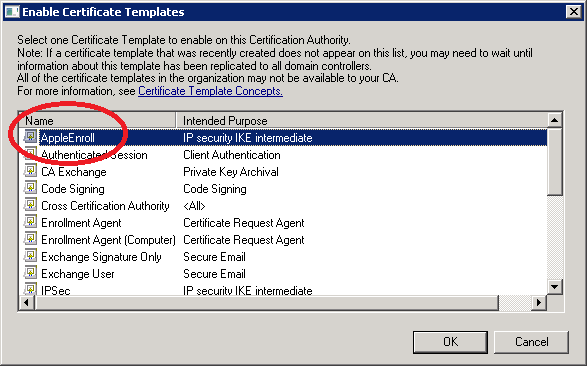
Select our AppleEnroll certificate template and click OK.
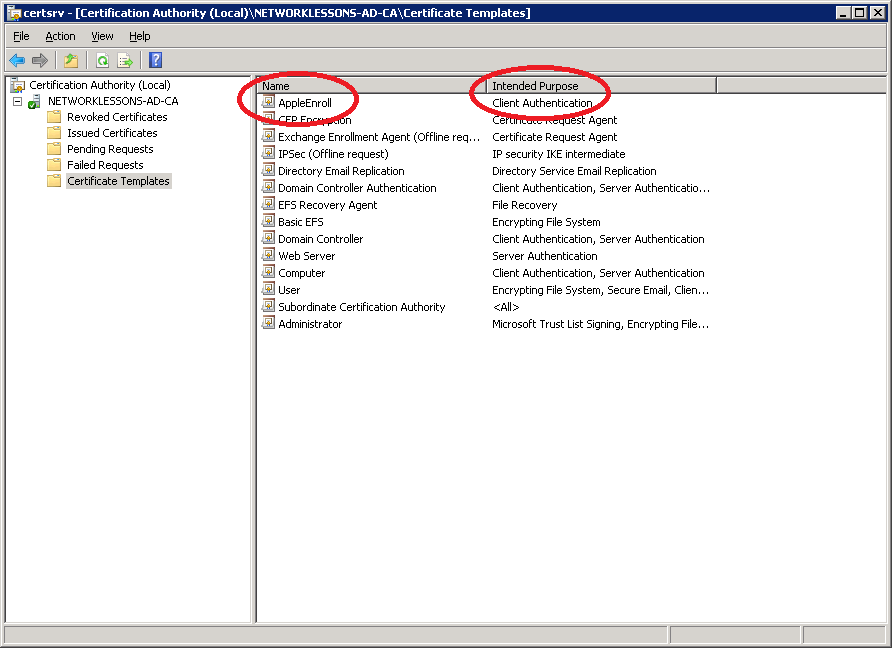
If everything went ok you should see the AppleEnroll template and its Intended Purpose being Client Authentication.
We are almost done but there is one more change we have to make. Even though we created a new custom certificate template, by default SCEP will always enroll the IPSEC (Offline request) template when a device requests a certificate. The only way to change this is by editing the registry.
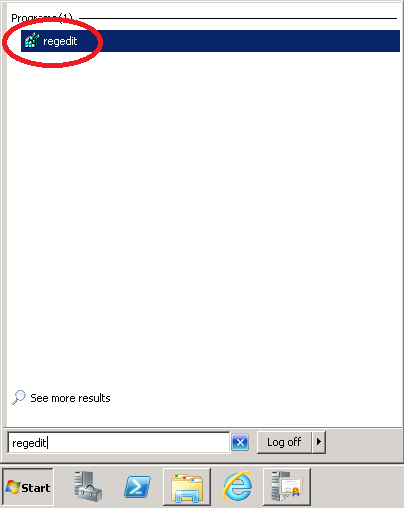
Click on the Start button > type “regedit” (without the quotes) and hit enter.
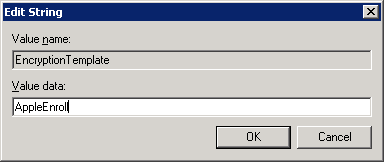
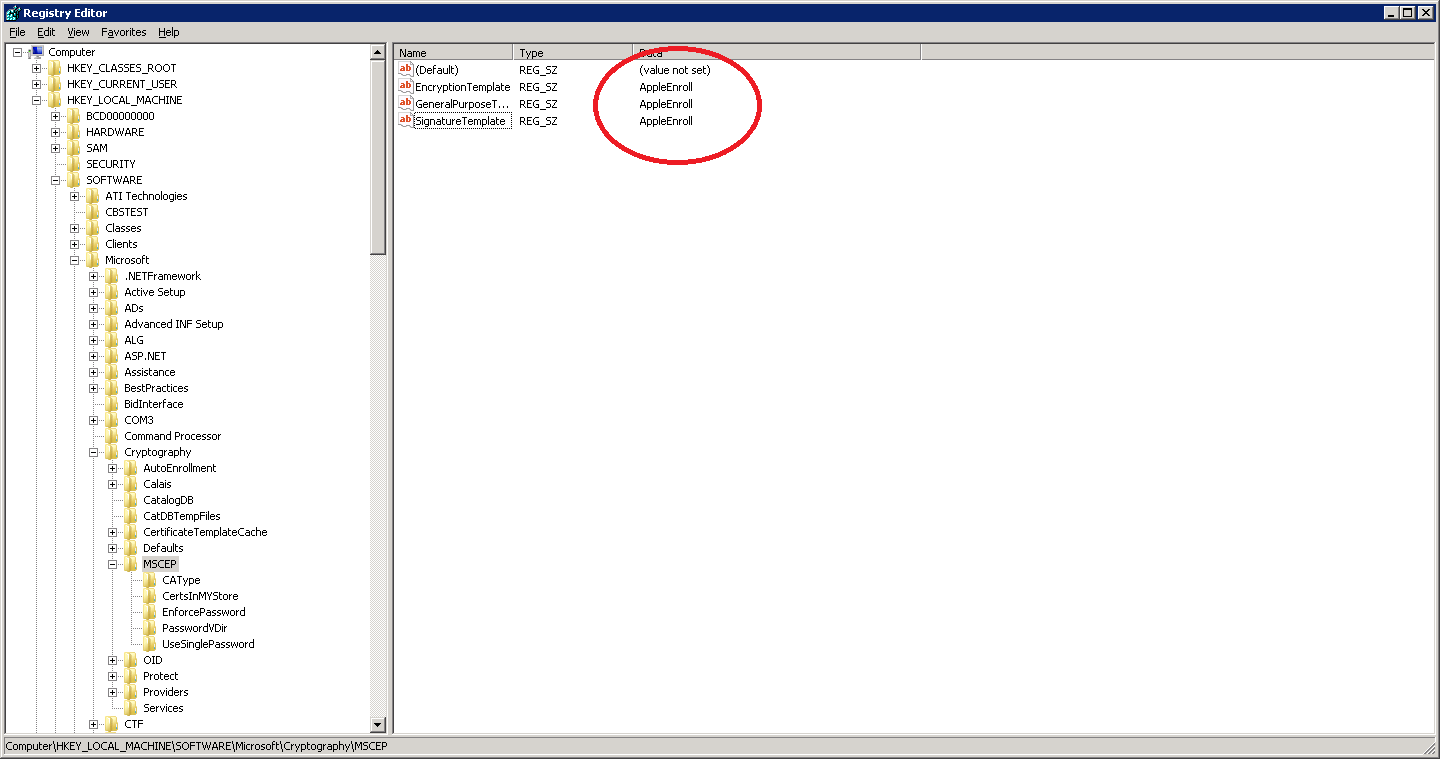
Select HKEY_LOCAL_MACHINE > SOFTWARE > Microsoft > Cryptography > MSCEP. Note that the default value is IPSECIntermediateOffline. We need to change all 3 values so double-click on them.

Change the Value data to AppleEnroll. Click OK to continue.
If everything went ok the registry entries should show “AppleEnroll”.
Before the changes in the registry take effect you either have to restart IIS and Certificates Services or just reboot the entire server. Once you did so it’s time to enroll a certificate to our Apple device.
Enroll Certificate to Apple Device
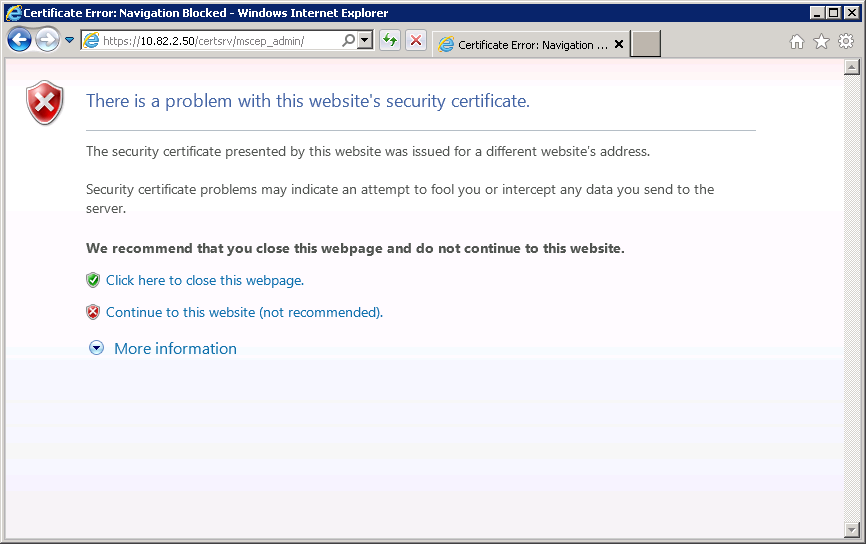
This is where the fun starts…we are about to enroll a certificate to an Apple device by using SCEP! Open up a web browser on your server or a computer that can reach the server and go to the following URL:
http://your-server-ip-address/certsrv/mscep_admin
You will receive a warning about the website certificate because it’s self-signed, just click Continue to this website.
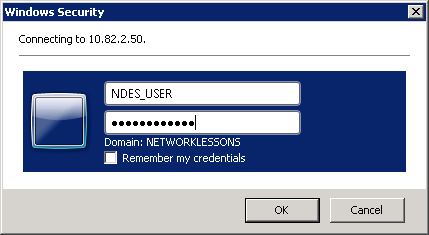
Use the NDES_USER account to authenticate yourself to the server.
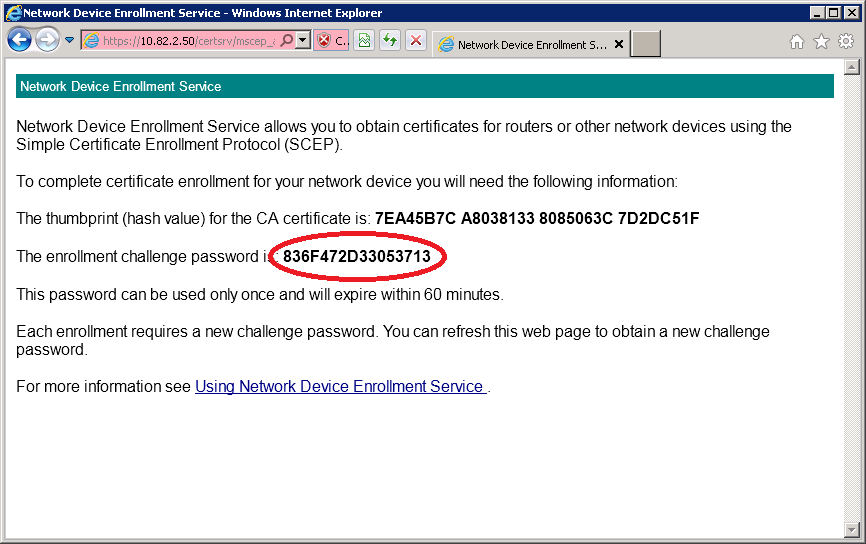
You will see the Network Device Enrollment Service and it will give you a enrollment challenge password. Copy and paste this to notepad because we will need it in a minute.
Our server is ready to enroll a certificate to the Apple iPhone / iPad. To configure our iPhone or iPad we need to use the iPhone Configuration Utility. You can download it from the Apple website for free. This utility lets us configure profiles from a Windows or Mac computer and apply them to your iPhone or iPad.
Download this on your computer and make sure to connect your iPhone or iPad to your computer with a USB cable.
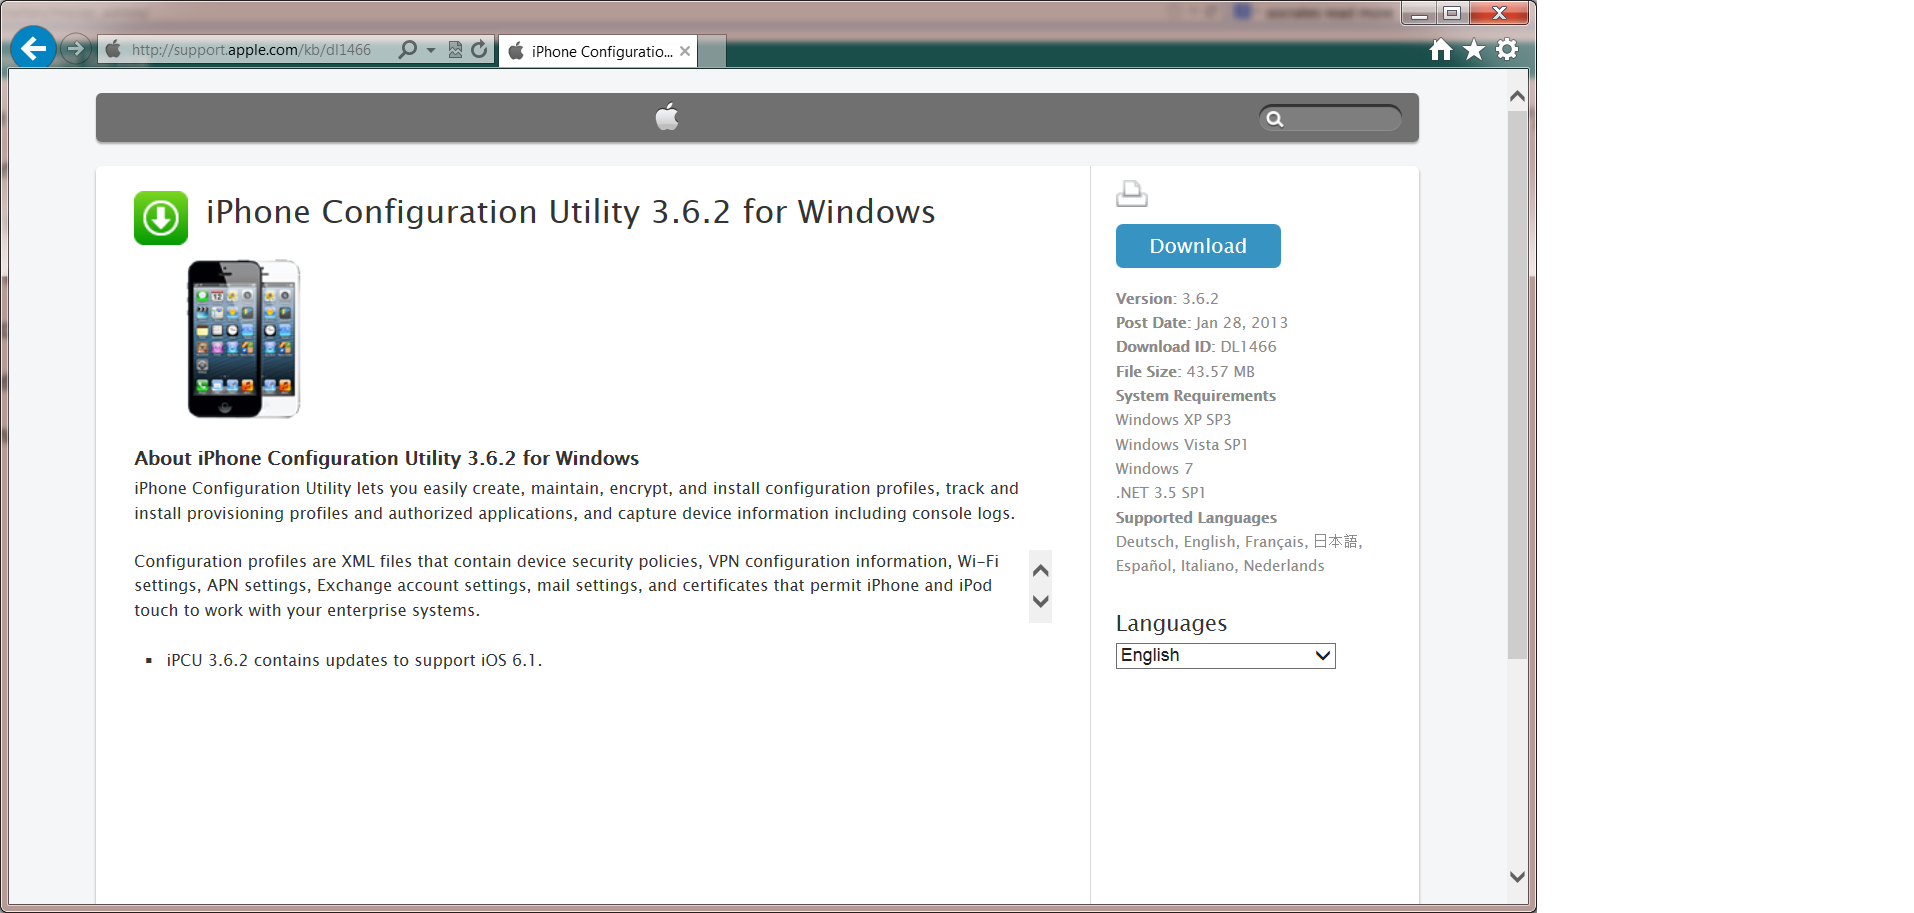
Install the iPhone Configuration Utility on your computer and connect your Apple iPhone or iPad.
We are going to use this to enroll a certificate to our Apple device and I’m also going to use it to configure a wireless profile so that it knows to which SSID it should connect and to use WPA2-Enterprise (802.1X).
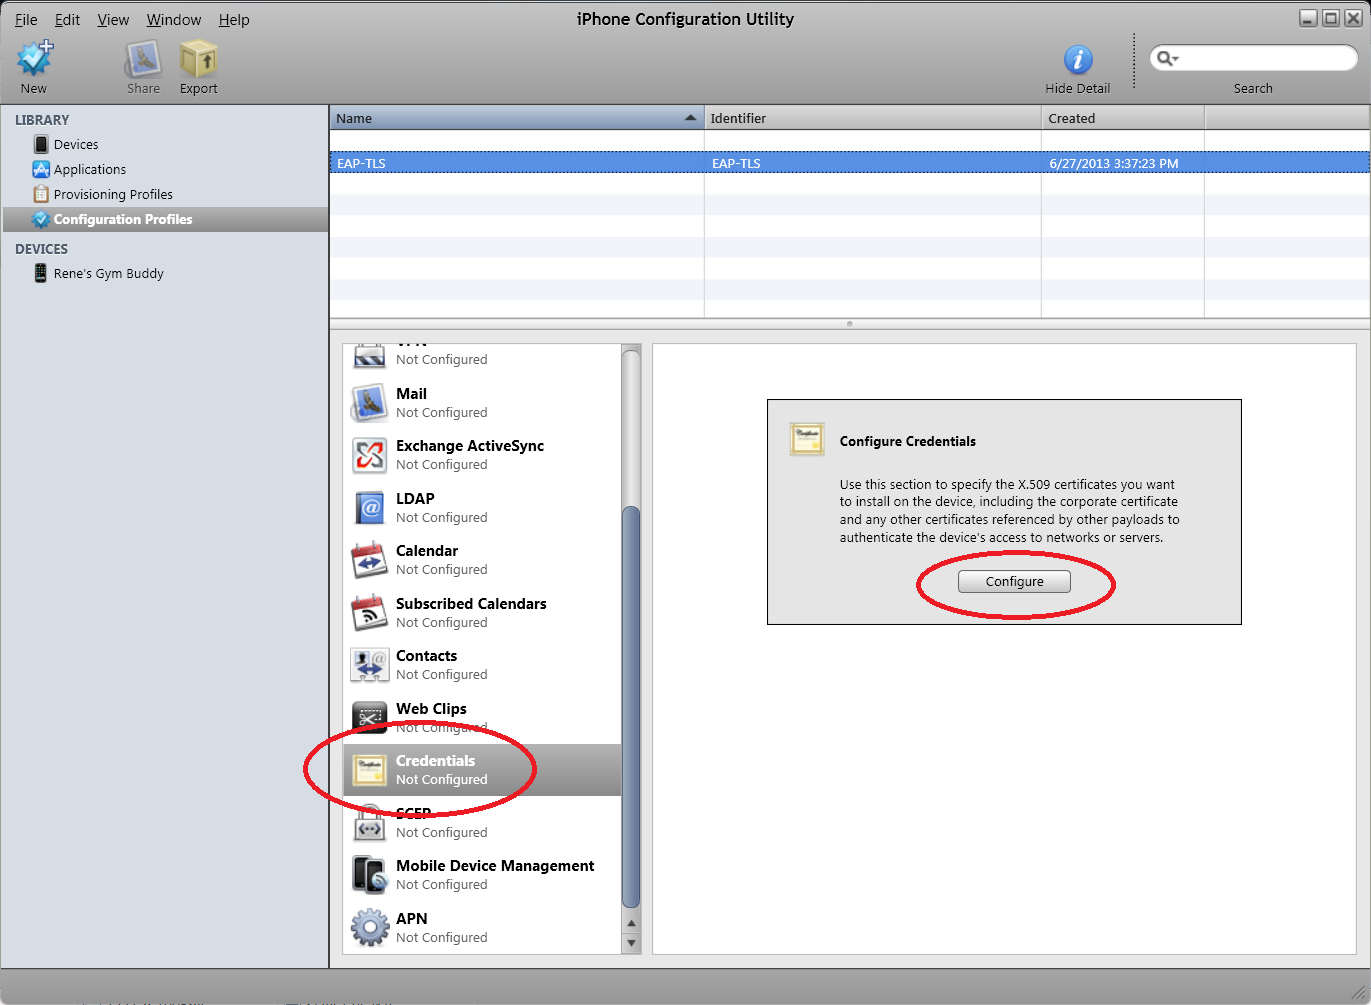
Start the utility and create a new profile, select General and enter the following details:
- Display name: EAP-TLS (pick any name you like).
- Identifier: EAP-TLS (pick any name you like).
- Organization: NetworkLessons (pick any name you like).
- Description: Give it a descriptive name like “enroll certificate for EAP-TLS and configure wireless”.

Select Credentials and click on Configure.
You will get a pop-up and you will have to select the root CA of our Certificate Server. If you don’t have the root CA on your computer then take a look at my PEAP / EAP-TLS lesson on Server 2008 to see how to export the root CA from your server.
Select your root CA (NETWORKLESSONS-AD-CA in my case) and click OK.
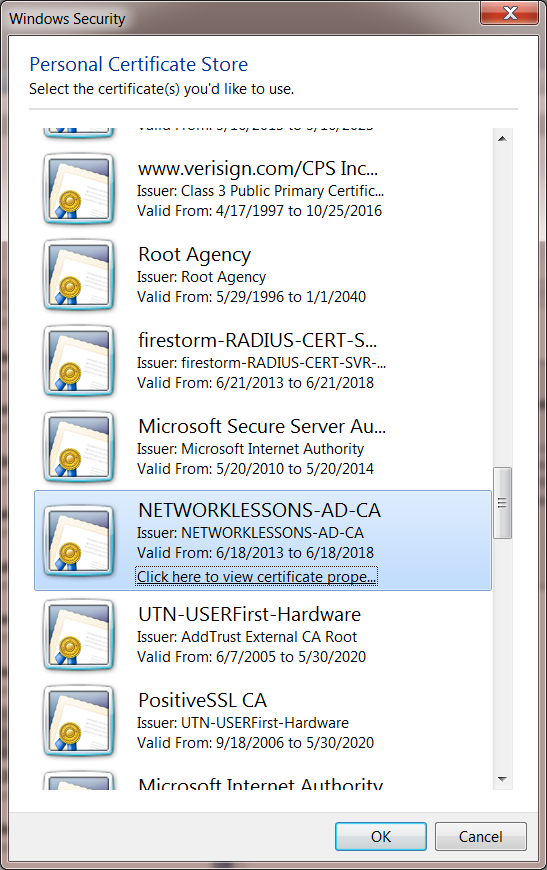
You will now see the root CA in the credentials overview.

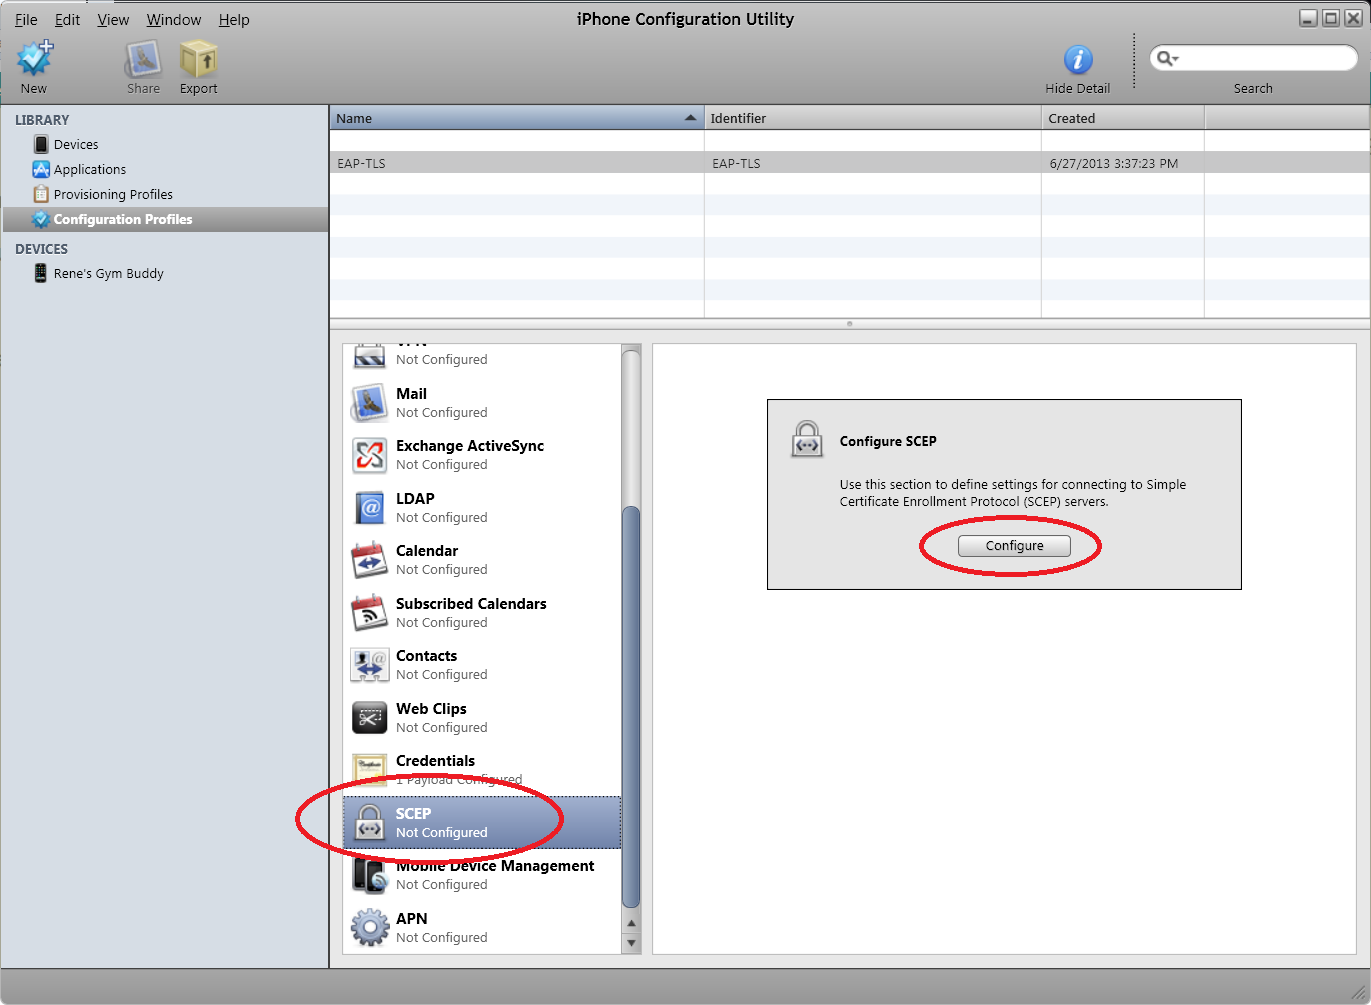
Select SCEP and click on Configure.
In the following screen you will have to enter the following details:
- URL: http://your-server-ip-address/certsrv/mscep/mscep.dll
- Name: The name of your certificate server, look at the root CA certificate to see the correct name!
- Subject: O=your-domain-name,CN=name-of-apple-device (Give the device a useful name, like “ReneIphone”).
- Challenge: This is where you paste the enrollment password that you received from NDES through the web browser.
- Key Size: this is the key size of the custom certificate template that we created. I have set it at 1024.
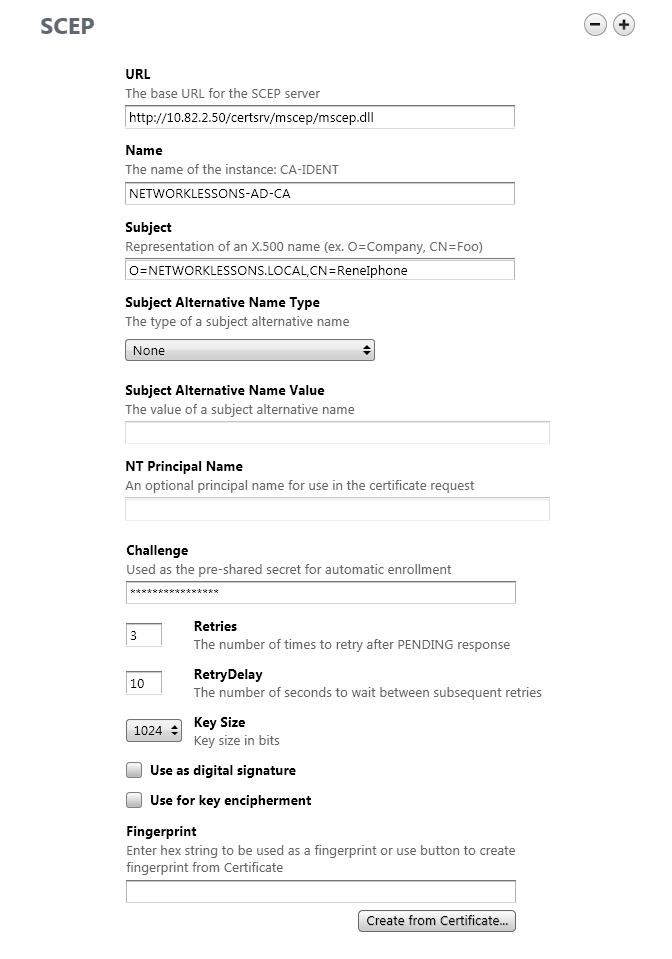
Scroll down to Fingerprint and select Create from Certificate. Select the Root CA certificate again and click on OK.
Now we can configure the wireless profile to use EAP-TLS to connect. Select Wi-FI and click on Configure.

Enter the following details:
- Service Set Identifier: this is the SSID that you want to connect that is configured for EAP-TLS authentication. Mine is called “EAP”.
- Security Type: WPA / WPA2 Enterprise.
- Accepted EAP Types: TLS
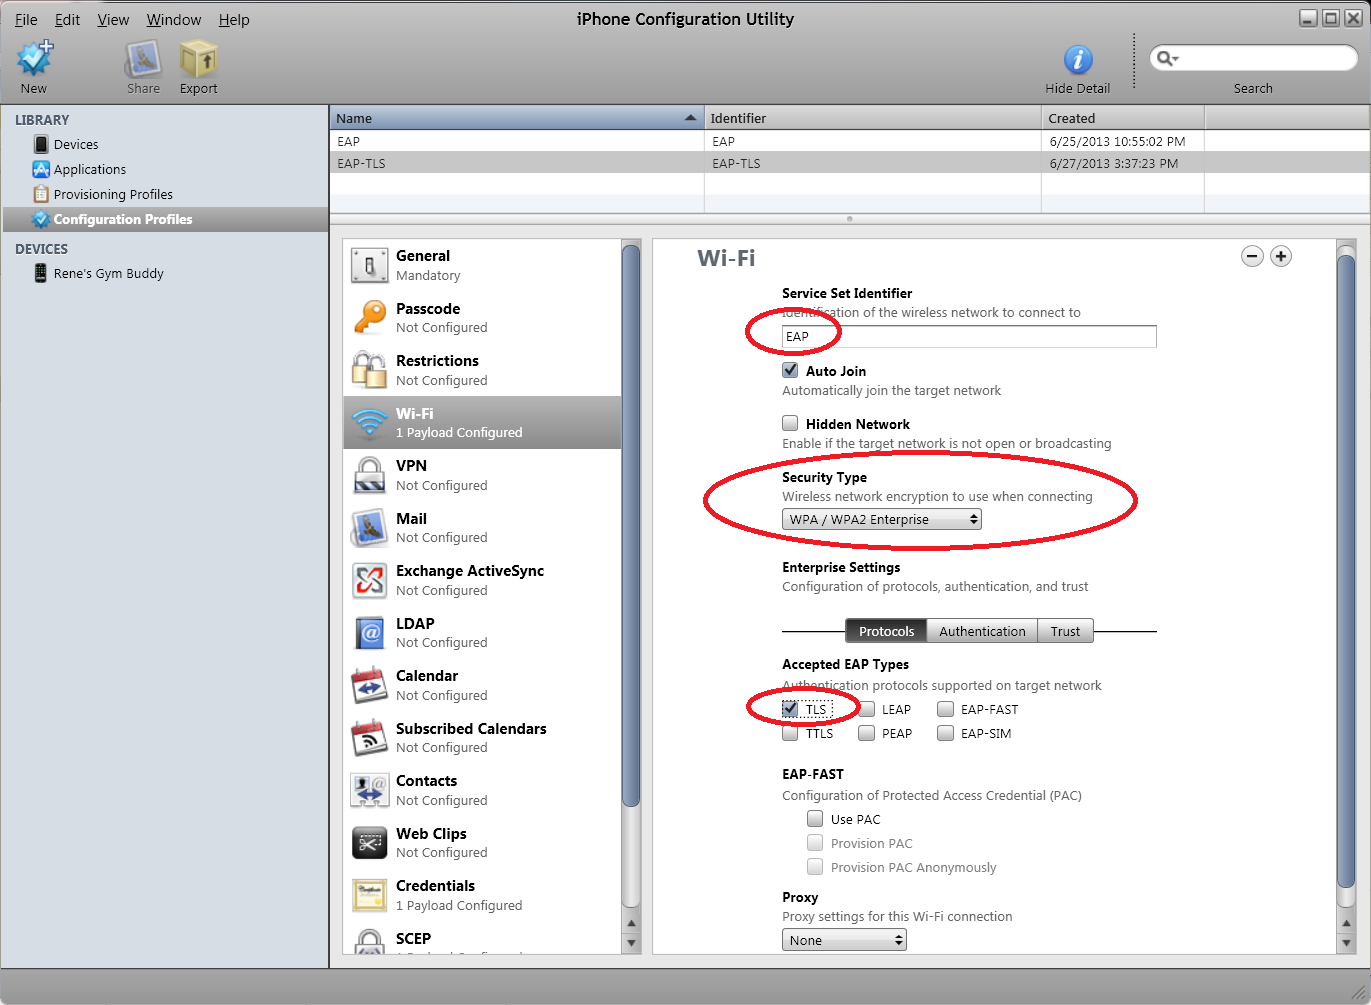
Click on the Authentication tab and select the credentials that we configured a few steps earlier.
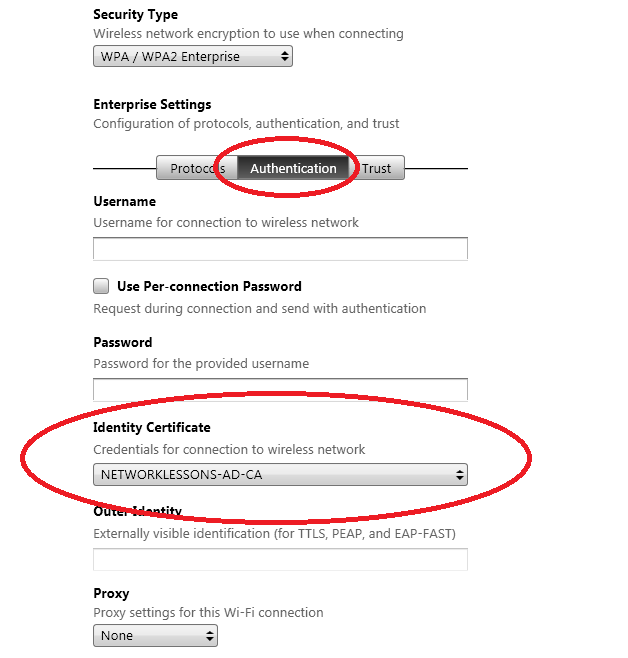
Click on the Trust tab and put a mark in the checkbox next to the certificate that we selected before.

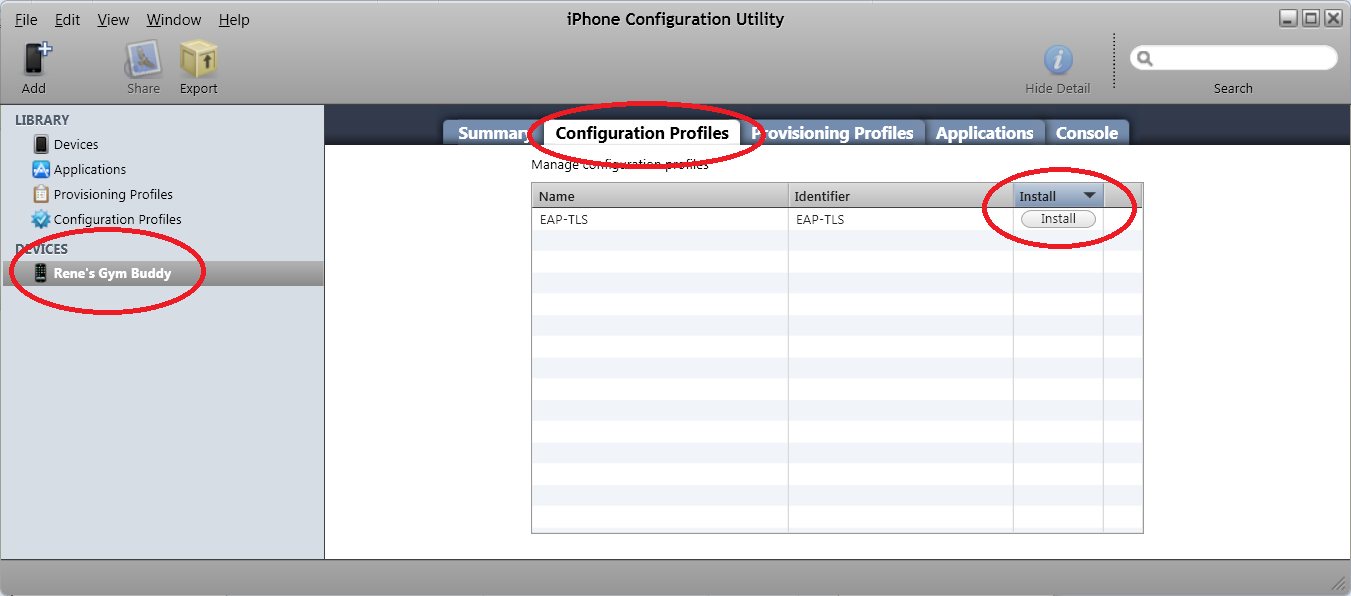
Everything is configured as it should be. It’s now finally time to enroll a certificate to our Apple iPhone or iPad. I have an old iPhone 3Gs called “Rene’s Gym Buddy” (I like to connect it to the technogym equipment at the gym and watch some movies there). Select your device > Configuration Profiles > Install.
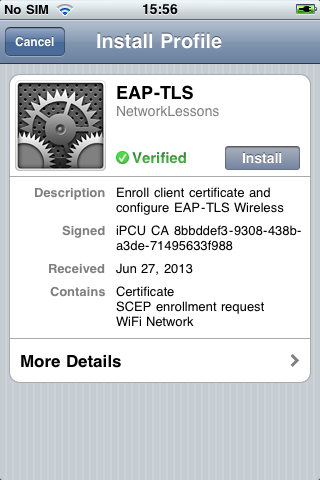
Now take a look at your iPhone or iPad and press Install.
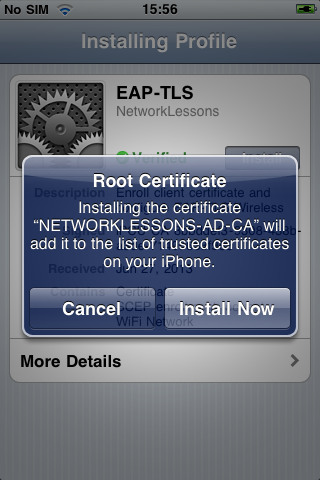
Your iPhone will ask if it is ok to install the root CA in the list of trusted certificates. Press Install Now to continue.
It might take some time to generate the keys, but eventually, the profile will be installed. Press on More Details if you want to take a look at the different certificates.
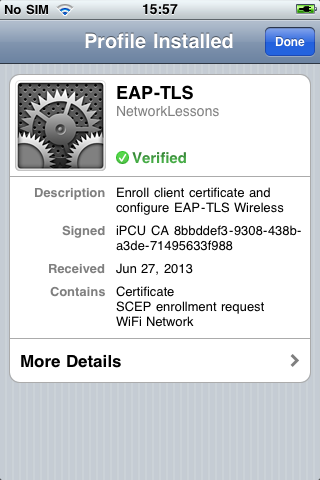
Our iPhone or iPad now has the root certificate in its trusted list and a client certificate that we can use to connect to our EAP-TLS wireless network. We are almost done but there’s still something we have to do in the certificate authority…
Map Client Certificate to User Account
We just enrolled a client certificate to our iPhone, but we still have to map this client certificate to a user account in Active Directory. I will create a new user called “ReneIphone” and map the client certificate to it so that whenever NPS (Network Policy Server) tries to authenticate the client certificate, it will use this username.
In order to do this, we first have to export the client certificate to a file…
Go to Start > All Programs > Administrative Tools > Certificate Authority.
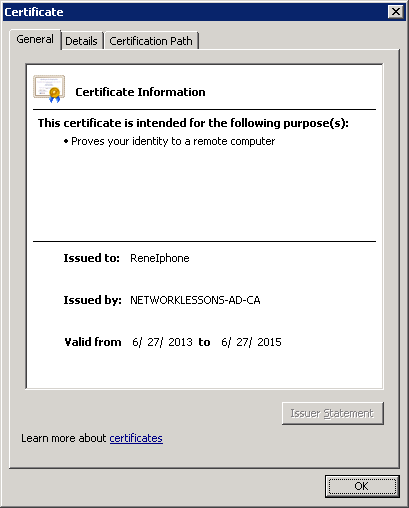
Select Issued Certificates and look for the client certificate. Double-click on the client certificate to open it.
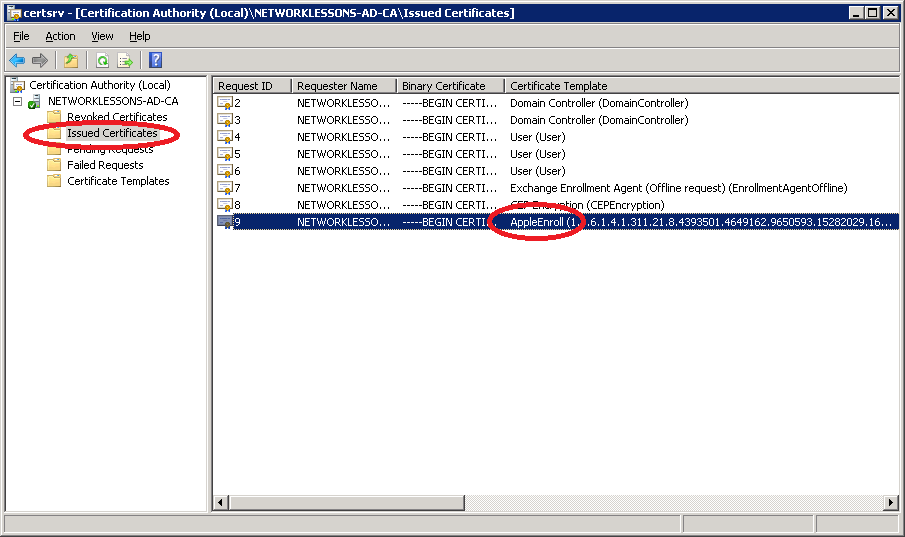
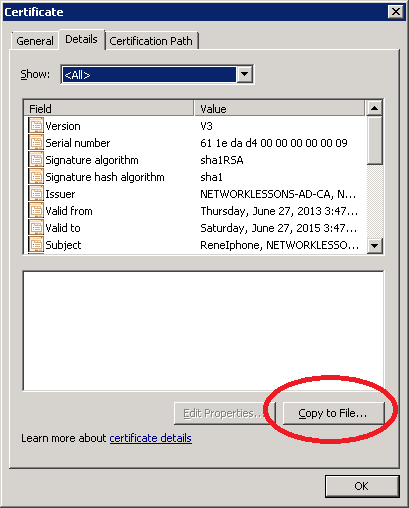
You can see that the client certificate has been issued to ReneIphone. Click on Details.
Click on Copy to File.
Click Next in the Wizard to continue.
Select DER file format and click Next. 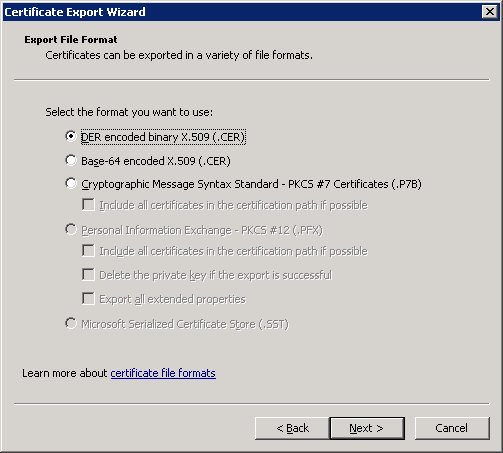
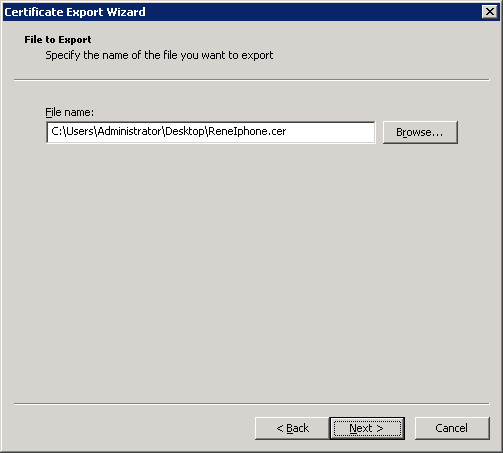
Select a File name and click Next to continue.
Click Finish to continue.

With the certificate stored in a file, it’s time to create the user account in Active Directory and map the certificate to it.
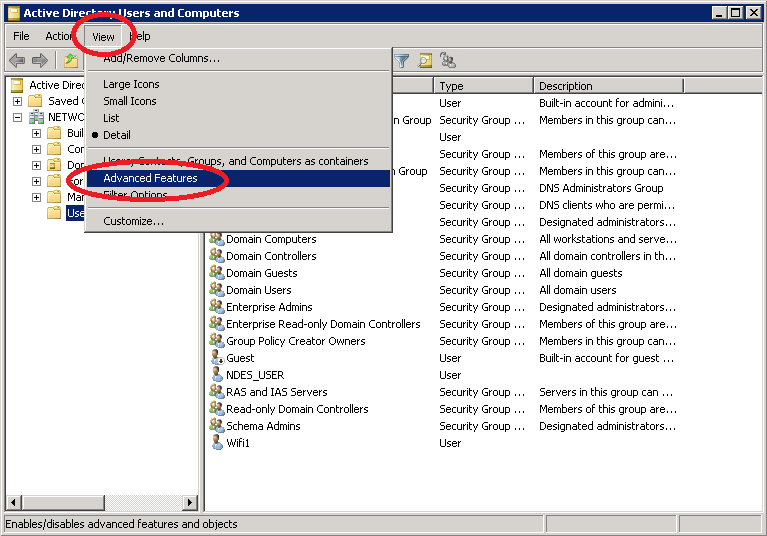
Go to Start > All Programs > Administrative Tools > Active Directory Users and Computers.
Click on View > Advanced Features.
We will add the new user account. Right-click on the white space and select New User.
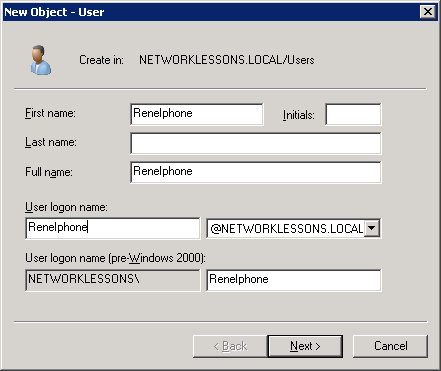
Configure a password and click on Next.

Click Finish to continue. 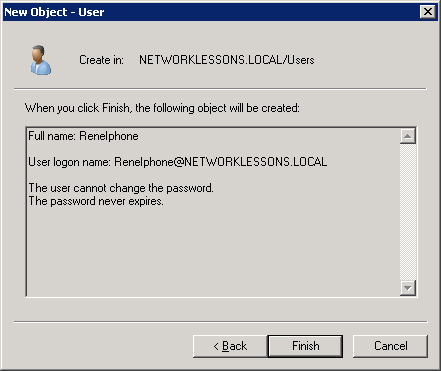
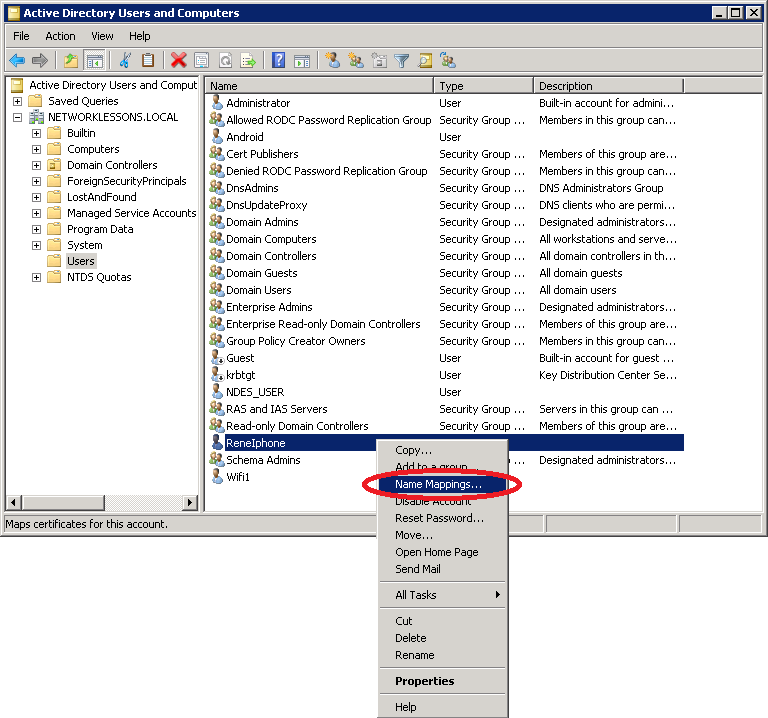
Once you get back to Active Directory, do a right mouse click on the username and select Name Mappings.
Click on Add.
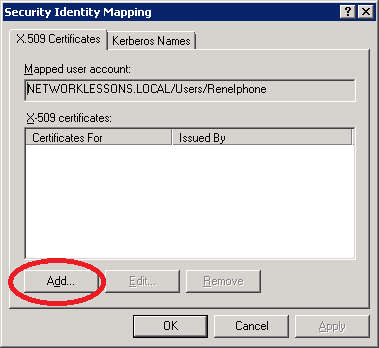
Select the filename you just exported using the certificate export wizard and import it. Click OK to continue.
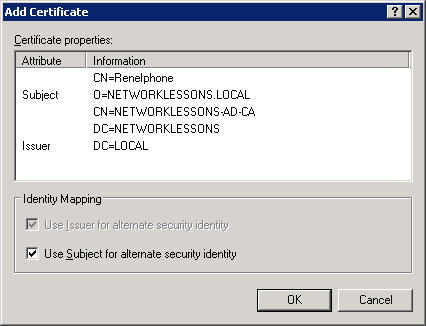
Your Security Identity Mapping will look like this. Click OK to continue.
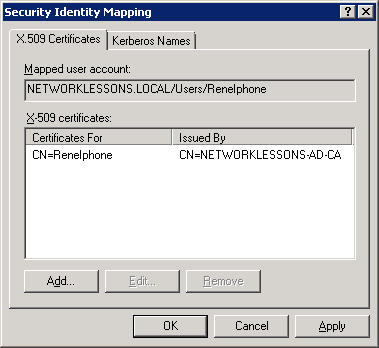
We are now done. Our client certificate has been mapped to the user account. We are ready to connect to the wireless network.
I’m getting stuck where the certificate gets installed on the iPhone. When I install the profile, I get “The SCEP server returned an invalid response”. There’s a couple of posts on Apple, etc to increase the query string for IIS, which I’ve done, but it didn’t help.
Solved. For those of you having the same issue. Step 1) Install Microsoft KB 2483564. Step 2) In the SCEP section of the iPhone configuration utility, in the “Subject” section, there’s a limitation of characters, for me, anything over 24 characters in that string failed.
Hi Chris,
Good thing you figured it out. Btw instead of using scep I think getting a certificate through the browser on a computer might be a better idea. It saves you the trouble of mapping a certificate at active directory.
Hi Rene, First I want to say I love what you do!! These tutorials are great and I used your CCNP SWITCH book to help pass that test.
I used your tutorial on how to setup a EAP_TLS WLAN using RADIUS backend and AD. It also has a cisco WLC. I am trying to get my iphones to work, and I have followed this tutorial, I can get it to work except for joining the network. Do you have any tips? I can see on the WLC that the user is not authenticating, but really unsure of what I am missing. Does the iphone pass domain info? Would it look at AD? Any info would be great.
Hi Cory,
I’m glad to hear you like my material!
First of all…the iphone and EAP-TLS is a pain, it took quite some time to get it working and to fully understand how it works. When you use SCEP like I did in this tutorial it will generate a “machine” certificate for your iphone but when the iphone authenticates itself it will ALWAYS present its certificate as a “user certificate”. As a result it will fail unless you manually map the certificate to the user account in the AD like I did in the “Map Client Certificate to User Account” section. Another issue is that
... Continue reading in our forum