Lesson Contents
In this lesson, I will show you how to configure an Etherchannel between your Cisco Catalyst Switch and a Synology NAS device. I’m using a Cisco 3560X switch and a Synology DS812+ rackstation with two gigabit interfaces. The Synology NAS and the Cisco switch support LACP (Link Aggregation Control Protocol).
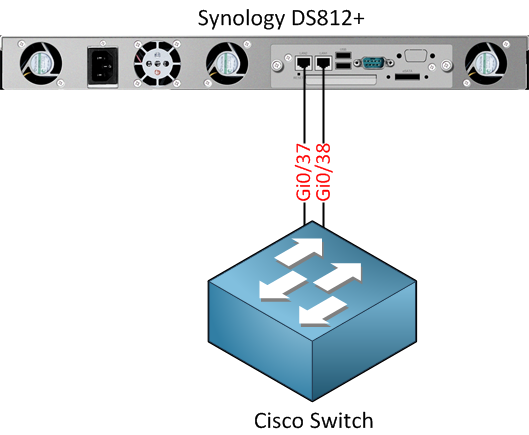
Here’s what it looks like:
Configure LACP on Synology NAS
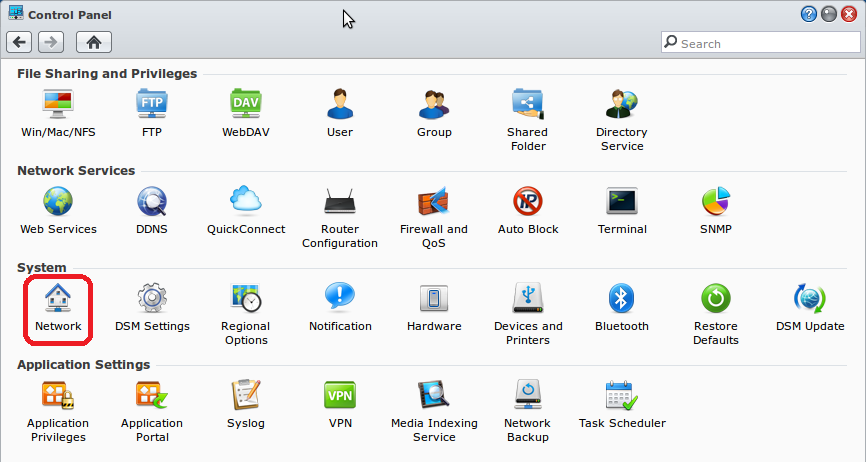
My Synology is connected to Gigabit 0/37 and 0/38 on the Cisco switch. First, we’ll configure the Synology NAS. Log into your NAS and open the control panel, select Network.
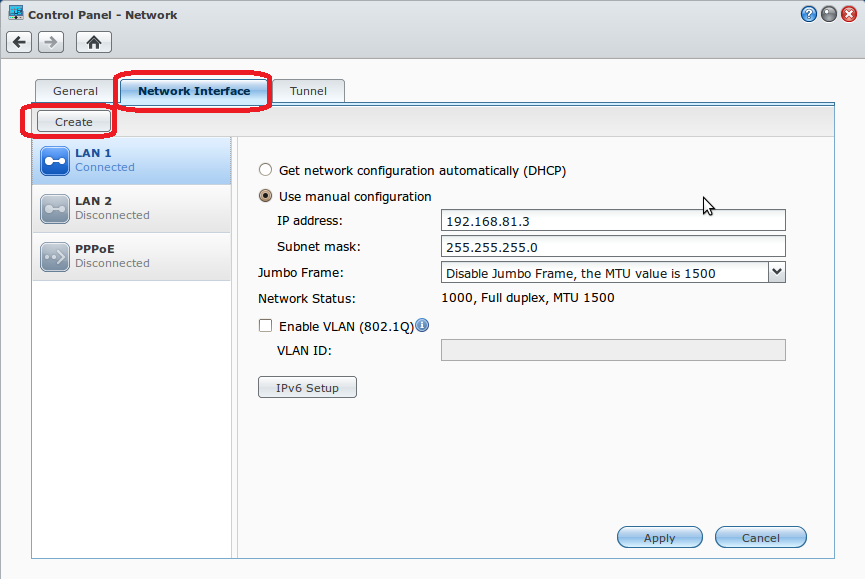
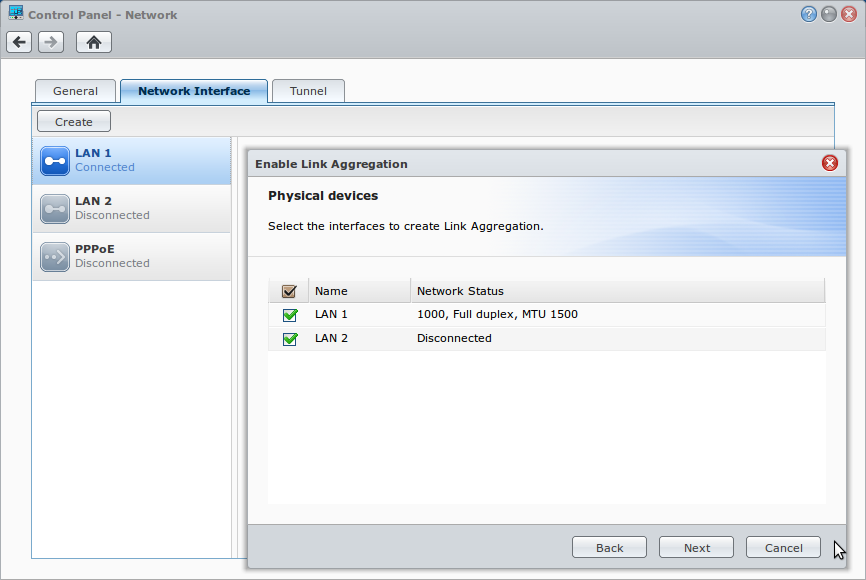
Select the Network Interface tab and click on Create.
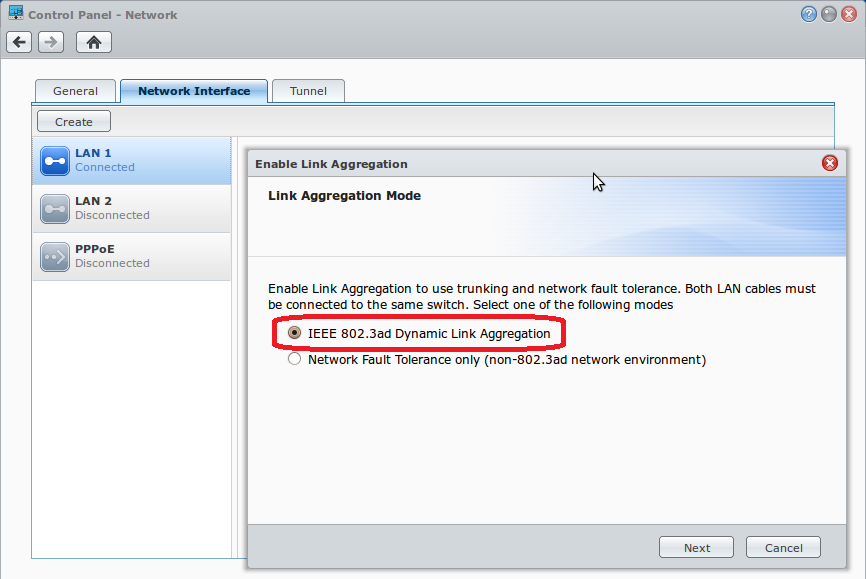
Select IEEE 802.3ad Dynamic Link Aggregation and click Next.
Select the interfaces that you want to use for the Etherchannel. I only have two Gigabit interfaces, so I’ll select both. Click Next to continue.
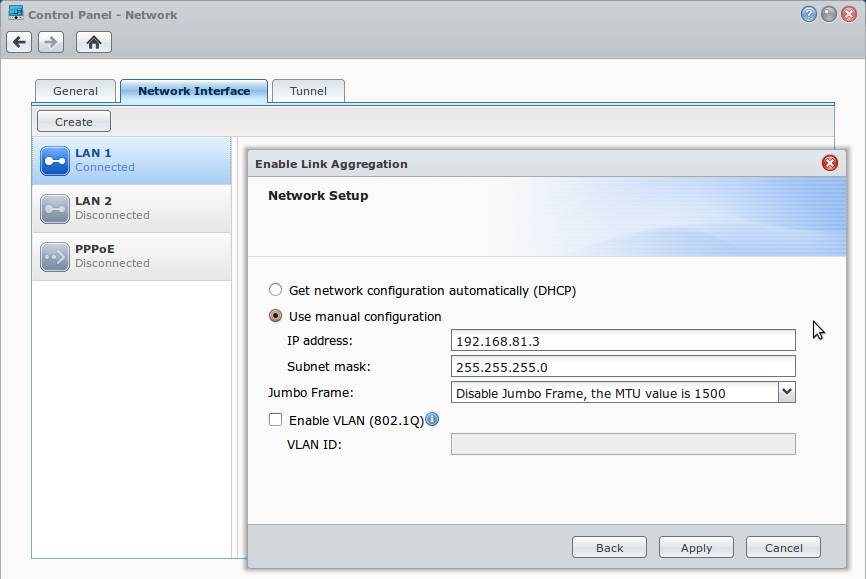
The last step is to configure your IP address. I don’t have to make any changes, so just click Apply to continue.
Your Synology NAS is now ready for LACP. We still have to configure the Cisco switch, however…
Configure LACP on Cisco Switch
Let’s configure the Gi0/37 and Gi0/38 interface as an Etherchannel using the LACP protocol:
CISCO(config)#interface range Gi0/37 - 38
CISCO(config-if-range)#description SYNOLOGY
CISCO(config-if-range)#switchport mode access
CISCO(config-if-range)#switchport nonegotiate
CISCO(config-if-range)#spanning-tree portfast
CISCO(config-if-range)#channel-group 3 mode active

CISCO(config)#interface port-channel 3
CISCO(config-if)#description SYNOLOGY
CISCO(config-if)#switchport mode access
CISCO(config-if)#switchport nonegotiate
I will assign a description to both interfaces so I know what device is connected to these interfaces. The switchport mode is access, and “nonegotiate” disables the negotiation for trunk/access mode. Portfast is enabled, so we don’t have to wait for spanning tree to unblock the port, and I’m adding this interface to channel-group 3.
Once you assign the interfaces to the port-channel, you will see that the switch creates a new port-channel interface. I will also configure this interface for access mode and disable the negotiation for access/trunk switchport mode. After configuring the interfaces you will see the following on your console:
%LINK-3-UPDOWN: Interface Port-channel3, changed state to up
%LINEPROTO-5-UPDOWN: Line protocol on Interface Port-channel3, changed state to up
This means our port-channel is operational. To verify that both interfaces are working, you can use the following command:
Rene, this looks like outstanding work. Thanks for your efforts. I am going to be doing this exact same configurations, but with 4 ports as soon as I can arrange a maintenance window for the synology.
Hi Bill,
You are welcome, glad you like it. Hopefully you got it working!
Rene
Hi Rene,
Do you know of any Cisco switch that supports IOS with 12 ports or less that I can get for this?
Thanks!
Hi Rene
I have the RS812+ and a SG200-26. Would it be possible that you post some screenshots of the SG200 settings using the web interface instead of the CISCO protocol? thank you
Felix
Hi Franklin,
The 2960 and 3560 switches both have 8 port versions, those are nice for small labs.
Rene