Lesson Contents
Most IoT tutorials use something like a Raspberry Pi as the “thing”. The Raspberry Pi is a great device but when it comes to IoT, it feels too much like a computer to me. It has GPIO pins so you can connect different hardware but it runs a full Linux distribution (Raspbian, based on Debian).
I wanted to try a “real” IoT device and decided on an ESP32 from Espressif. The ESP32 is a small device, which has a Wi-Fi & Bluetooth Chip, and plenty of GPIO pins. It supports a range of firmwares including Mongoose OS, Zerynth, ESP Easy, FreeRTOS, and MicroPython.
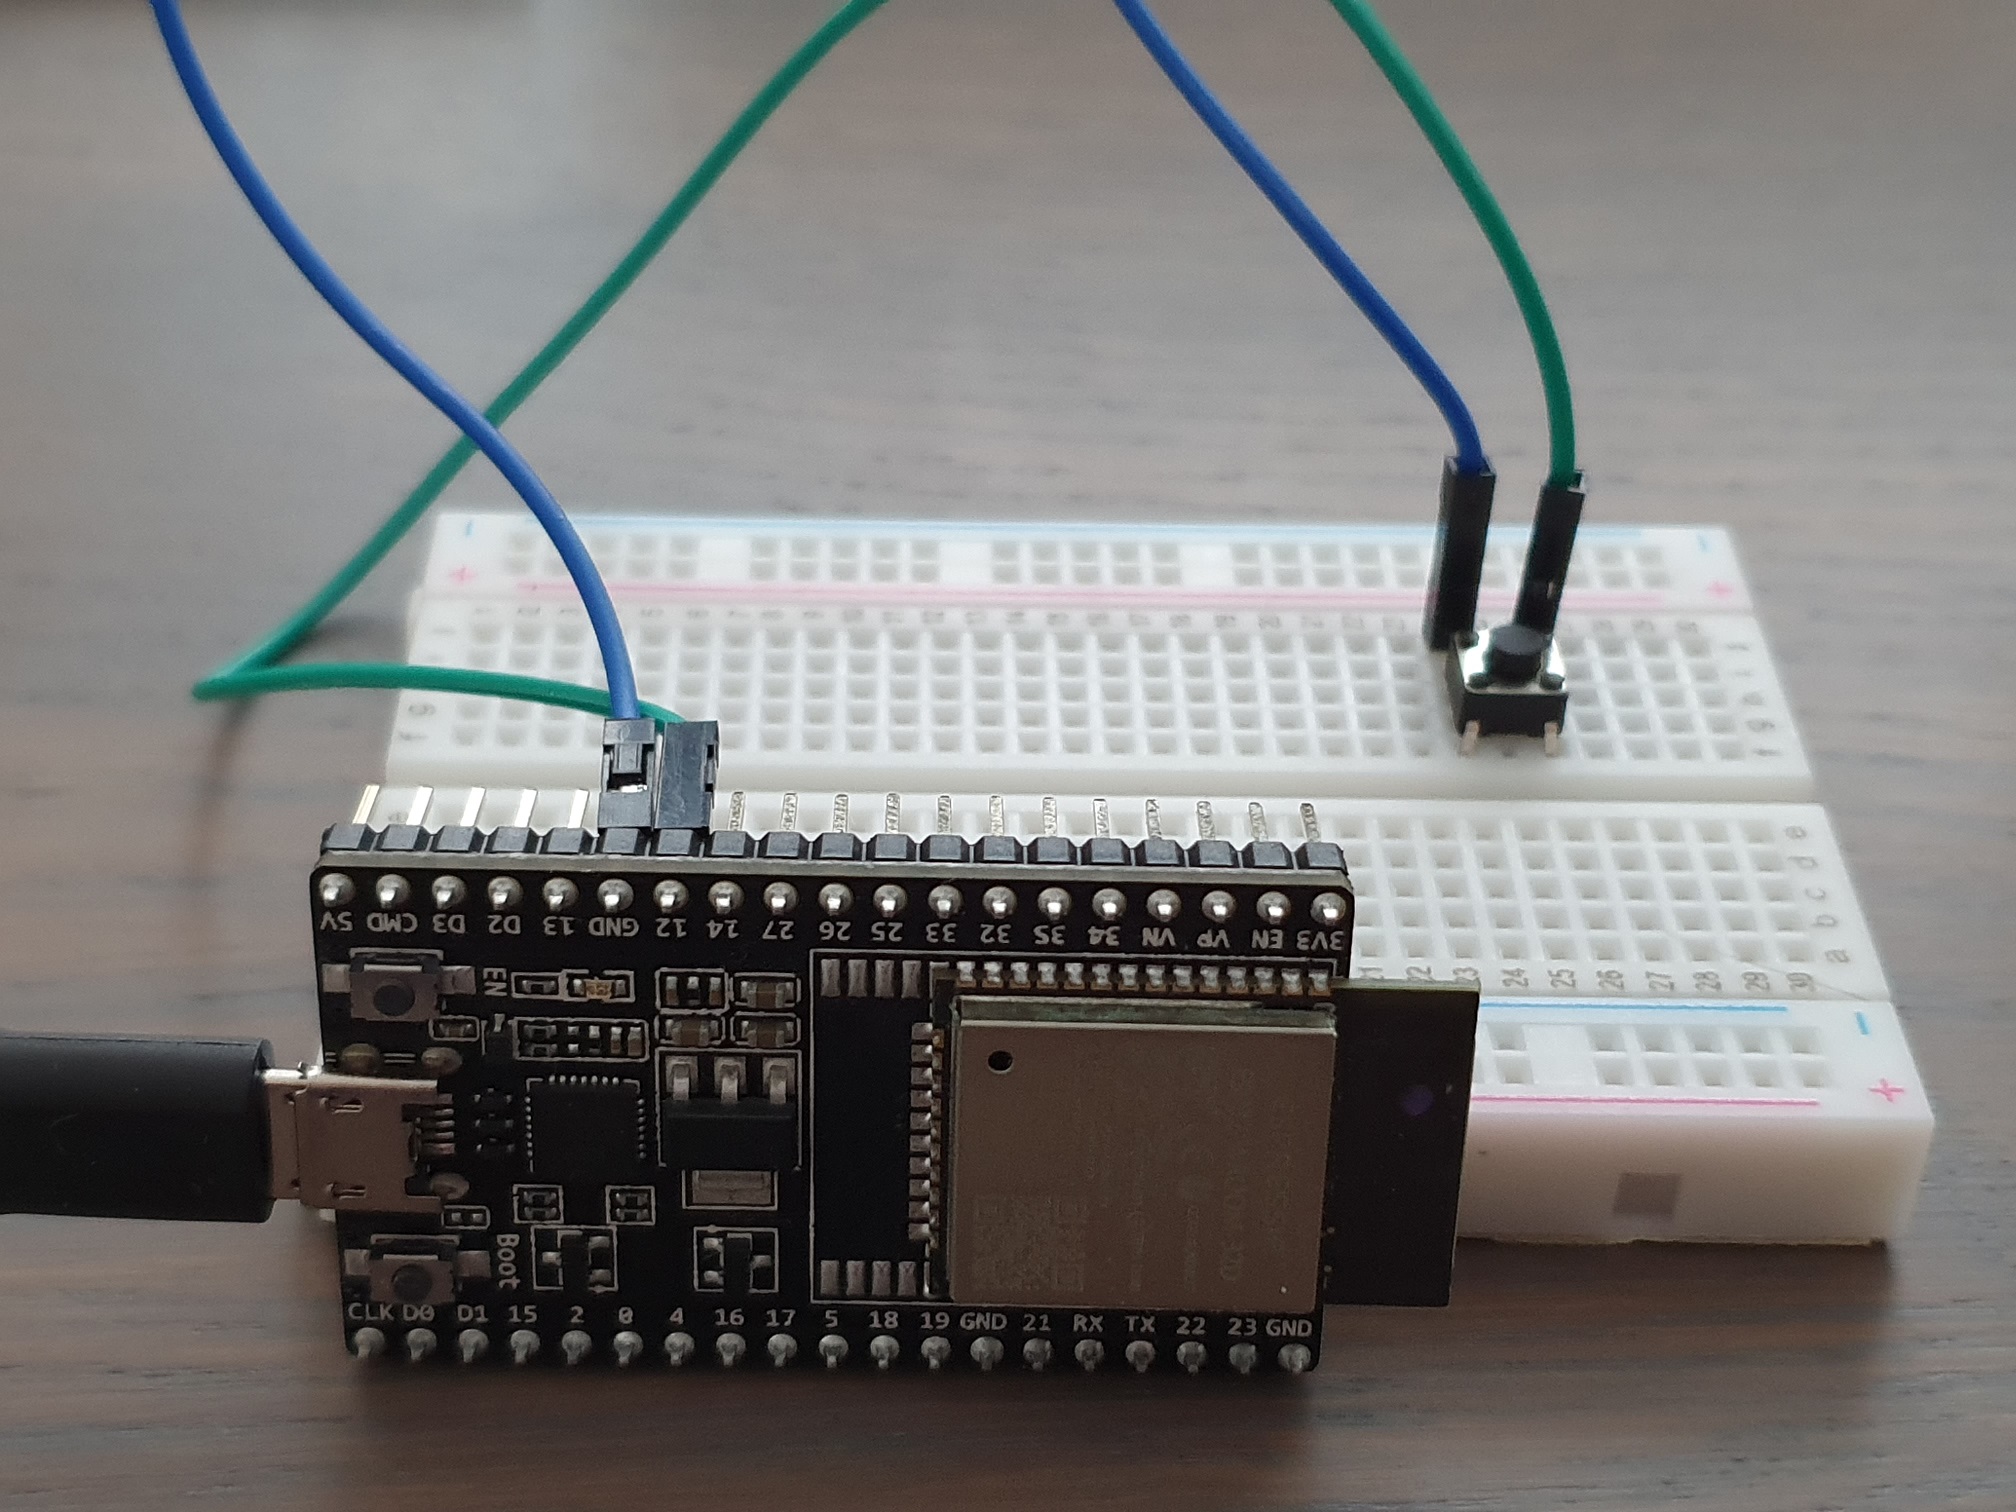
To make it a true IoT device, I added a hardware button. We are going to connect this ESP32 to AWS IoT and configure the ESP32 so it sends a message to AWS IoT when we press the button.
This lesson is lengthy, especially with all the AWS IoT screenshots. If you get lost, you can use the index below:
AWS IoT
Let’s start with AWS. There are three components we need:
- Thing
- Certificate
- Policy
The thing is our ESP32 and it requires a certificate for authentication. The policy defines what our thing can do.
Things
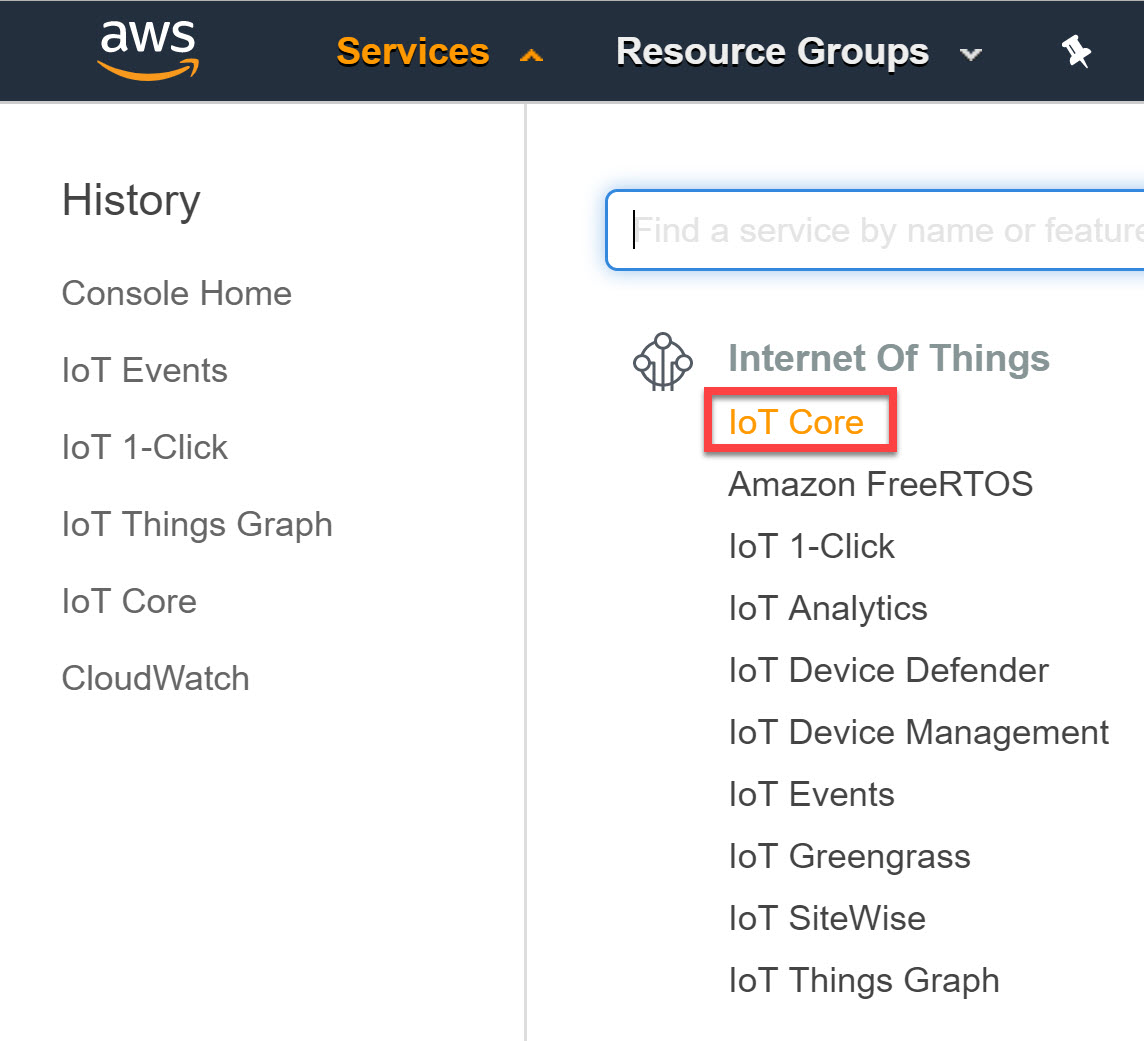
Let’s start with the “thing” part. Head over to AWS IoT Core in the services overview:
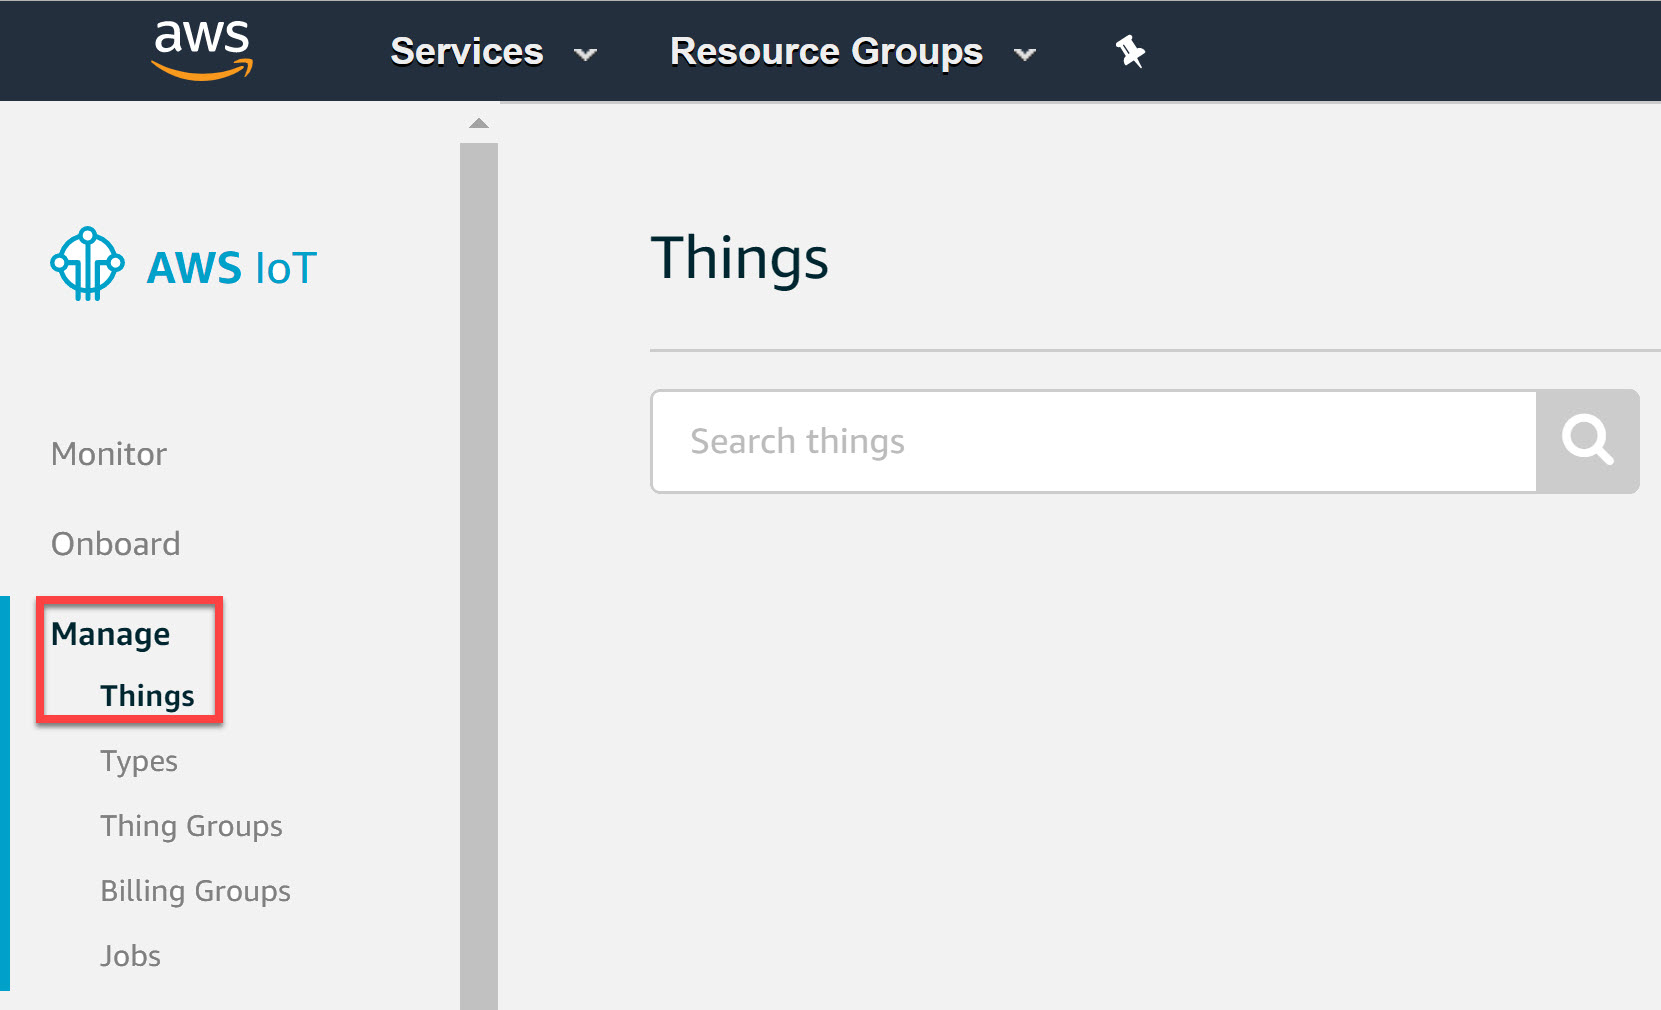
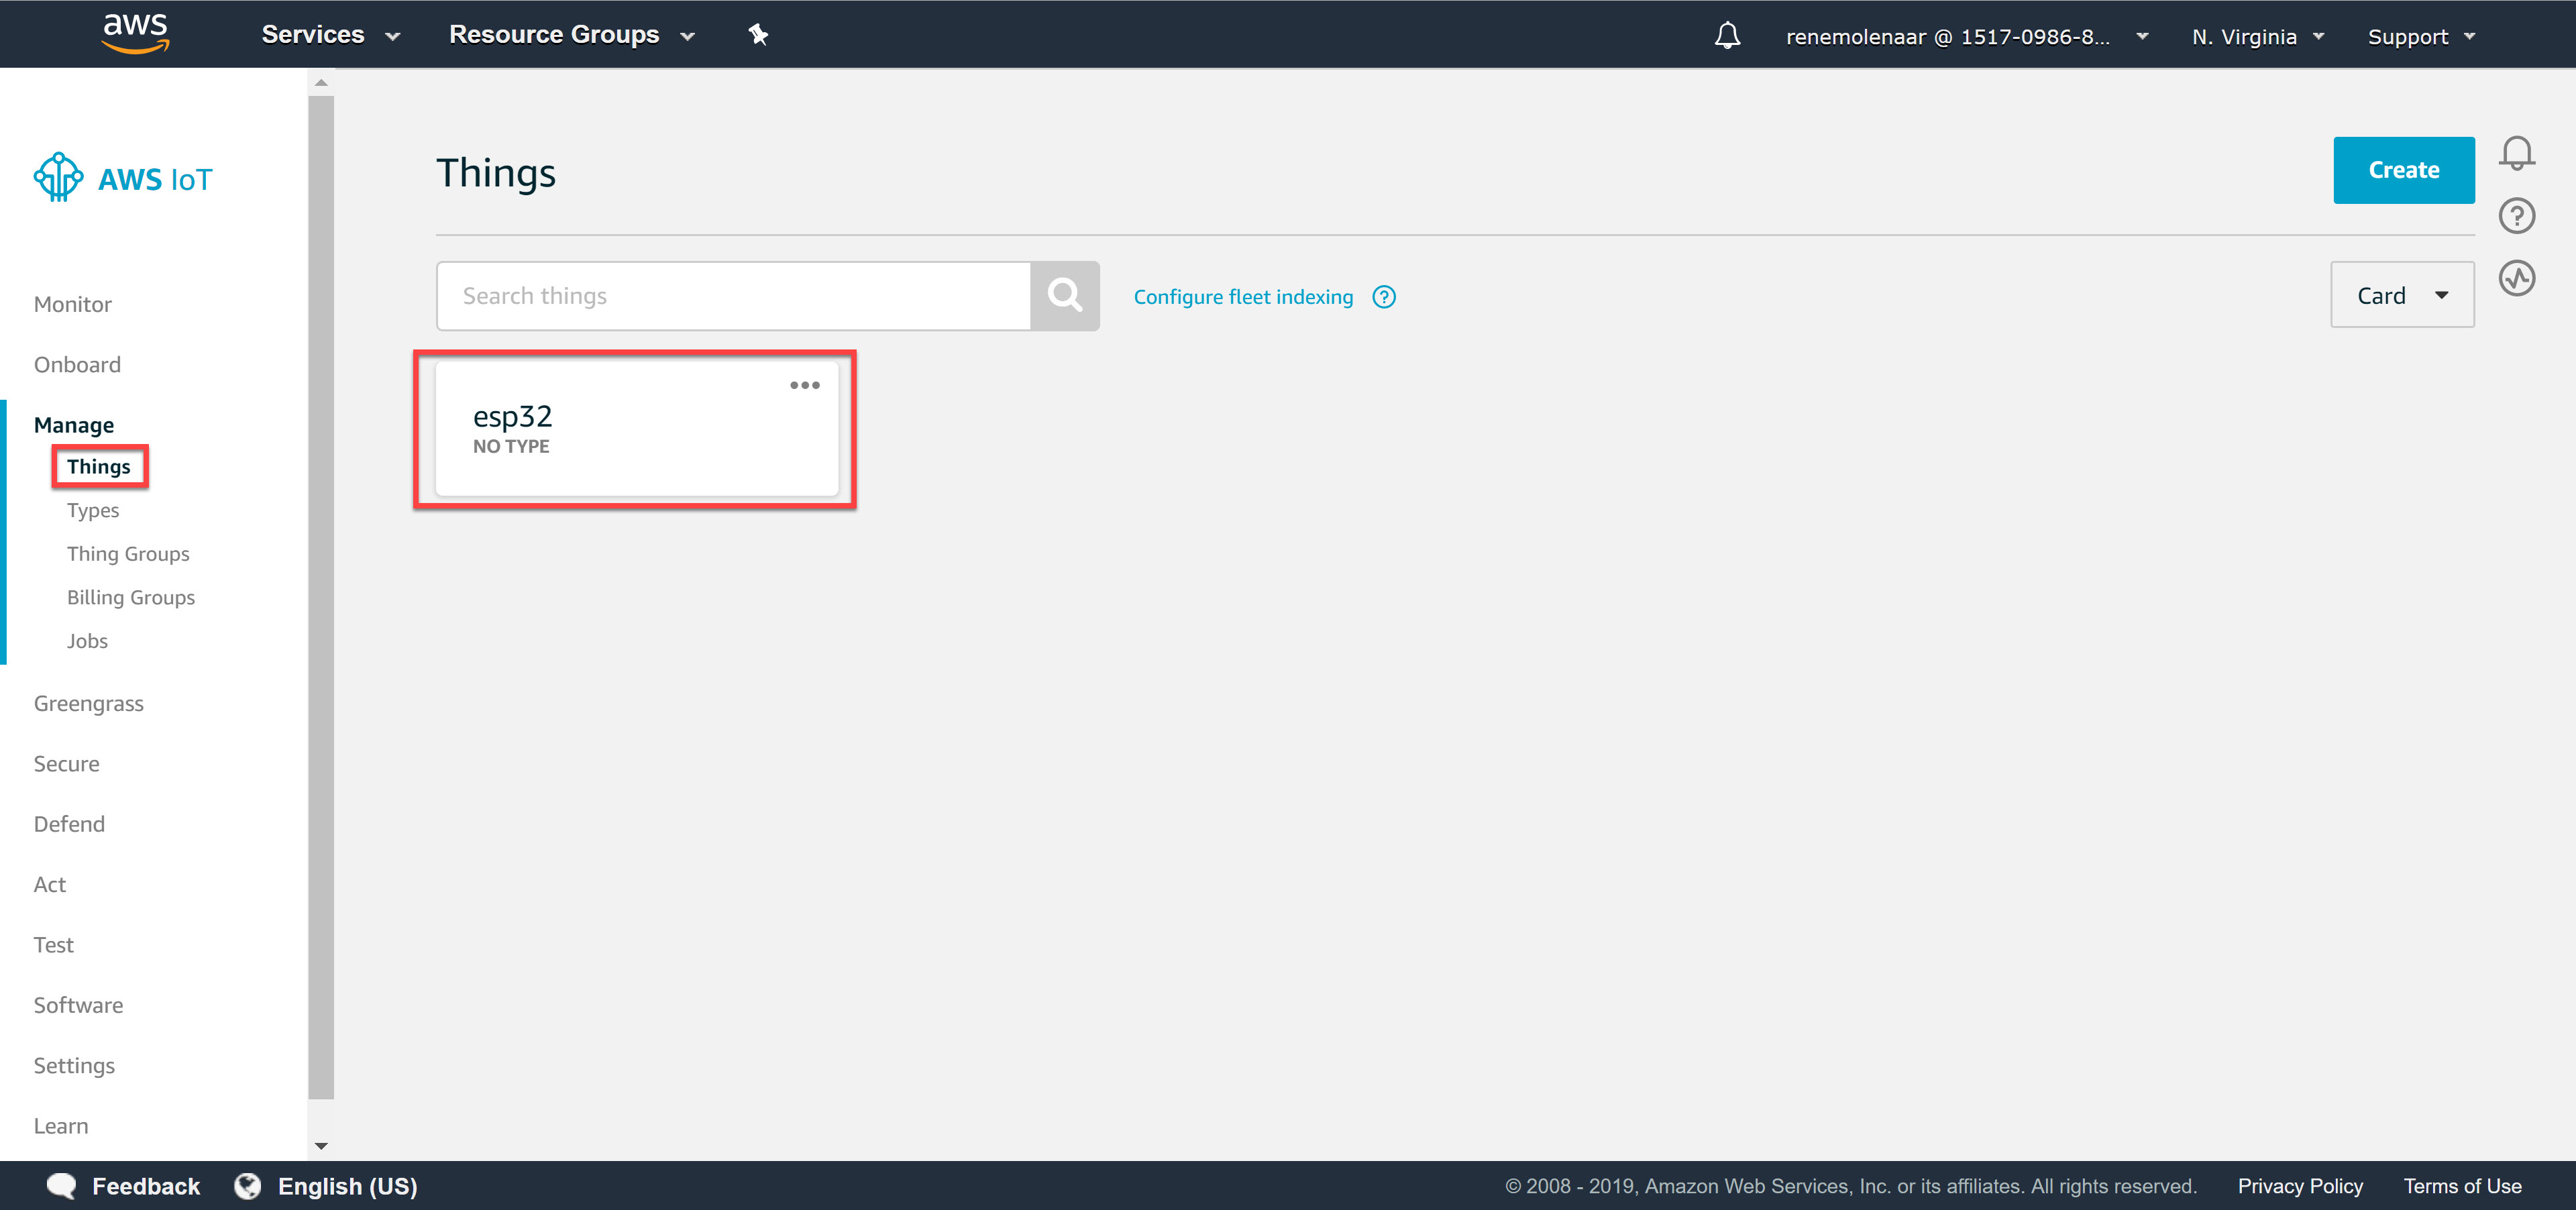
Under Manage, choose Things:
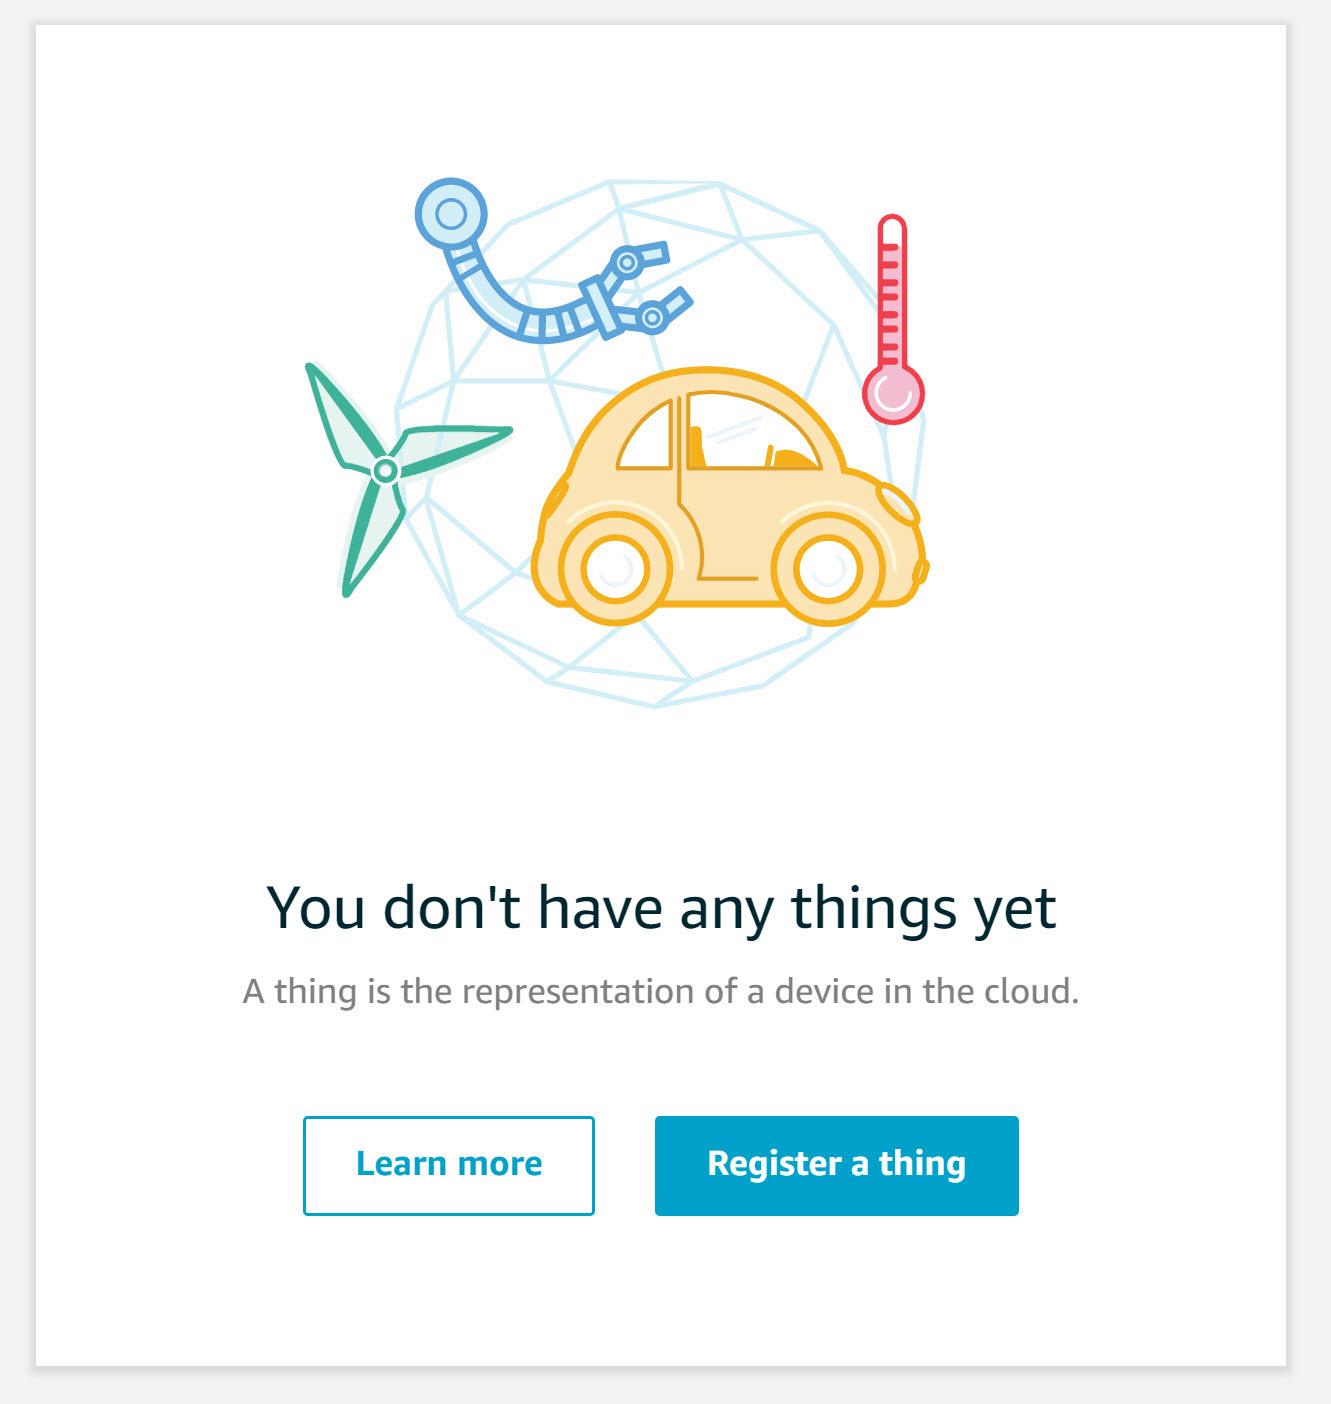
You’ll see the following screen because you don’t have any things yet:
Select register a thing and choose create a single thing:
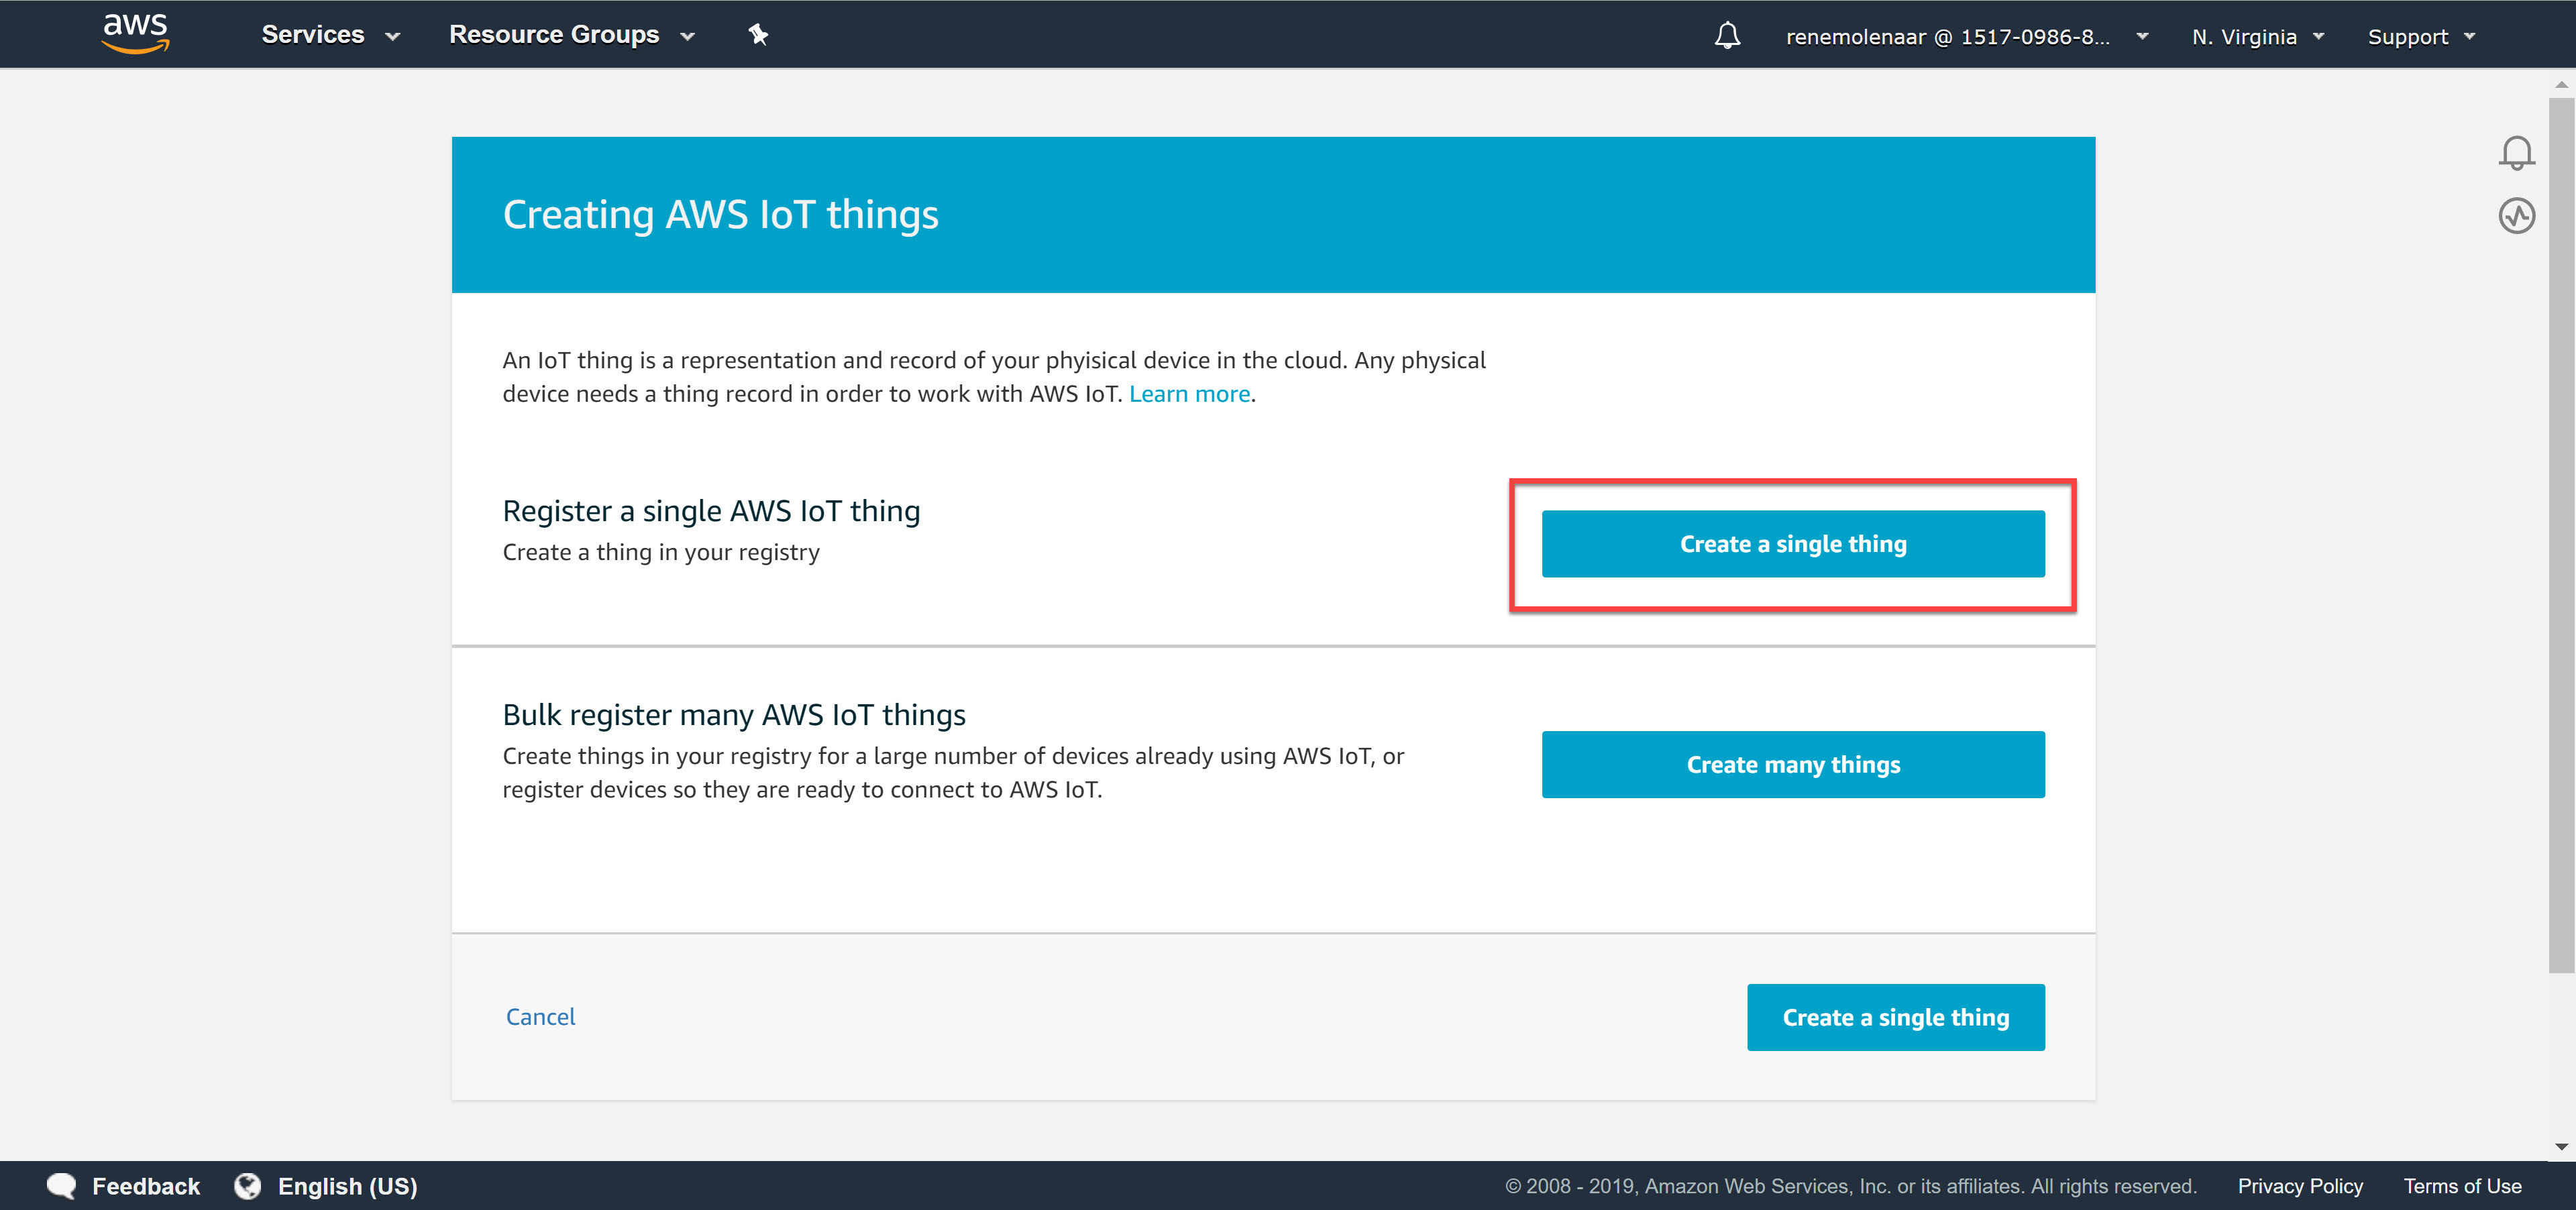
We’ll give our thing a name. I’ll call it “esp32”:
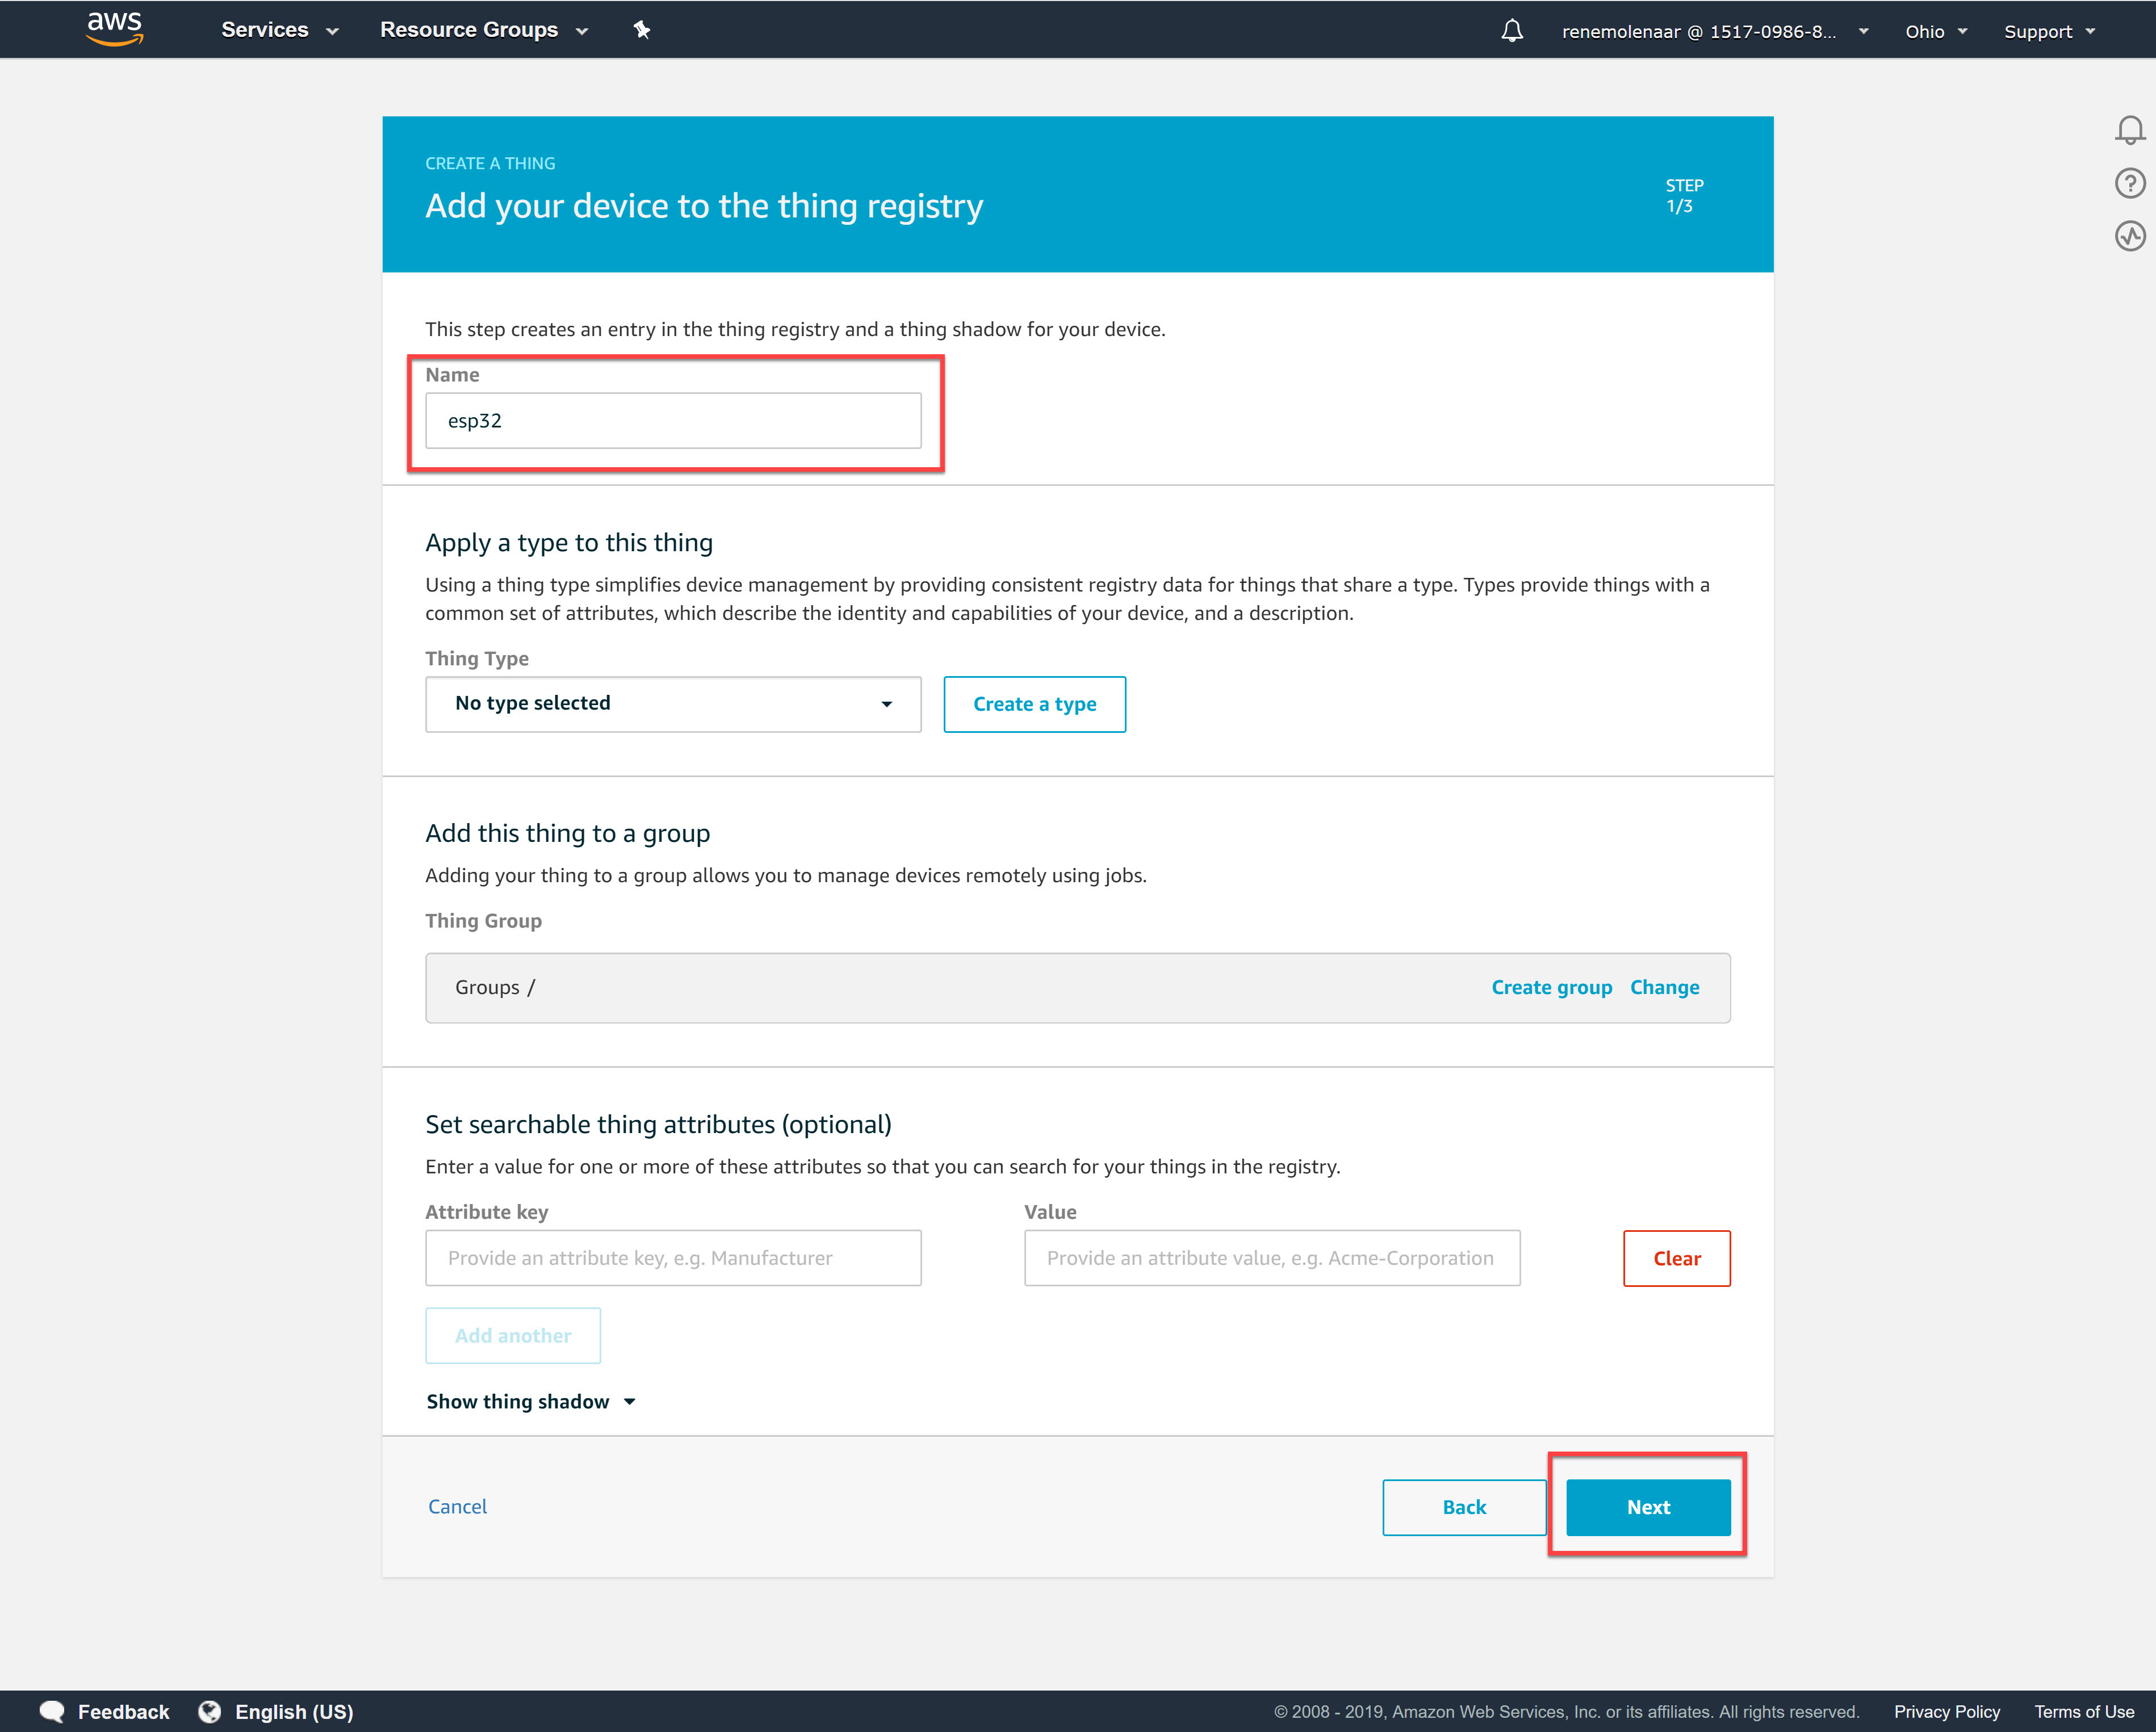
You don’t have to select any of the options. Click Next and it will ask you to create a certificate.
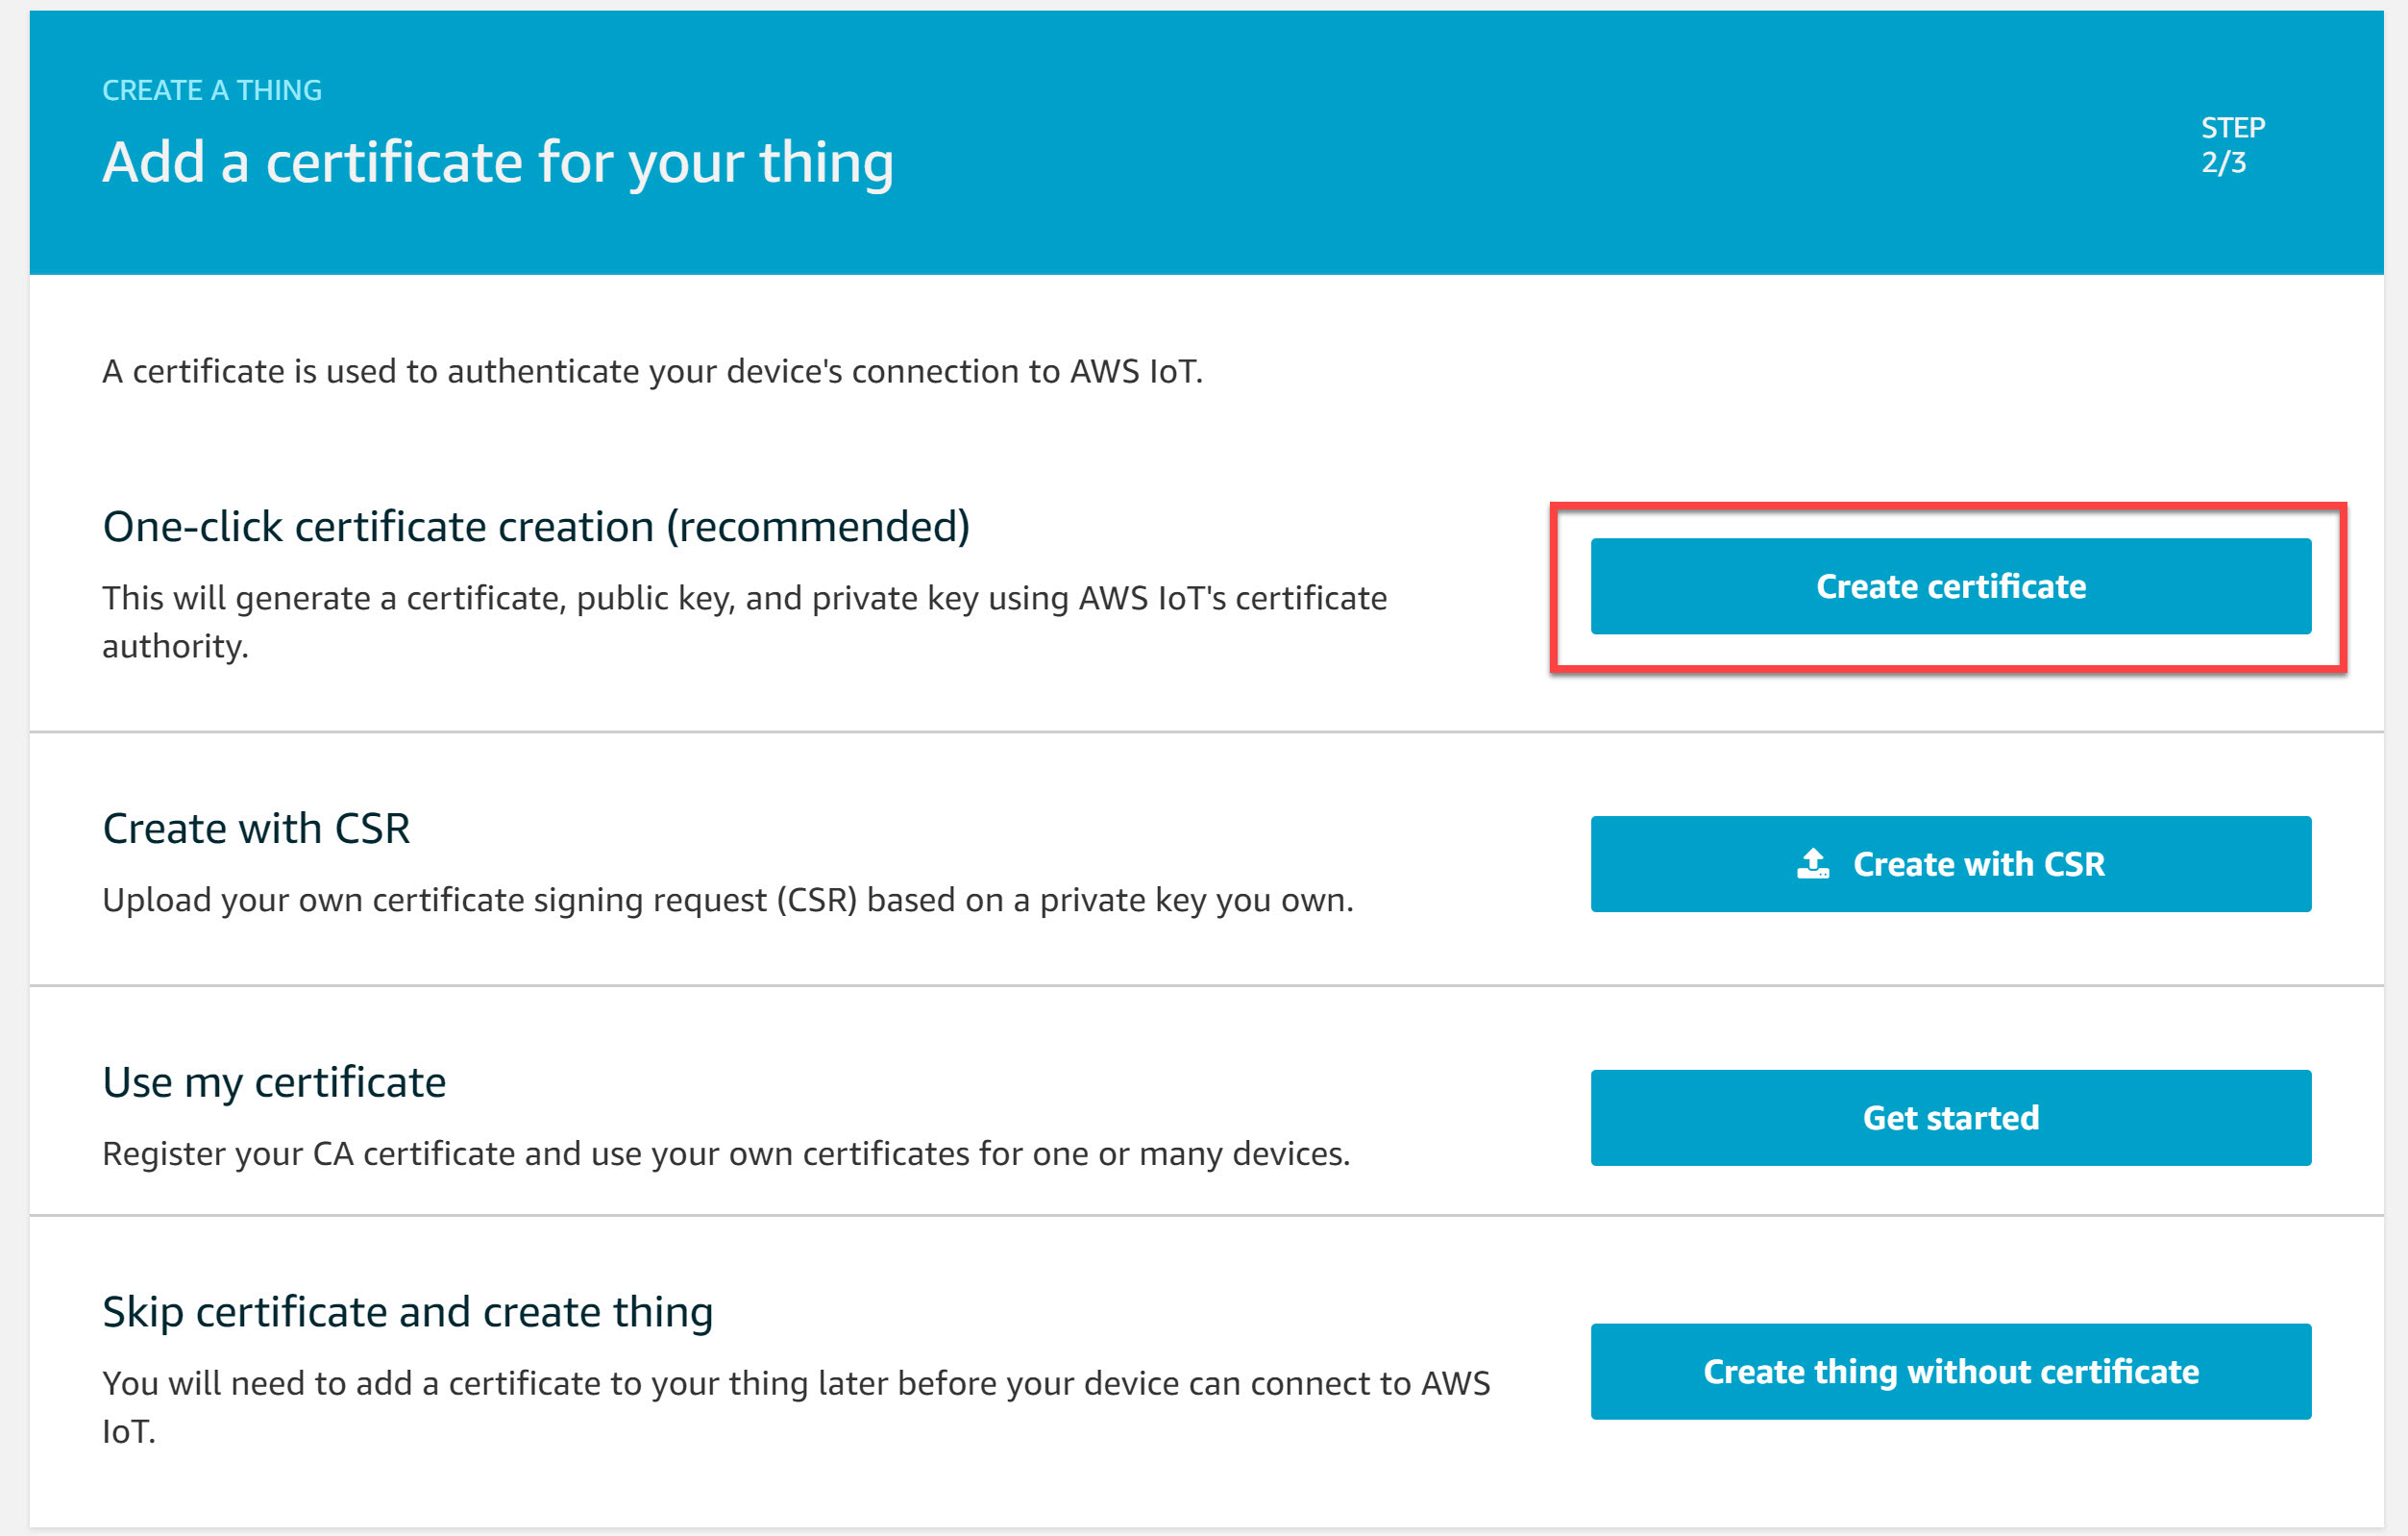
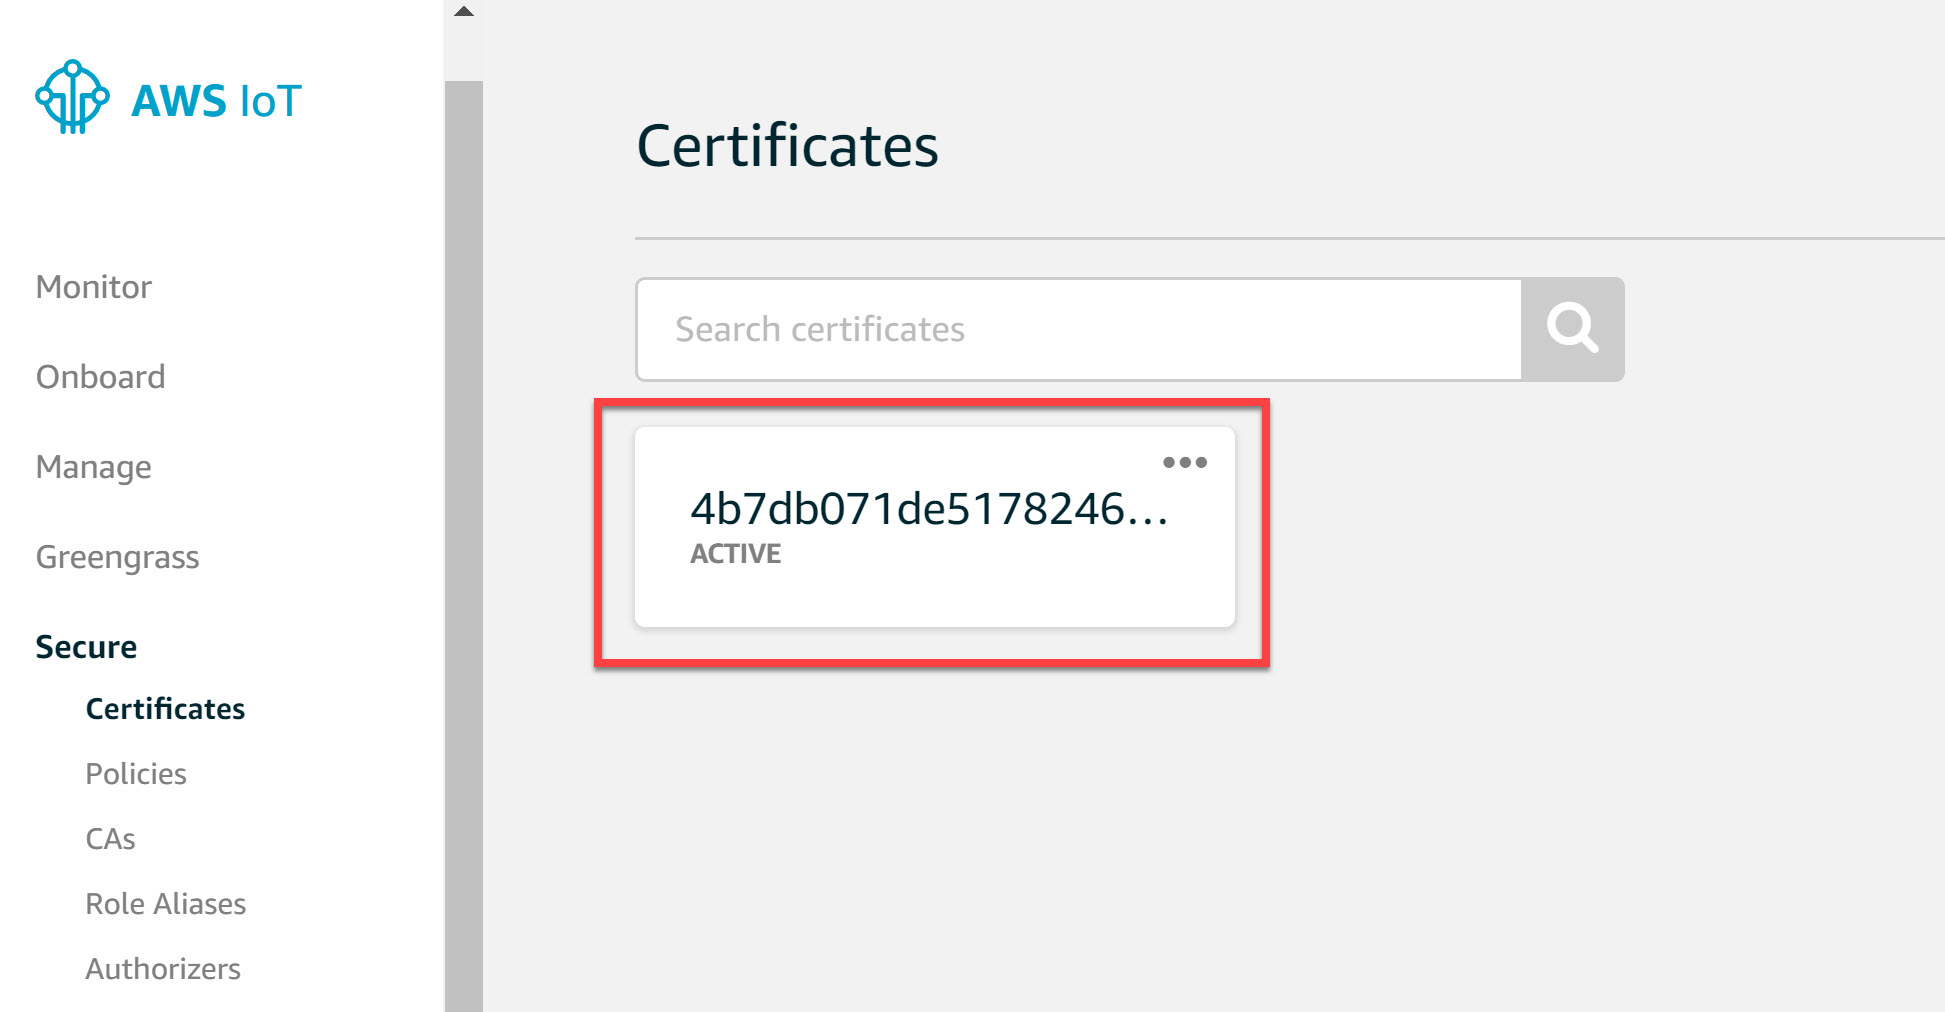
Certificates
The console asks us if we want to create a certificate. We need one so select the Create certificate option:
In the following screen you will see the certificates that were created:
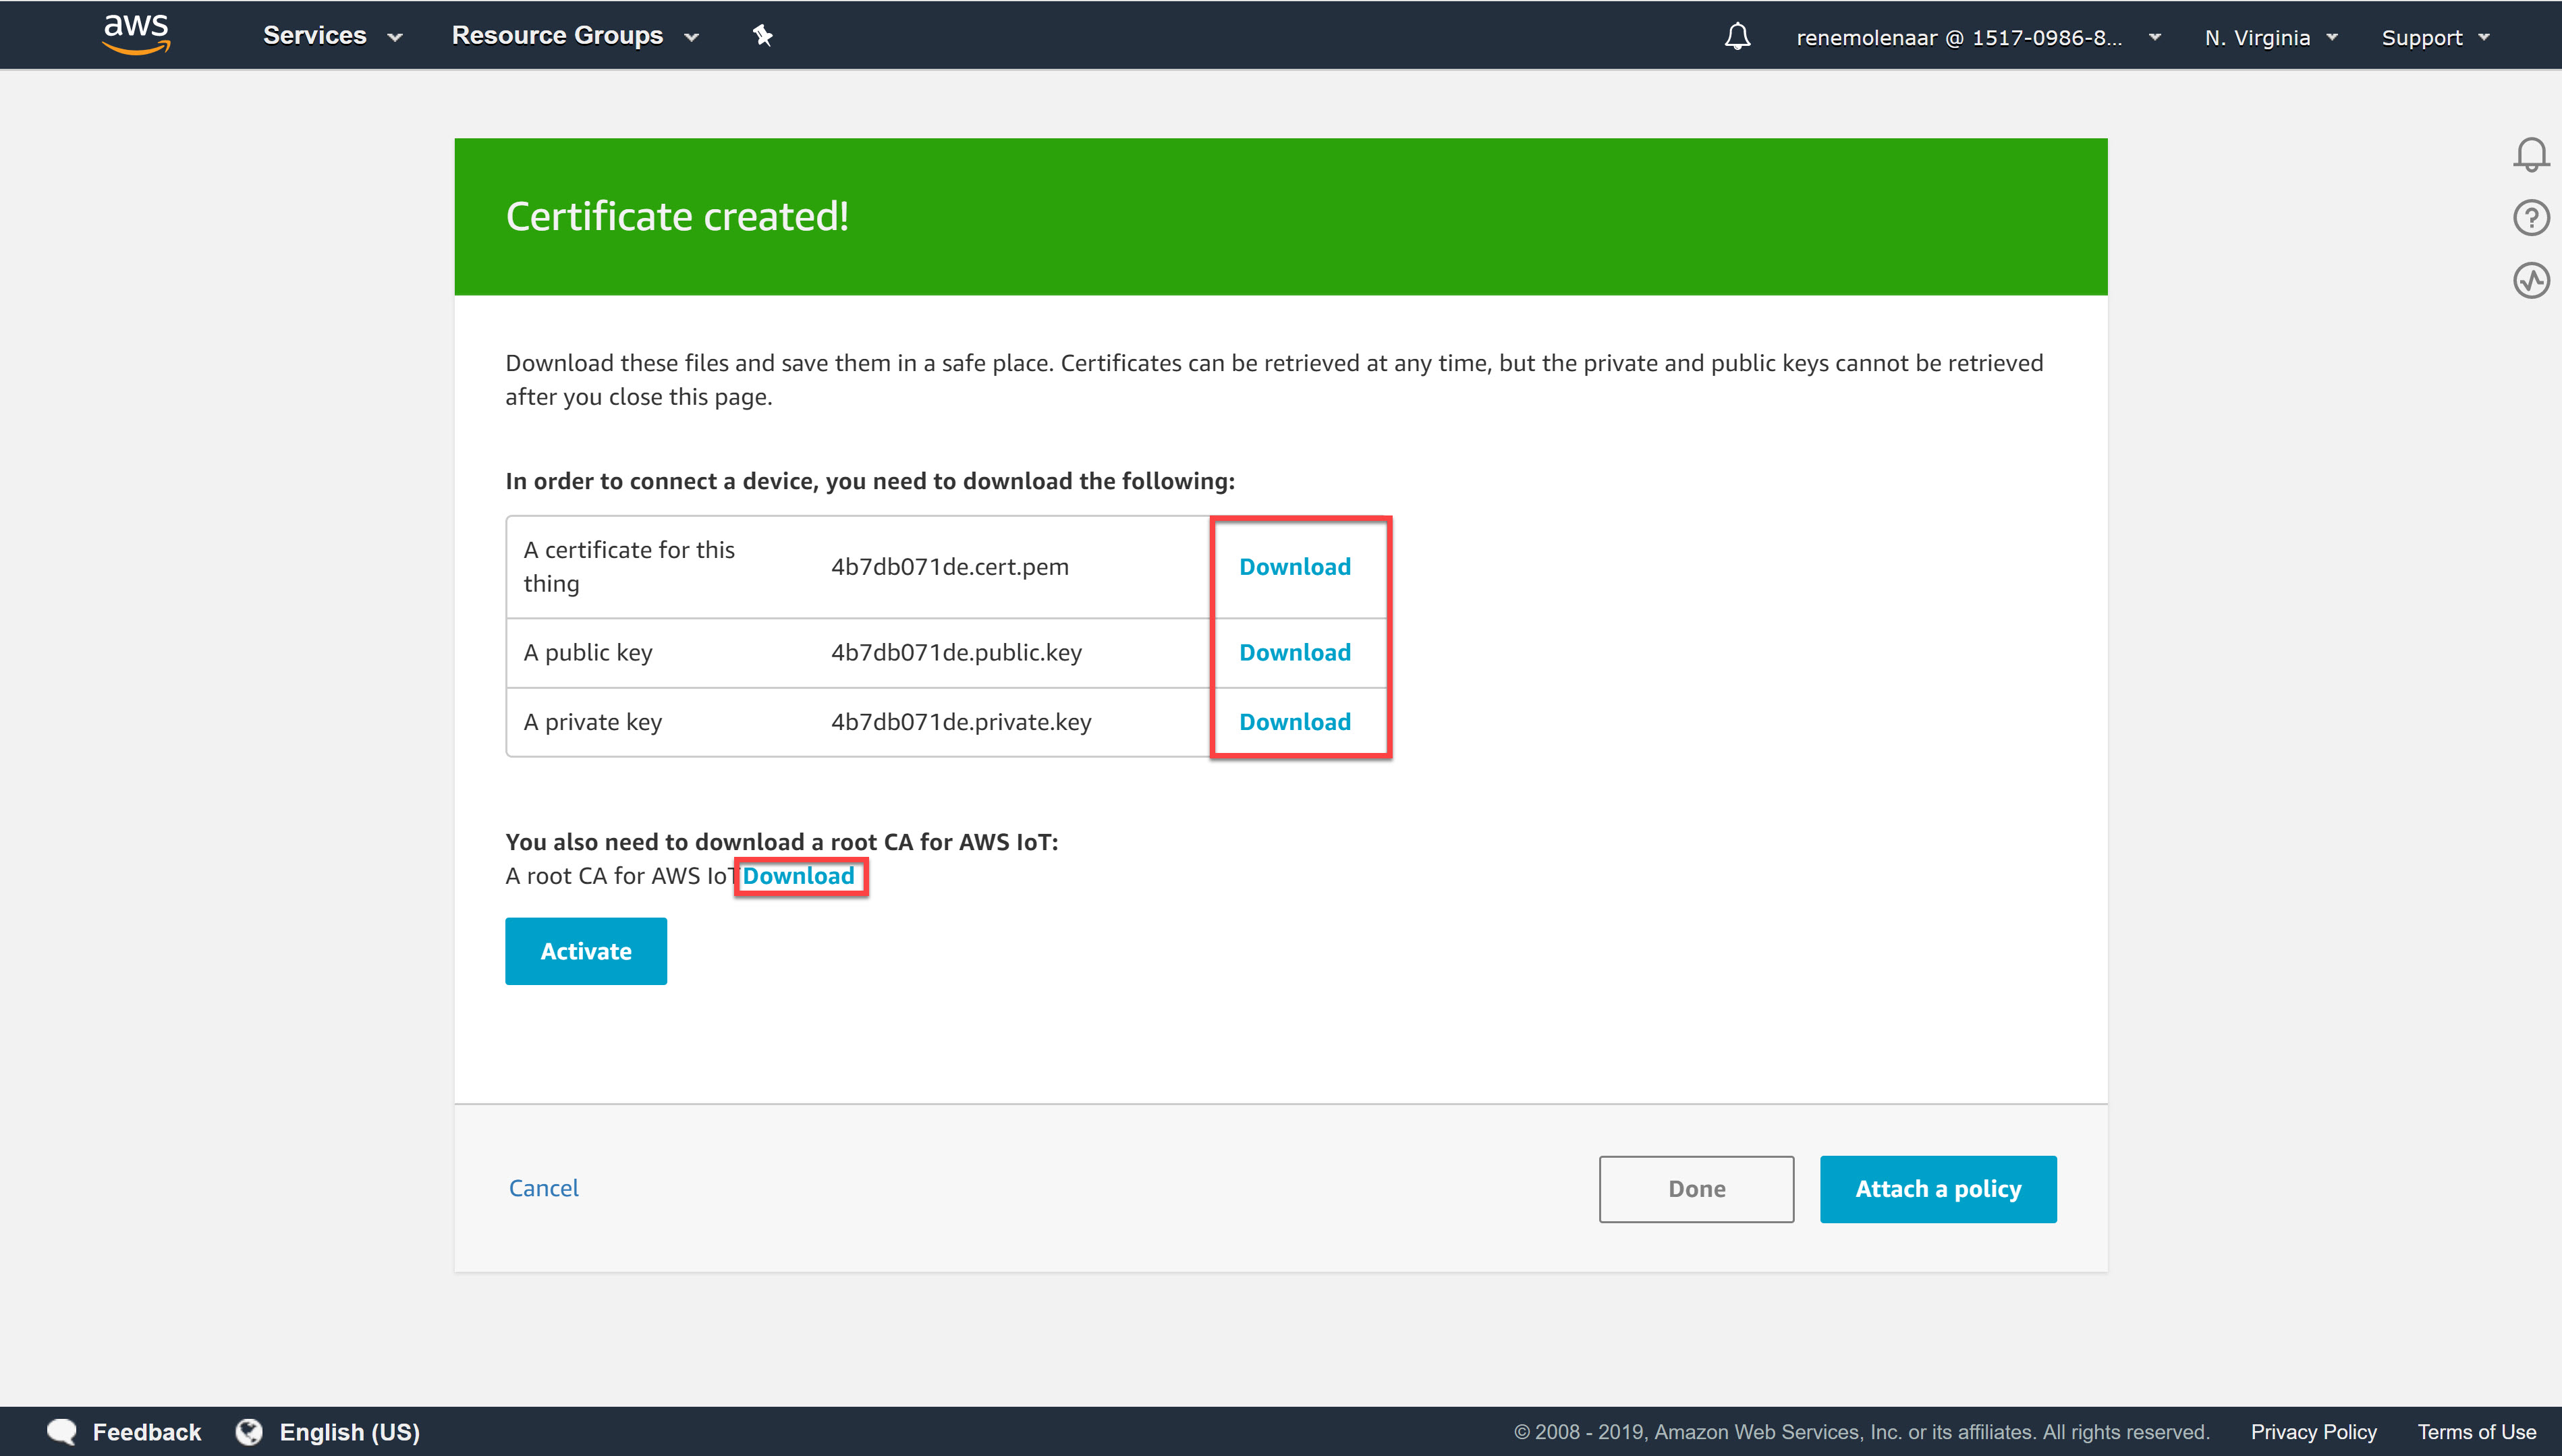
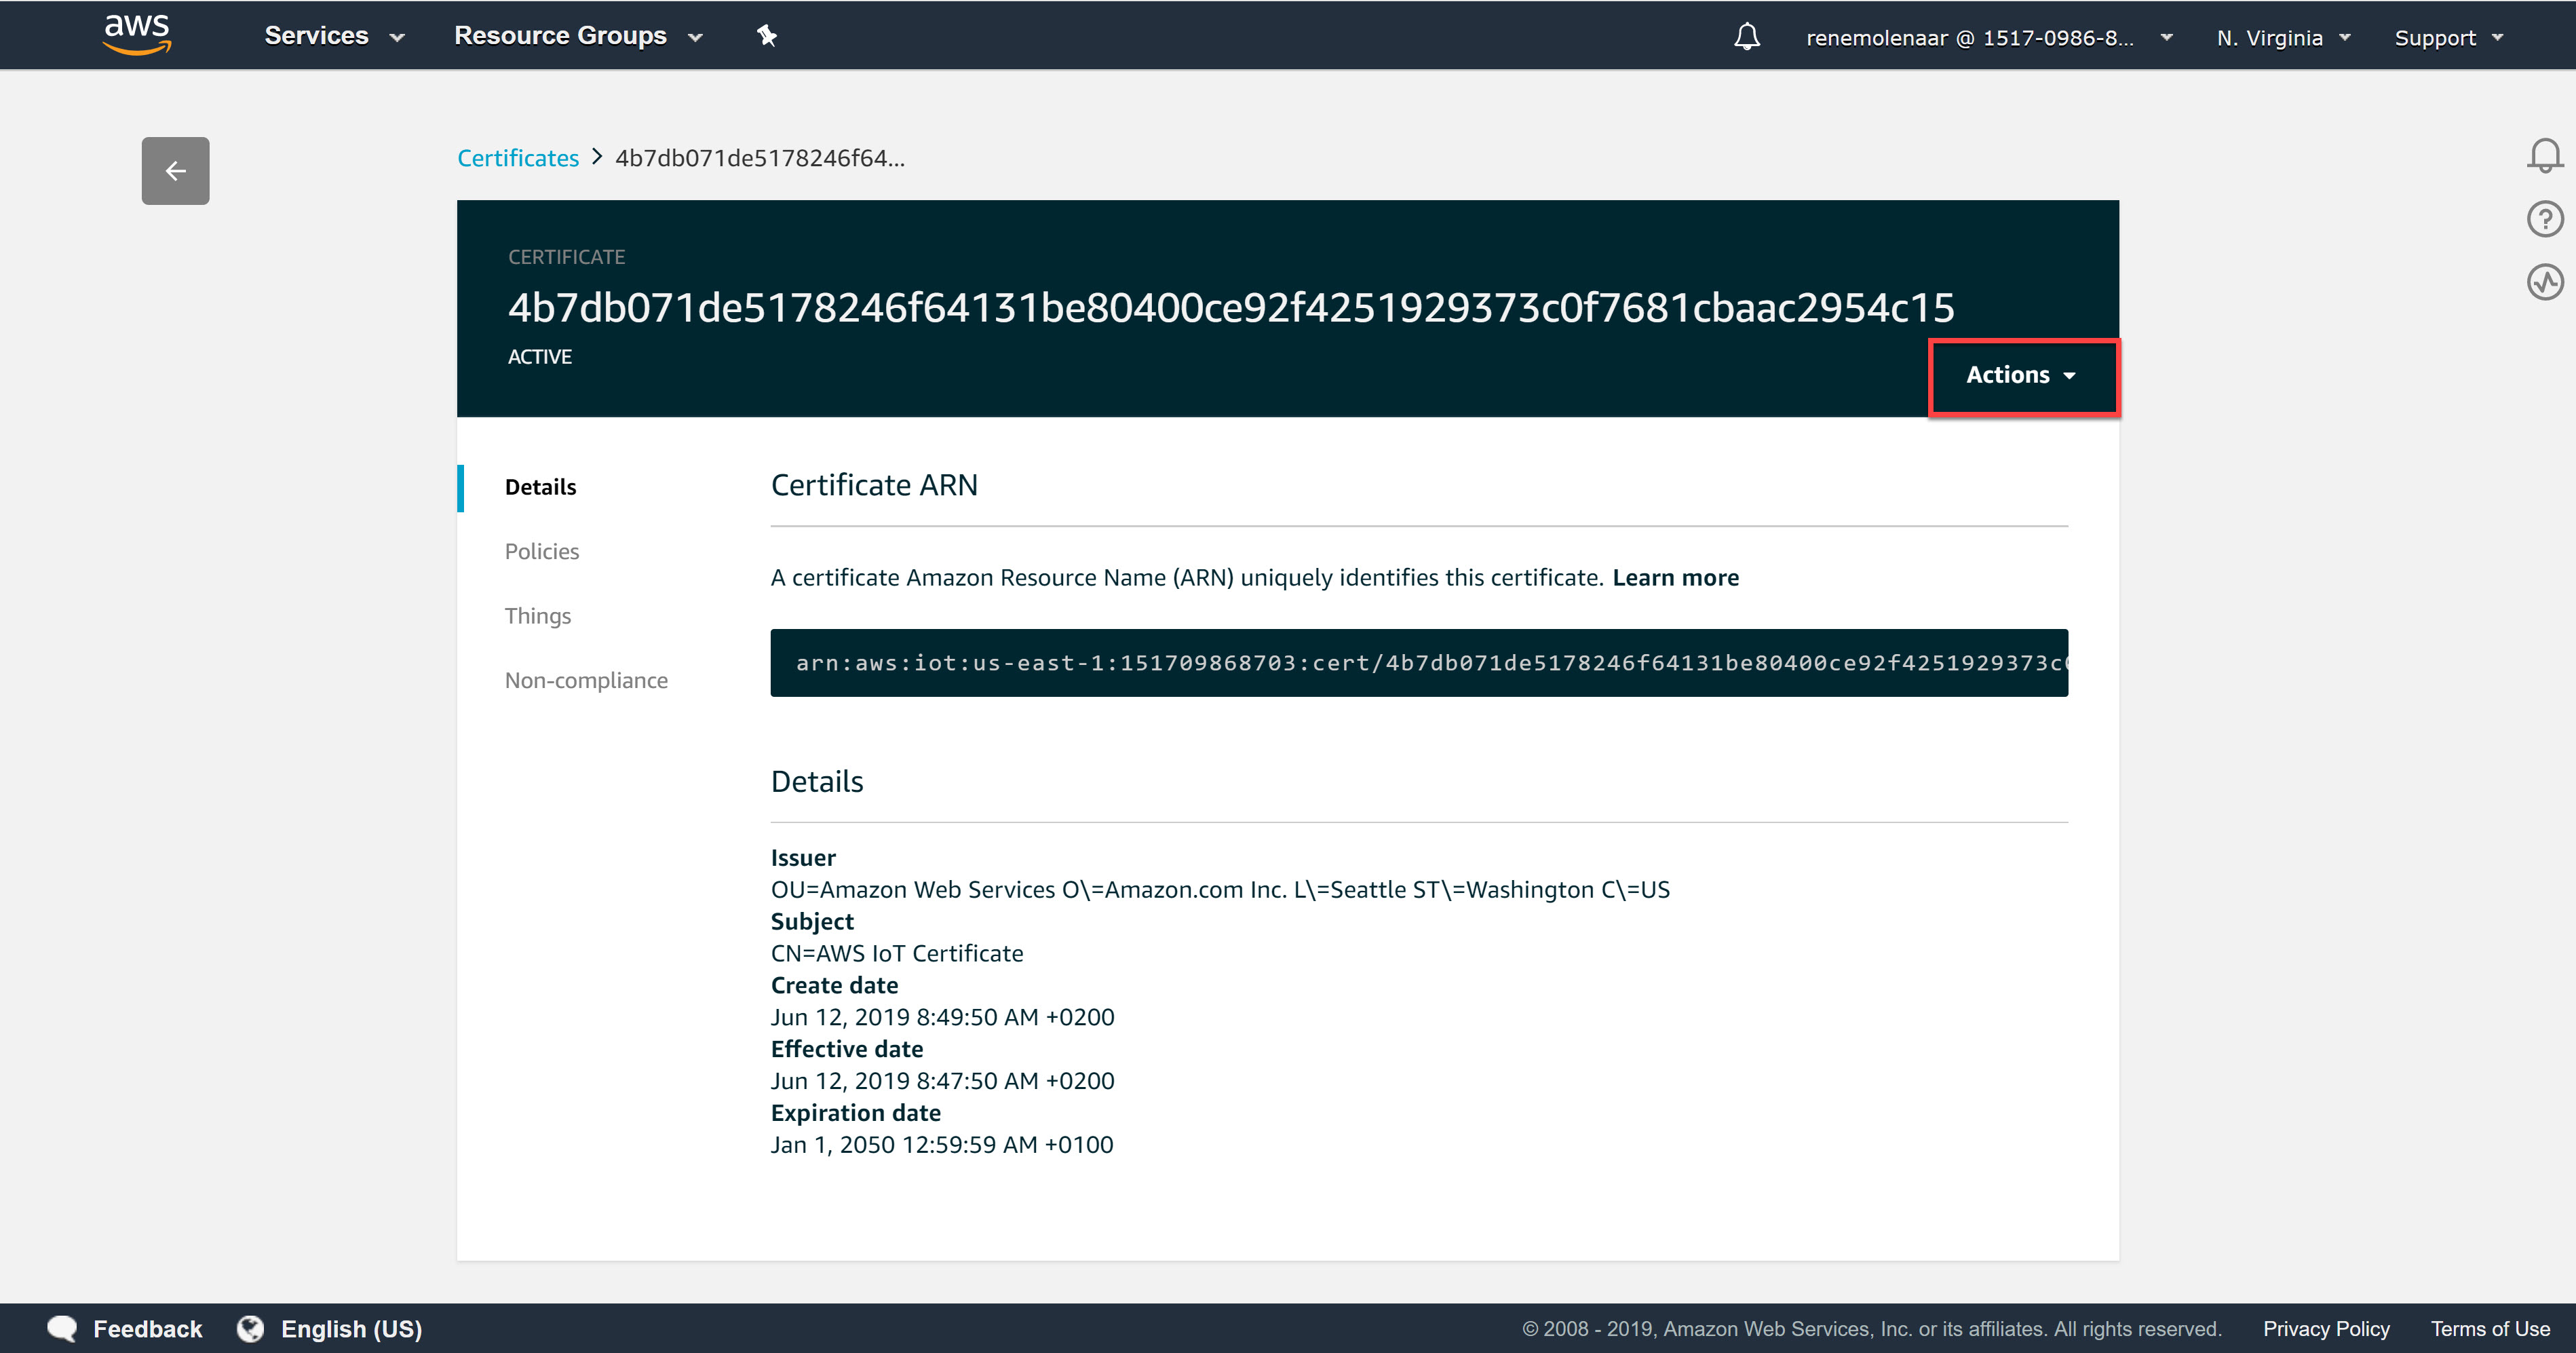
Save the certificate, public key, and private key. We’ll need them later. We’ll also need the root certificates so click on the download button next to A root CA for AWS IoT. This takes you to the X.590 Certificate and AWS IoT page:
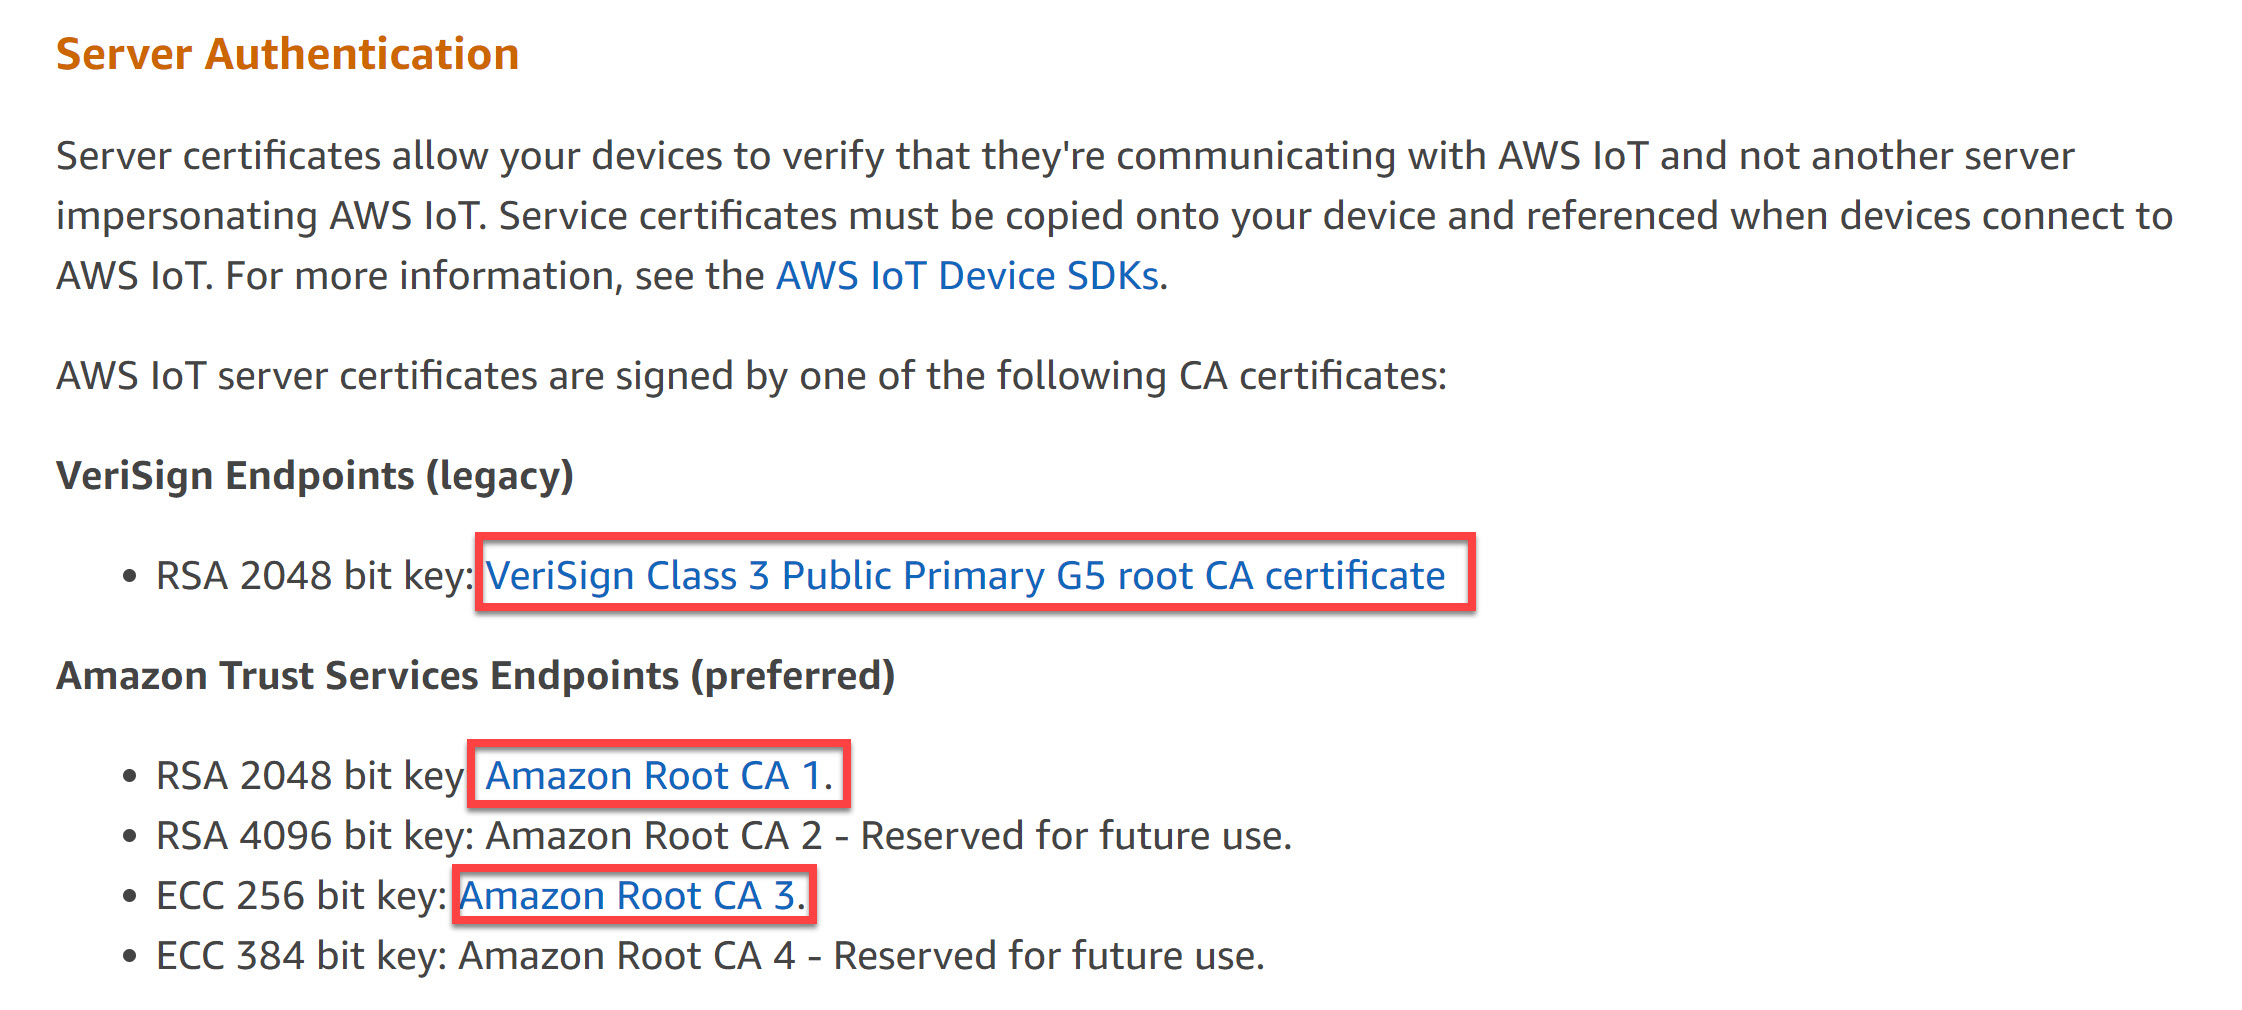
Download all the certificates you see here. We’ll need them later.
Policy
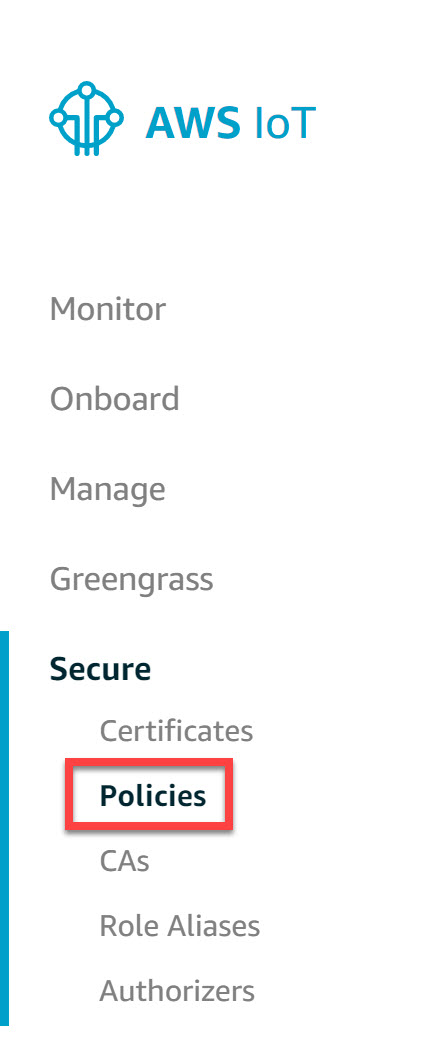
Now we need to create a policy that defines what our thing is allowed to do. Head over to Secure and select Policies:
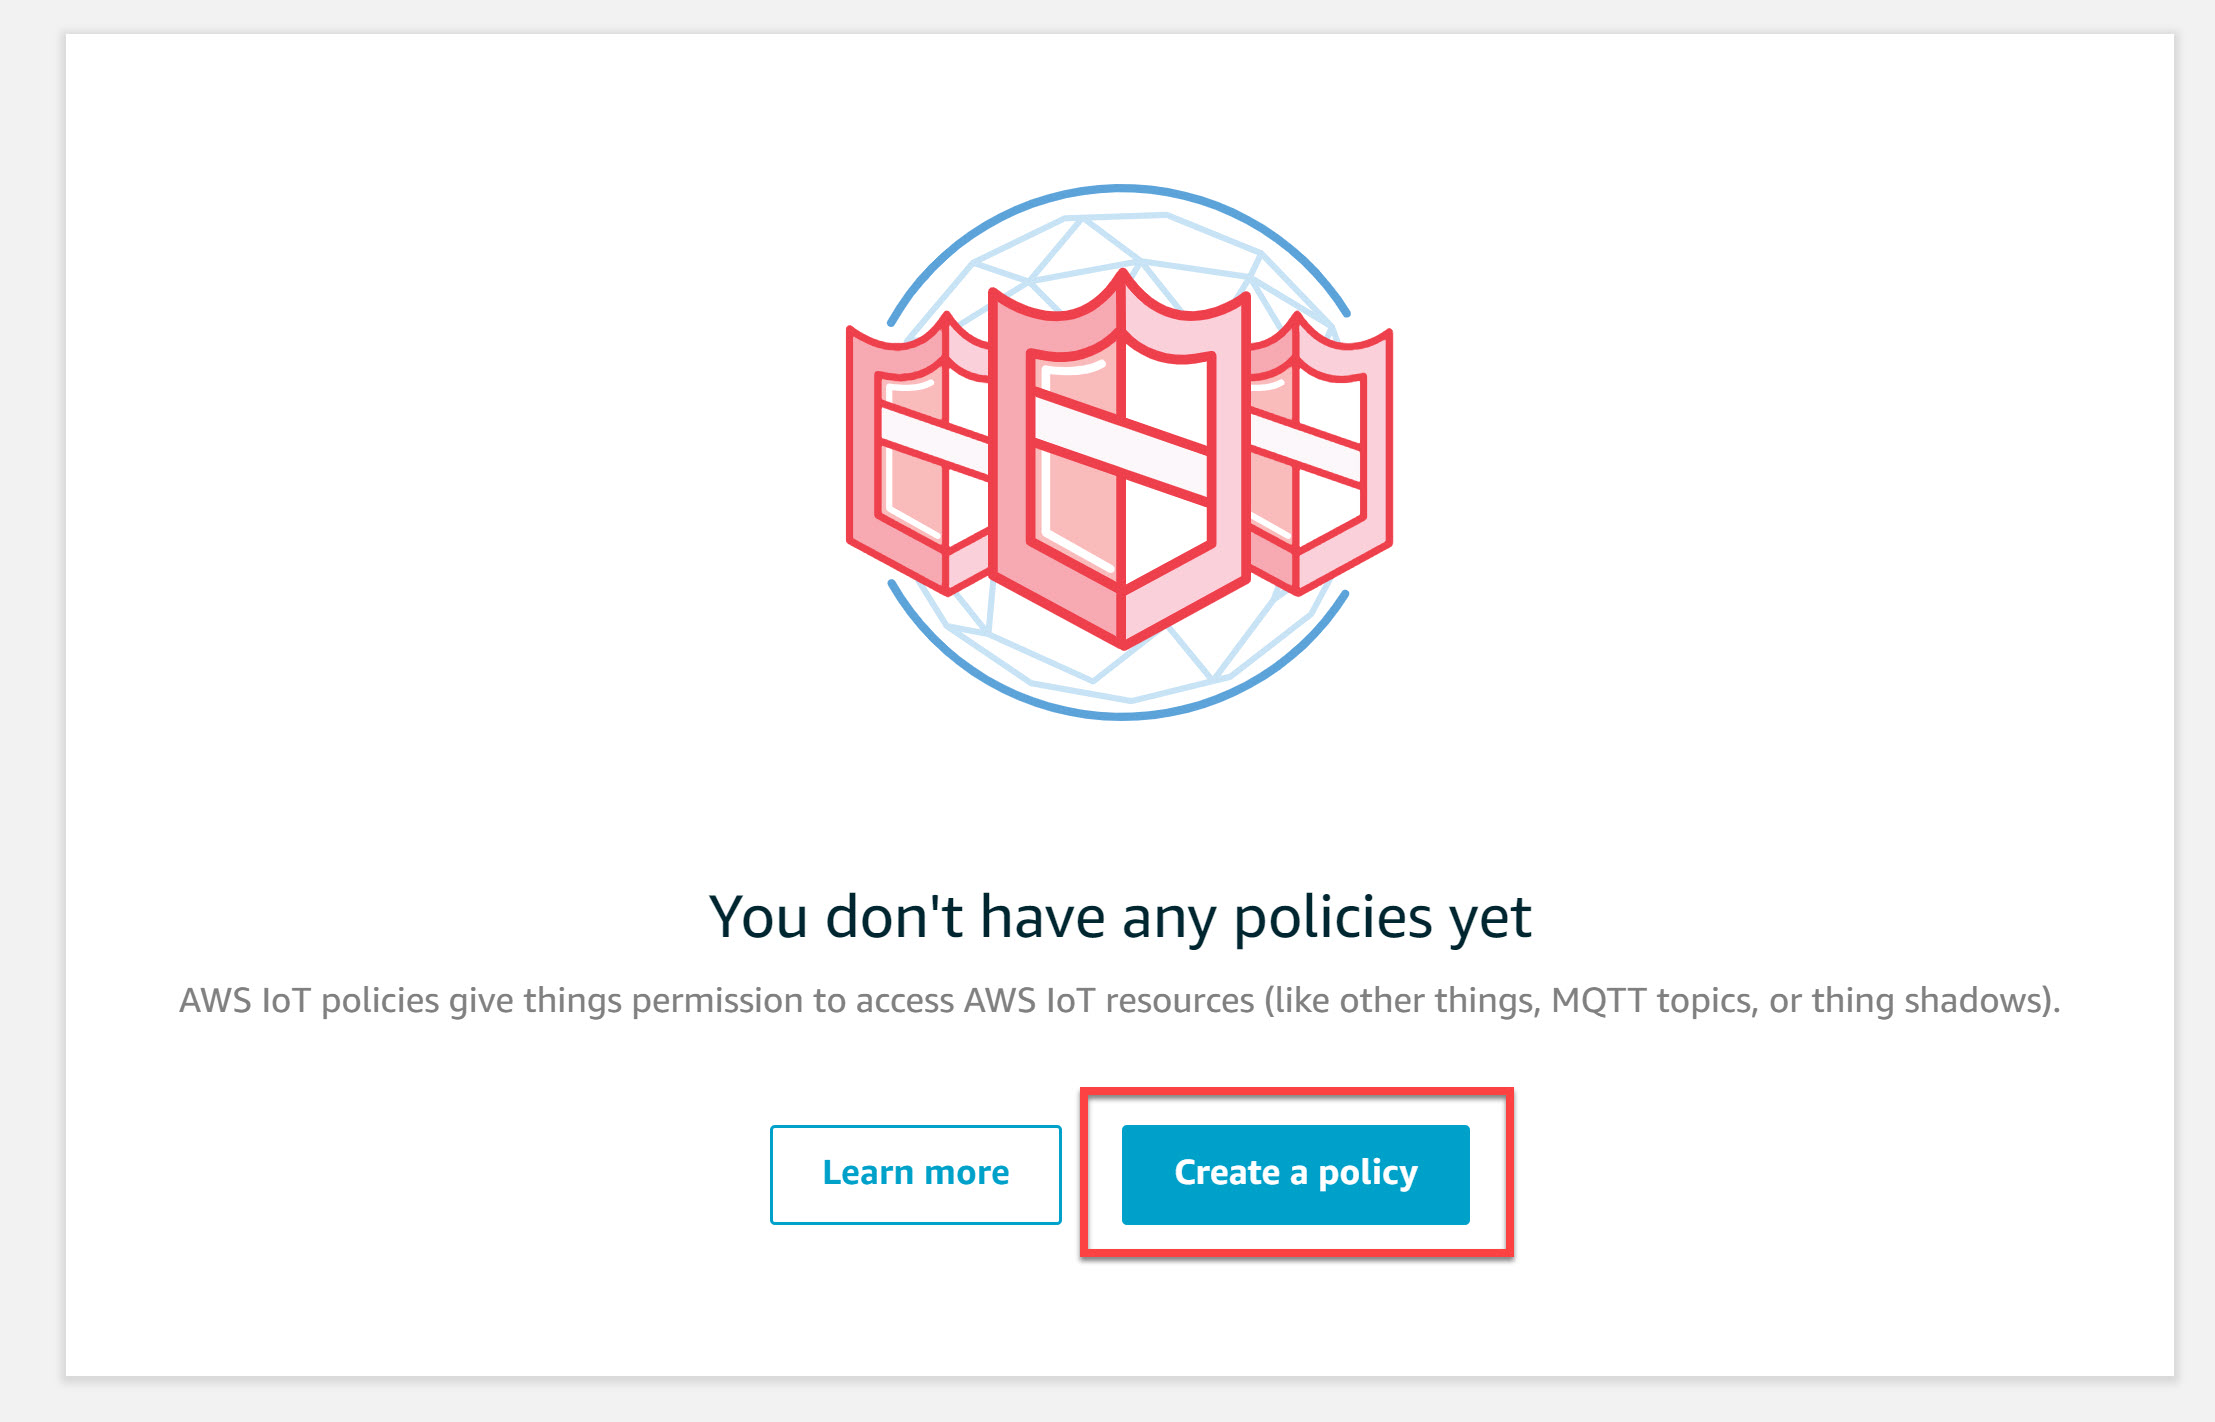
The console tells us we don’t have any policies yet. Click on the Create a policy button:
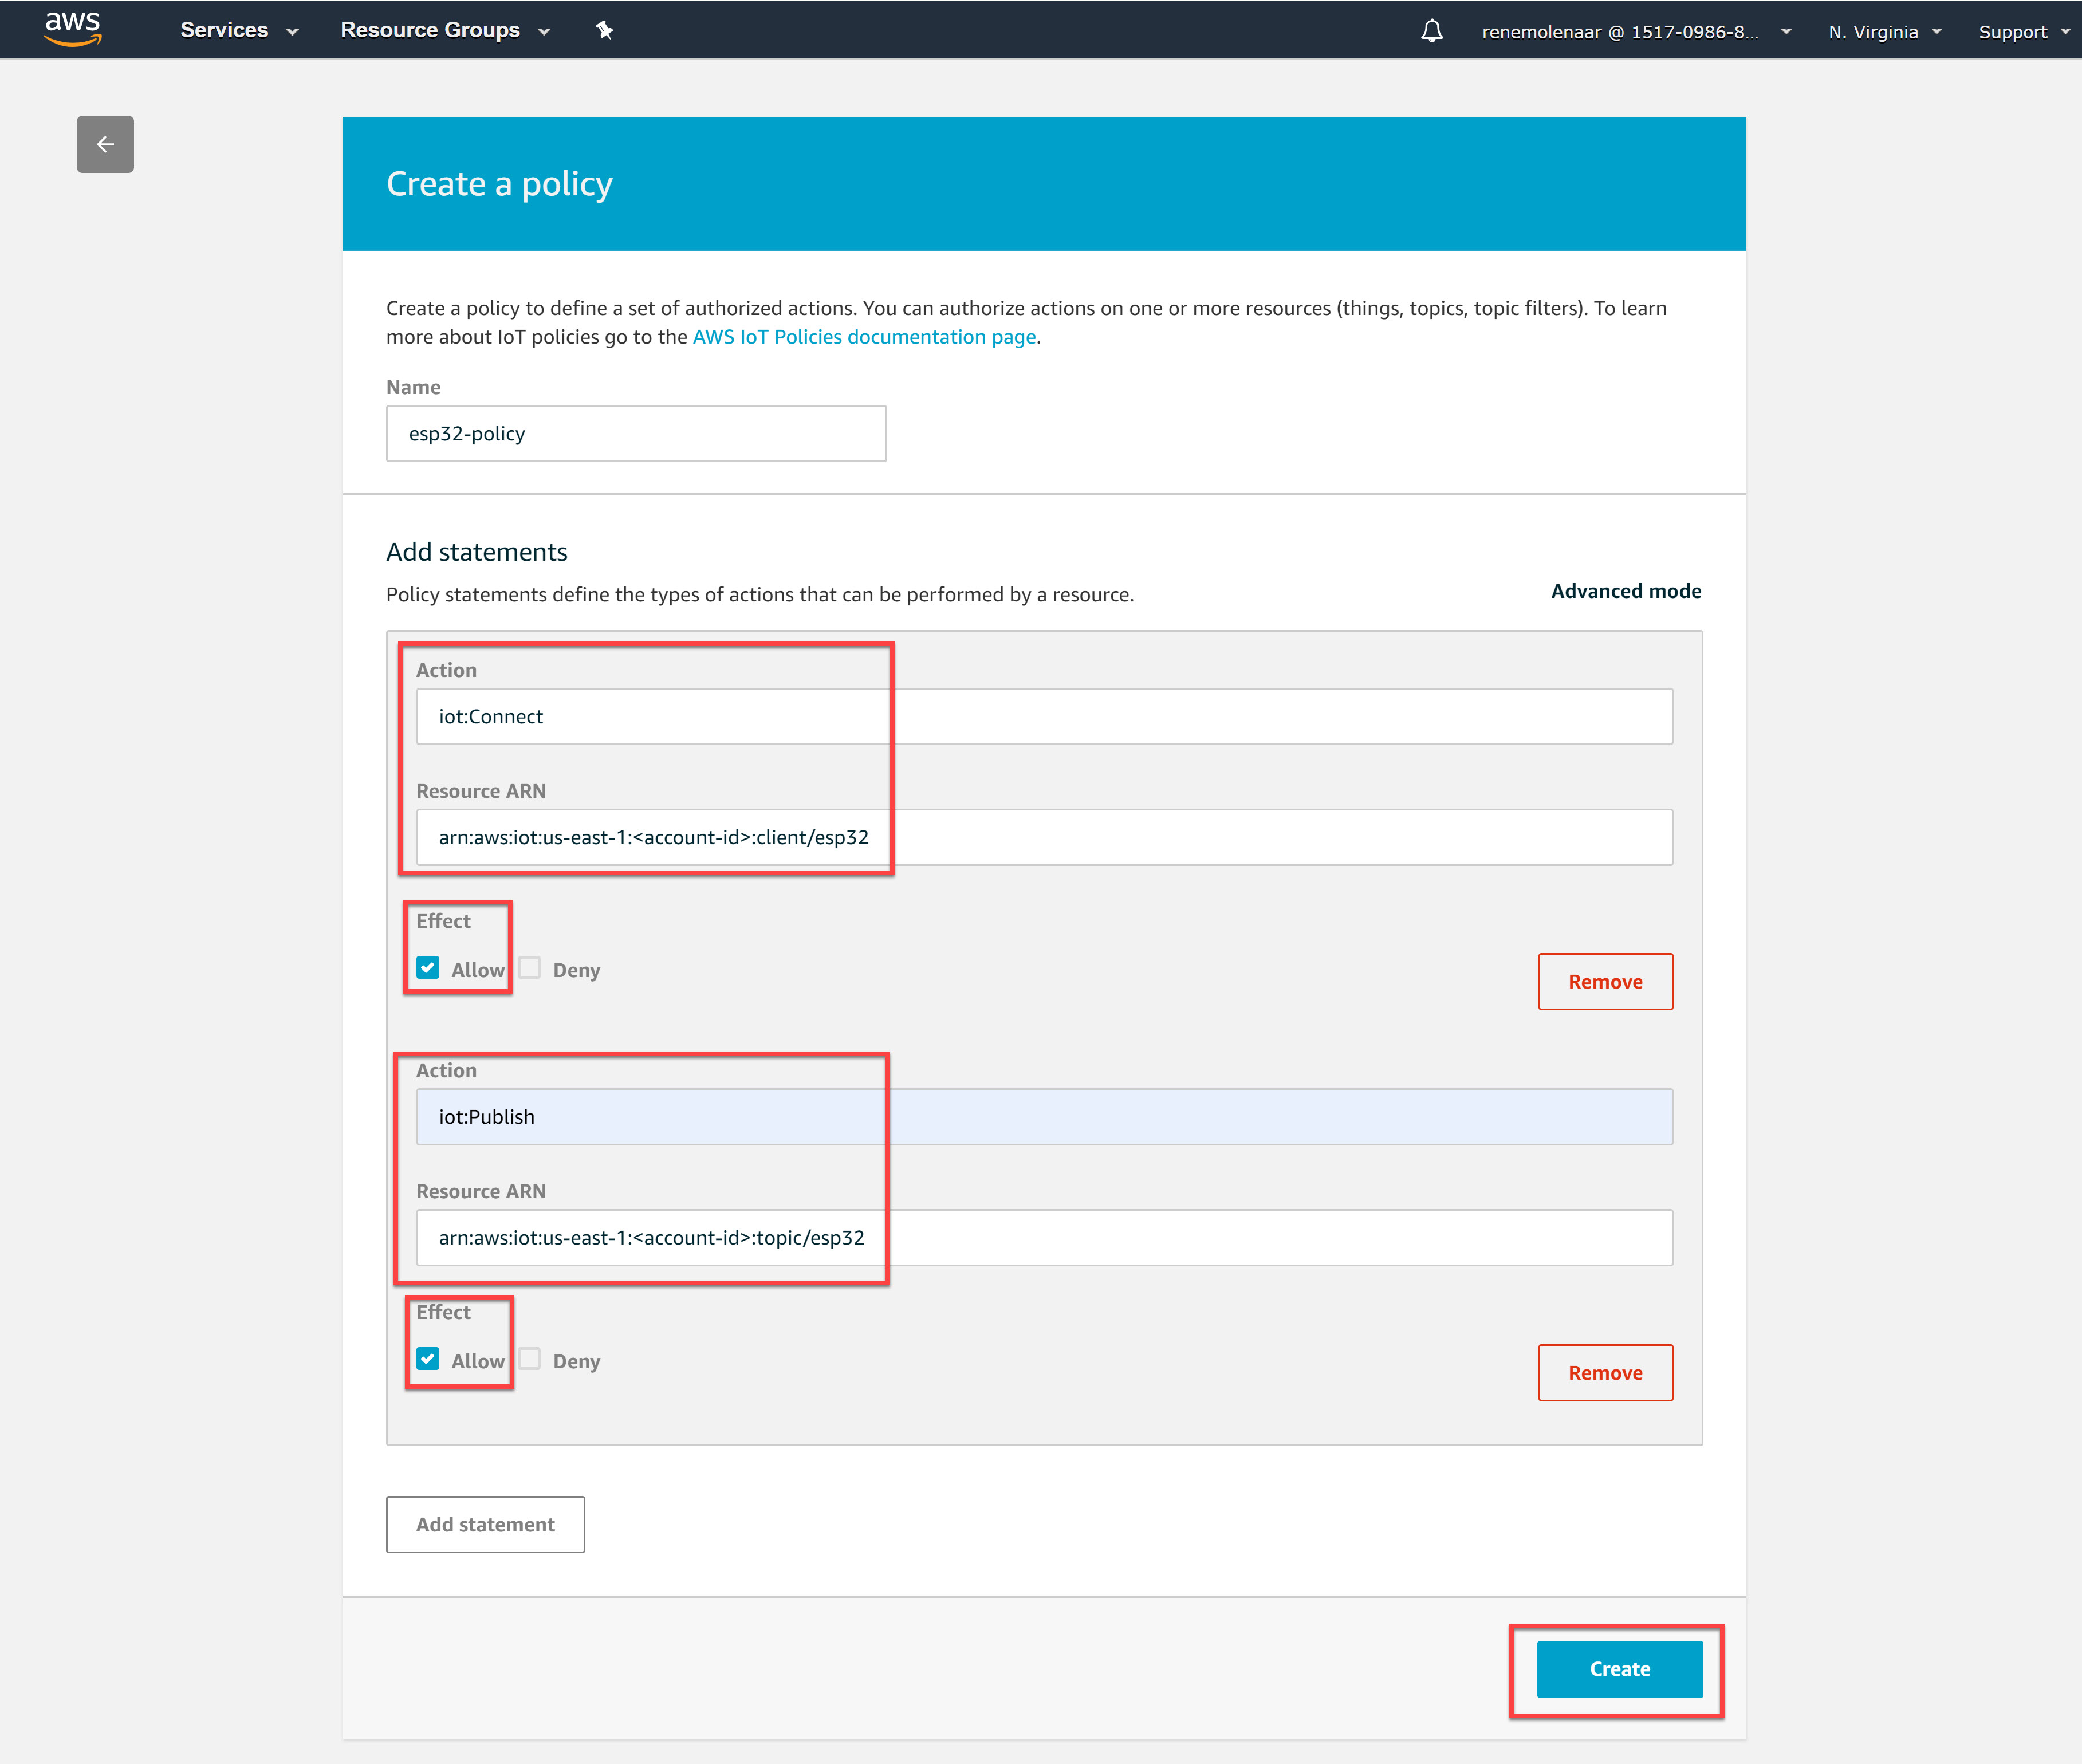
Our policy requires two actions:
- iot:Connect
- iot:Publish
The iot:Connect action grants permission to connect to AWS IoT with client id “esp32” and the iot:Publish action restricts the device to publishing on a topic named “esp32”.
Here’s what our actions look like:
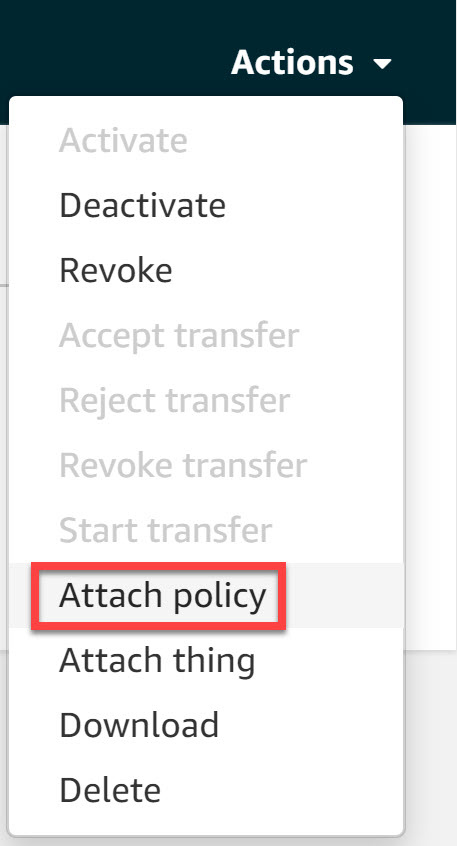
Hit the Create button and head back to Secure > Certificates:
In the upper right corner, select Actions:
Now choose the Attach policy option:
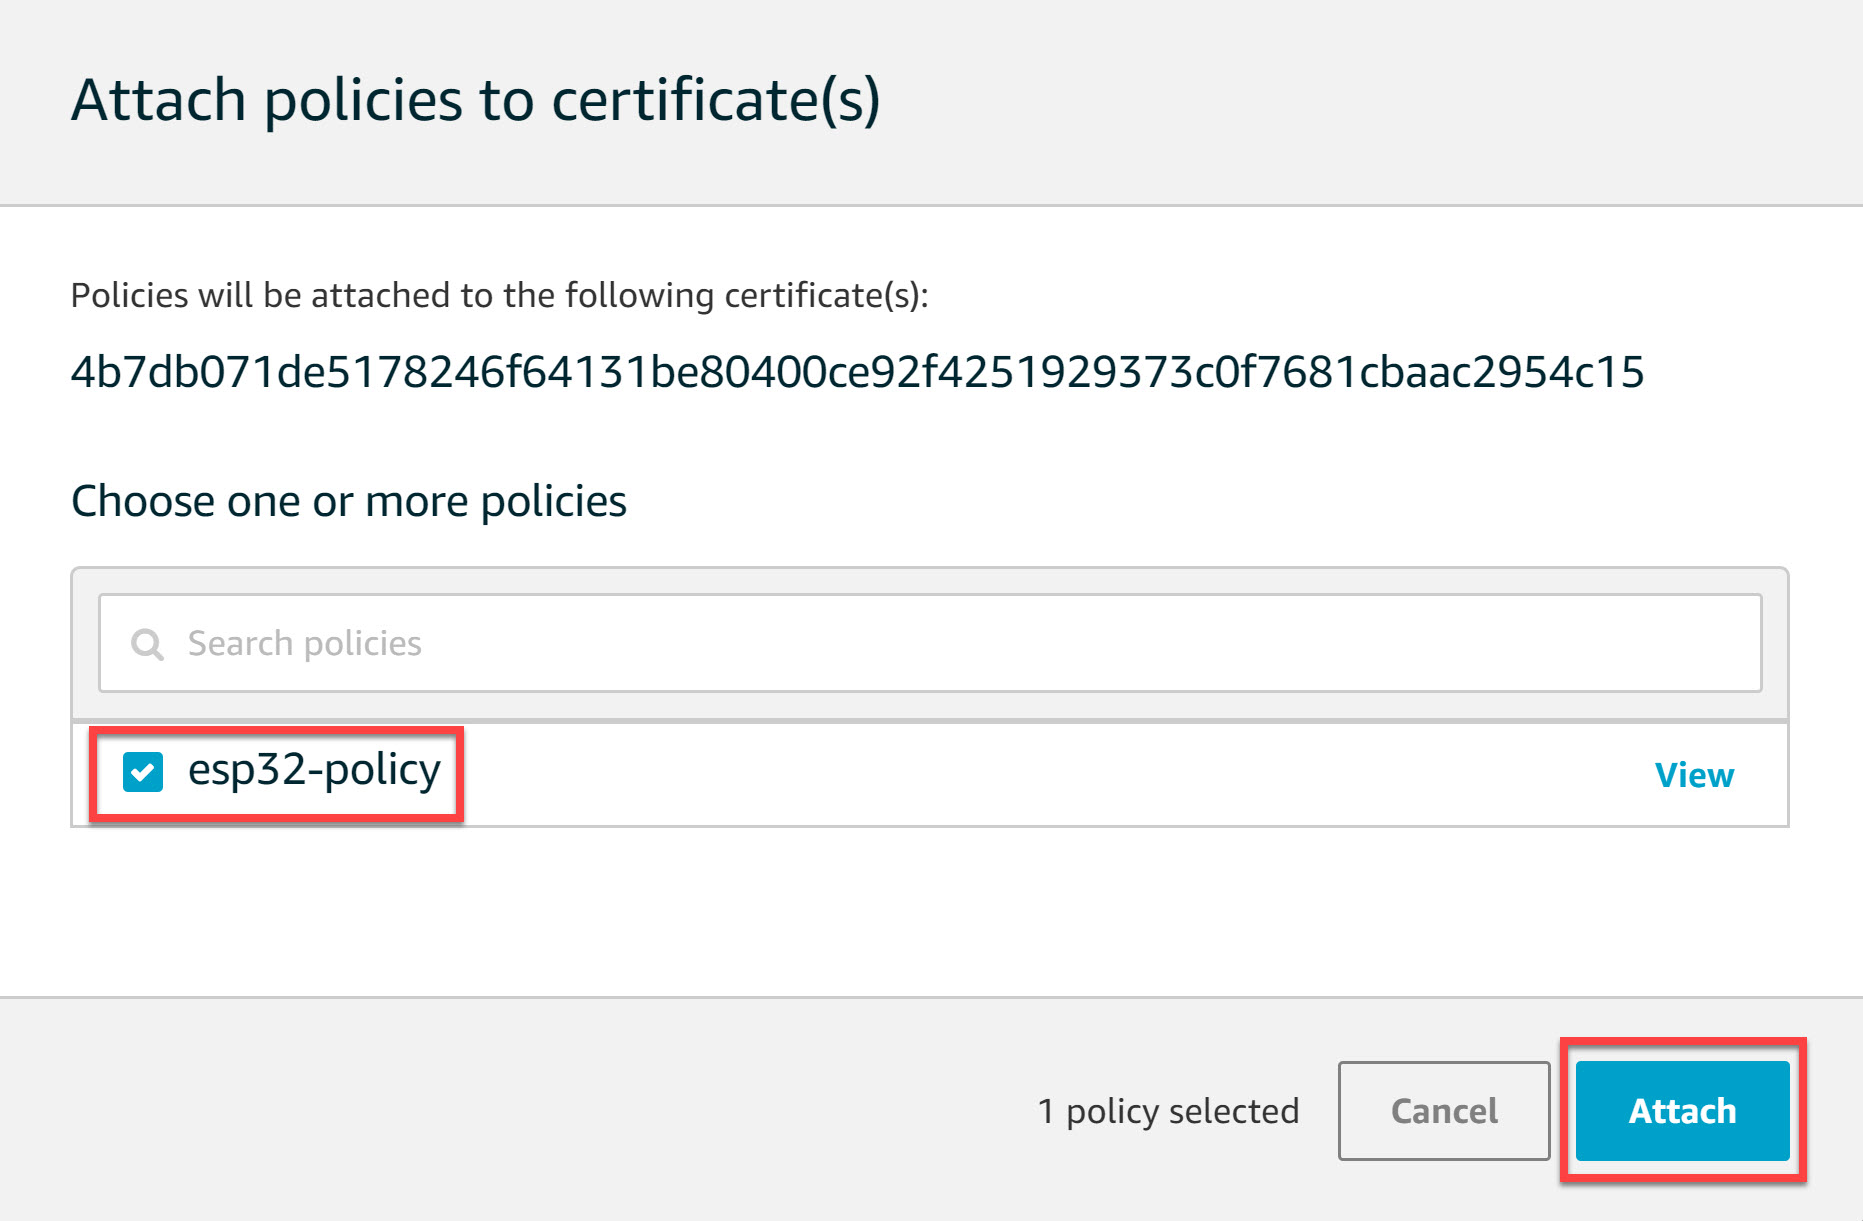
Select the “esp32-policy” we created and click on the Attach button:
There is one more thing to do. We need the REST API Endpoint. Go to Manage > Things:
Look for the Rest API Endpoint under Interact:
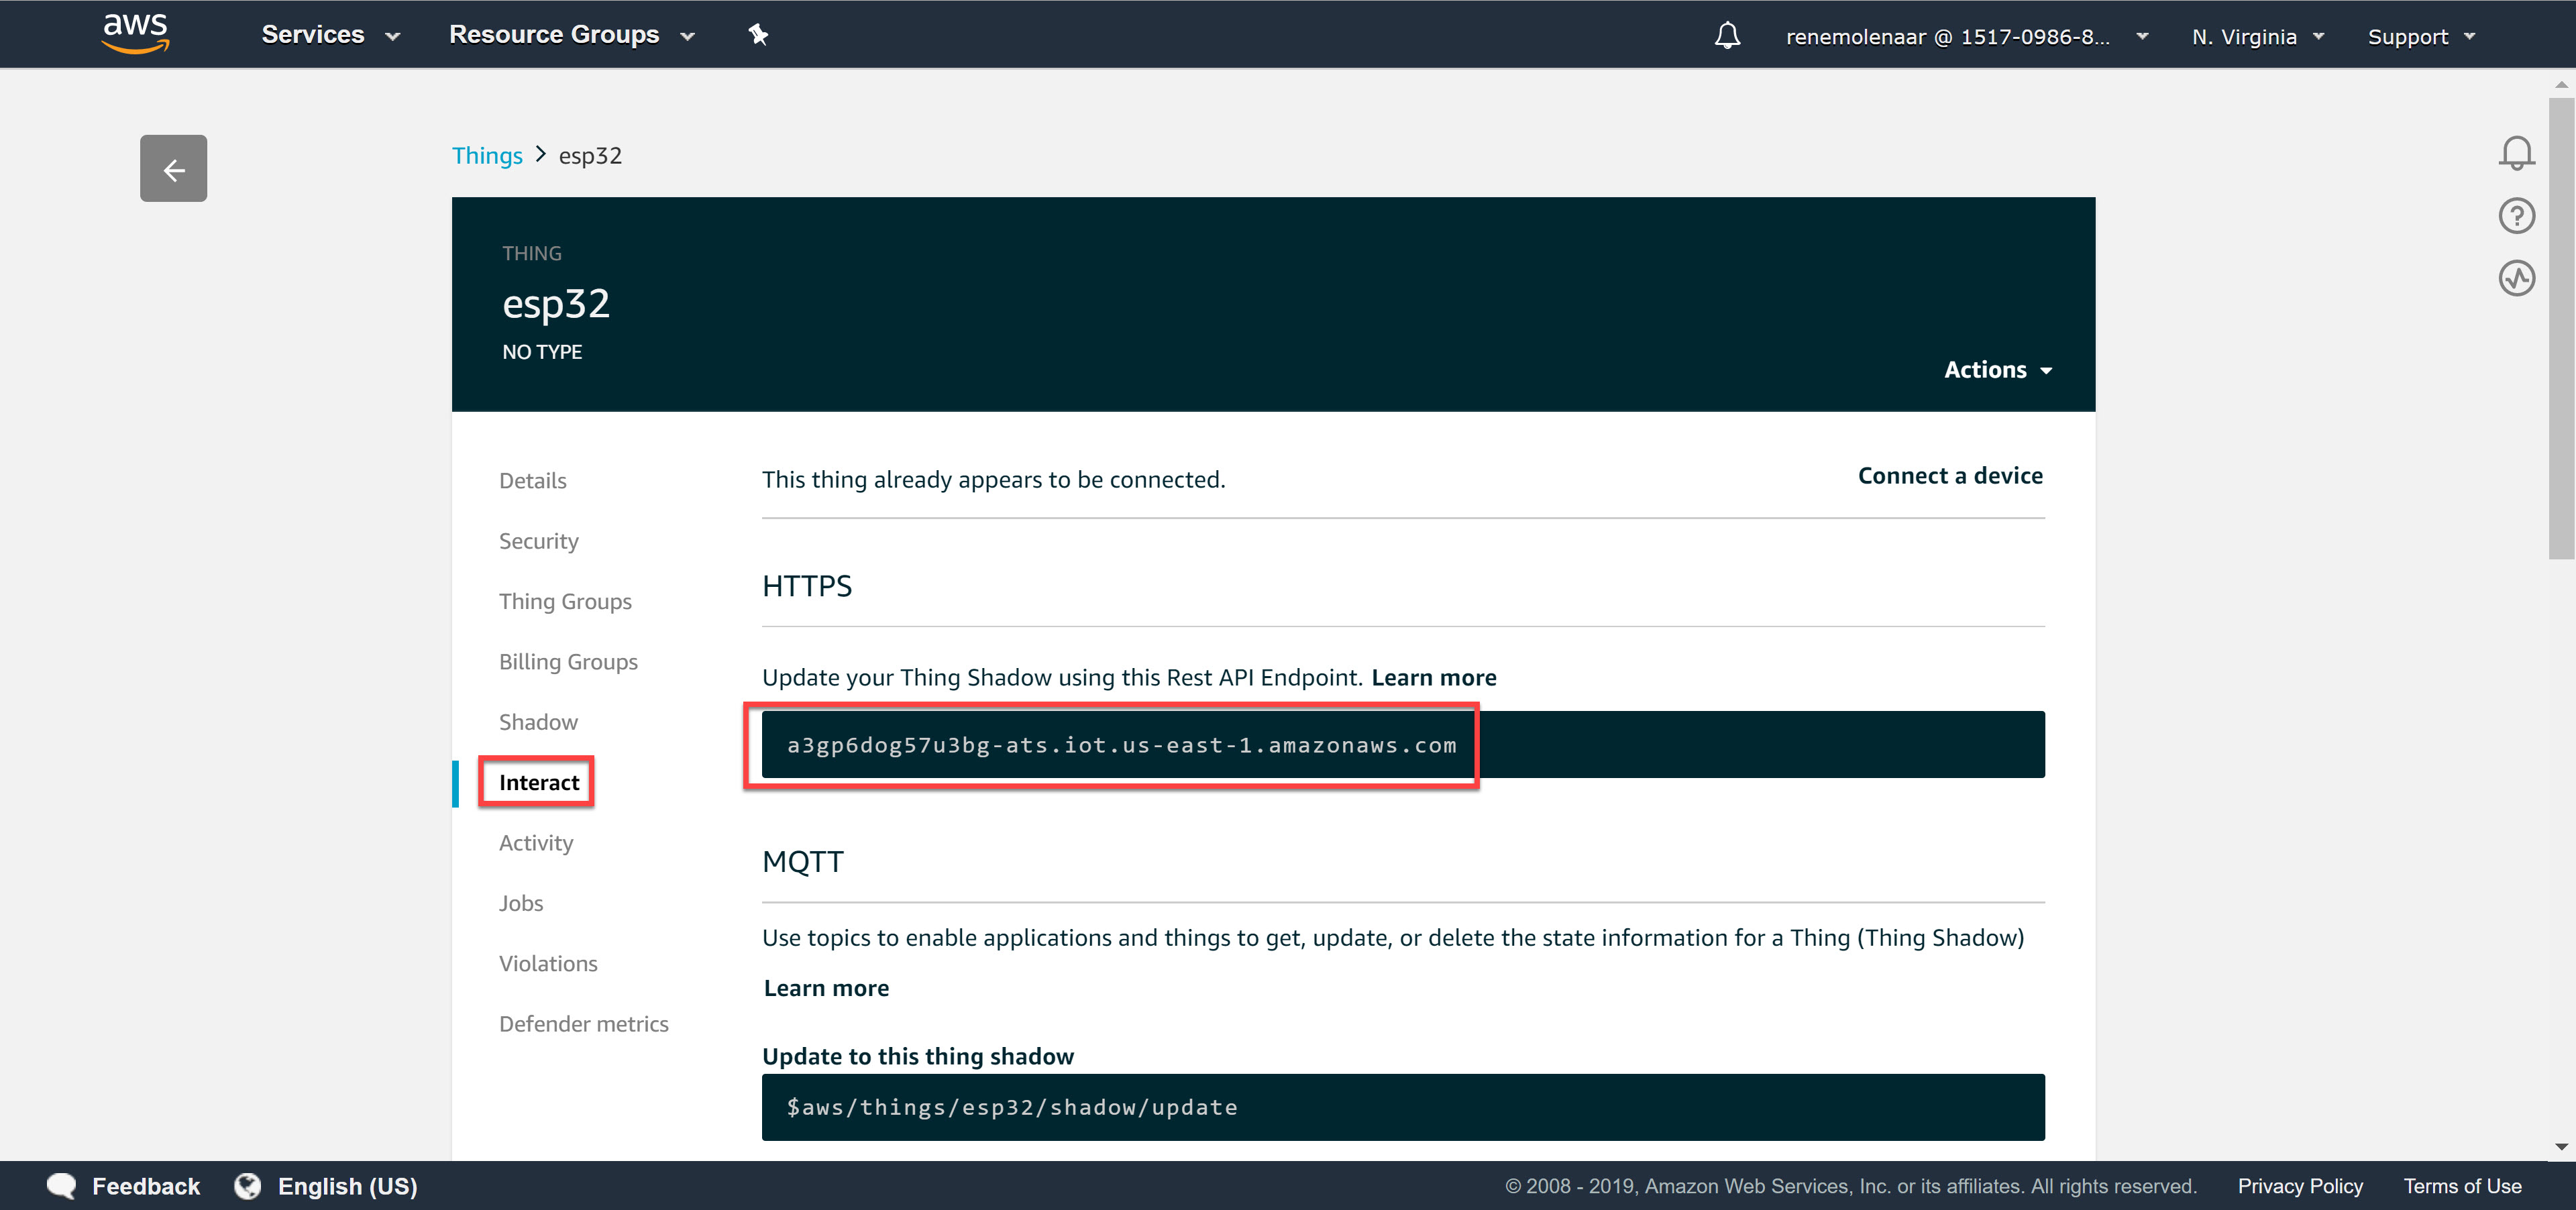
Write down the REST API Endpoint. In my case it’s:
a3gp6dog57u3bg-ats.iot.us-east-1.amazonaws.com
We’ll need it later when we configure the ESP32. This completes our AWS IoT configuration.
ESP32
Time to get our hands dirty with the ESP32.
Drivers
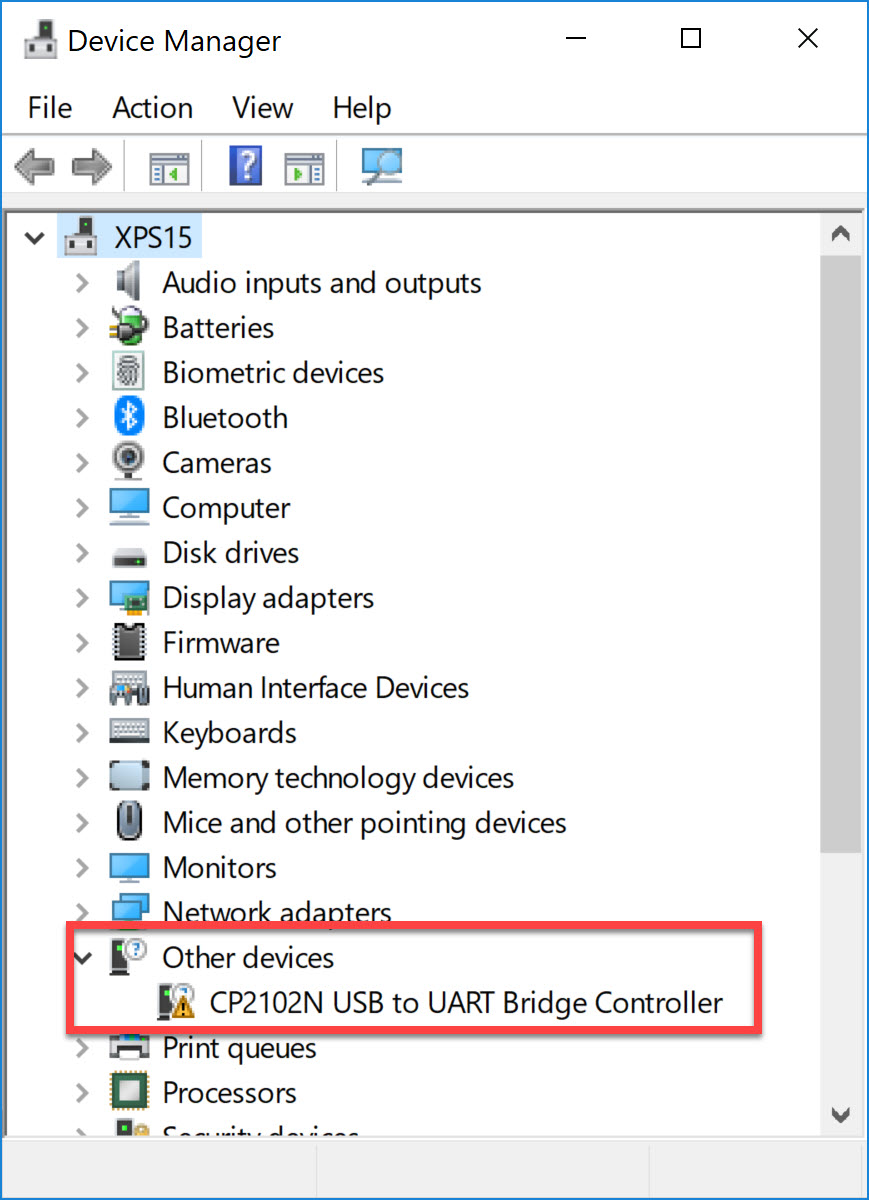
I’m using Windows 10. The first time you connect the ESP32 with the USB cable, your computer won’t recognize the device. Go to Device Manager and you will see an unknown device:
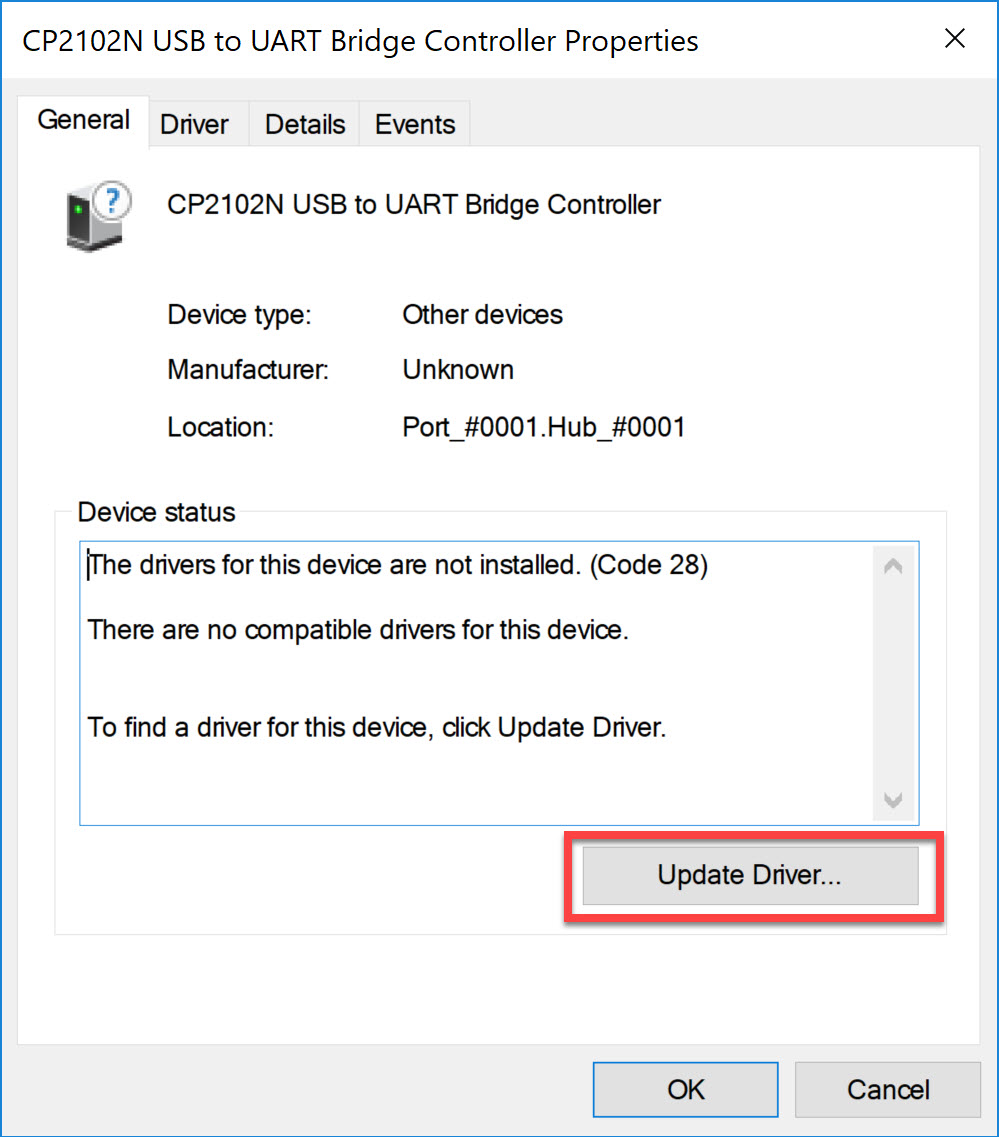
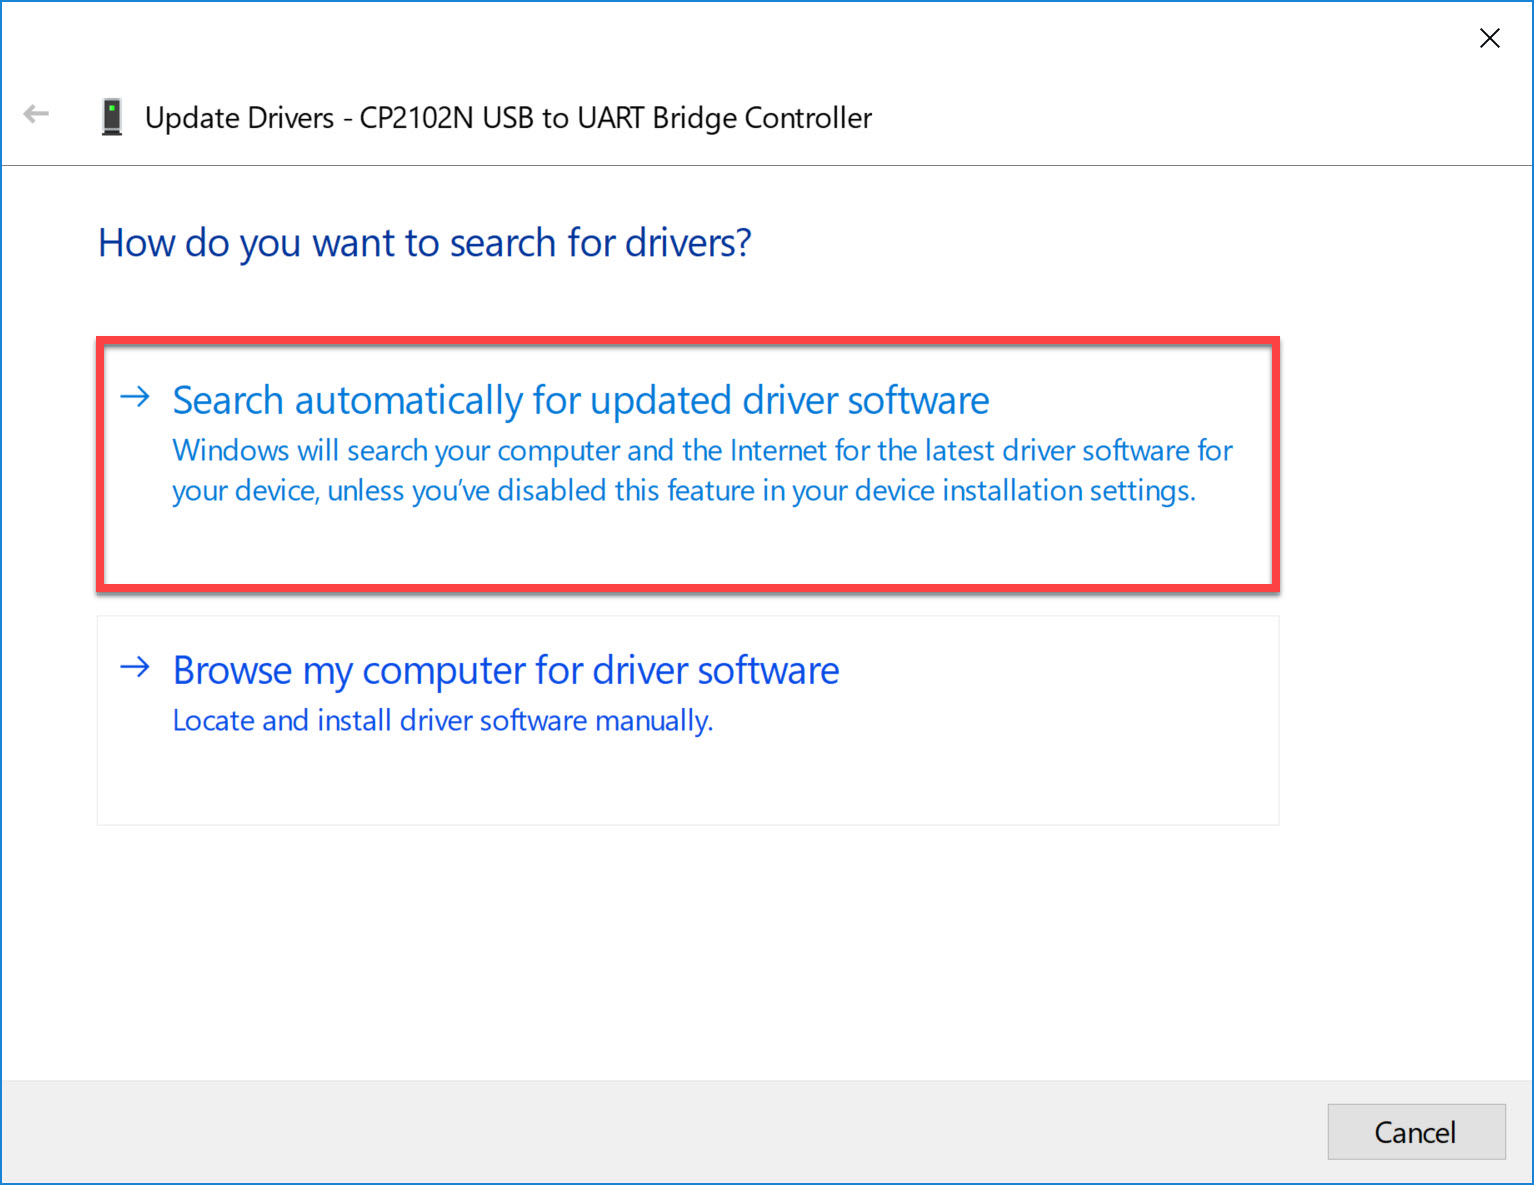
Double-click on the device and click on Update Driver:
Choose the first option to automatically search for the driver:
This won’t take long. Once the driver is downloaded it will also show you the COM port number:
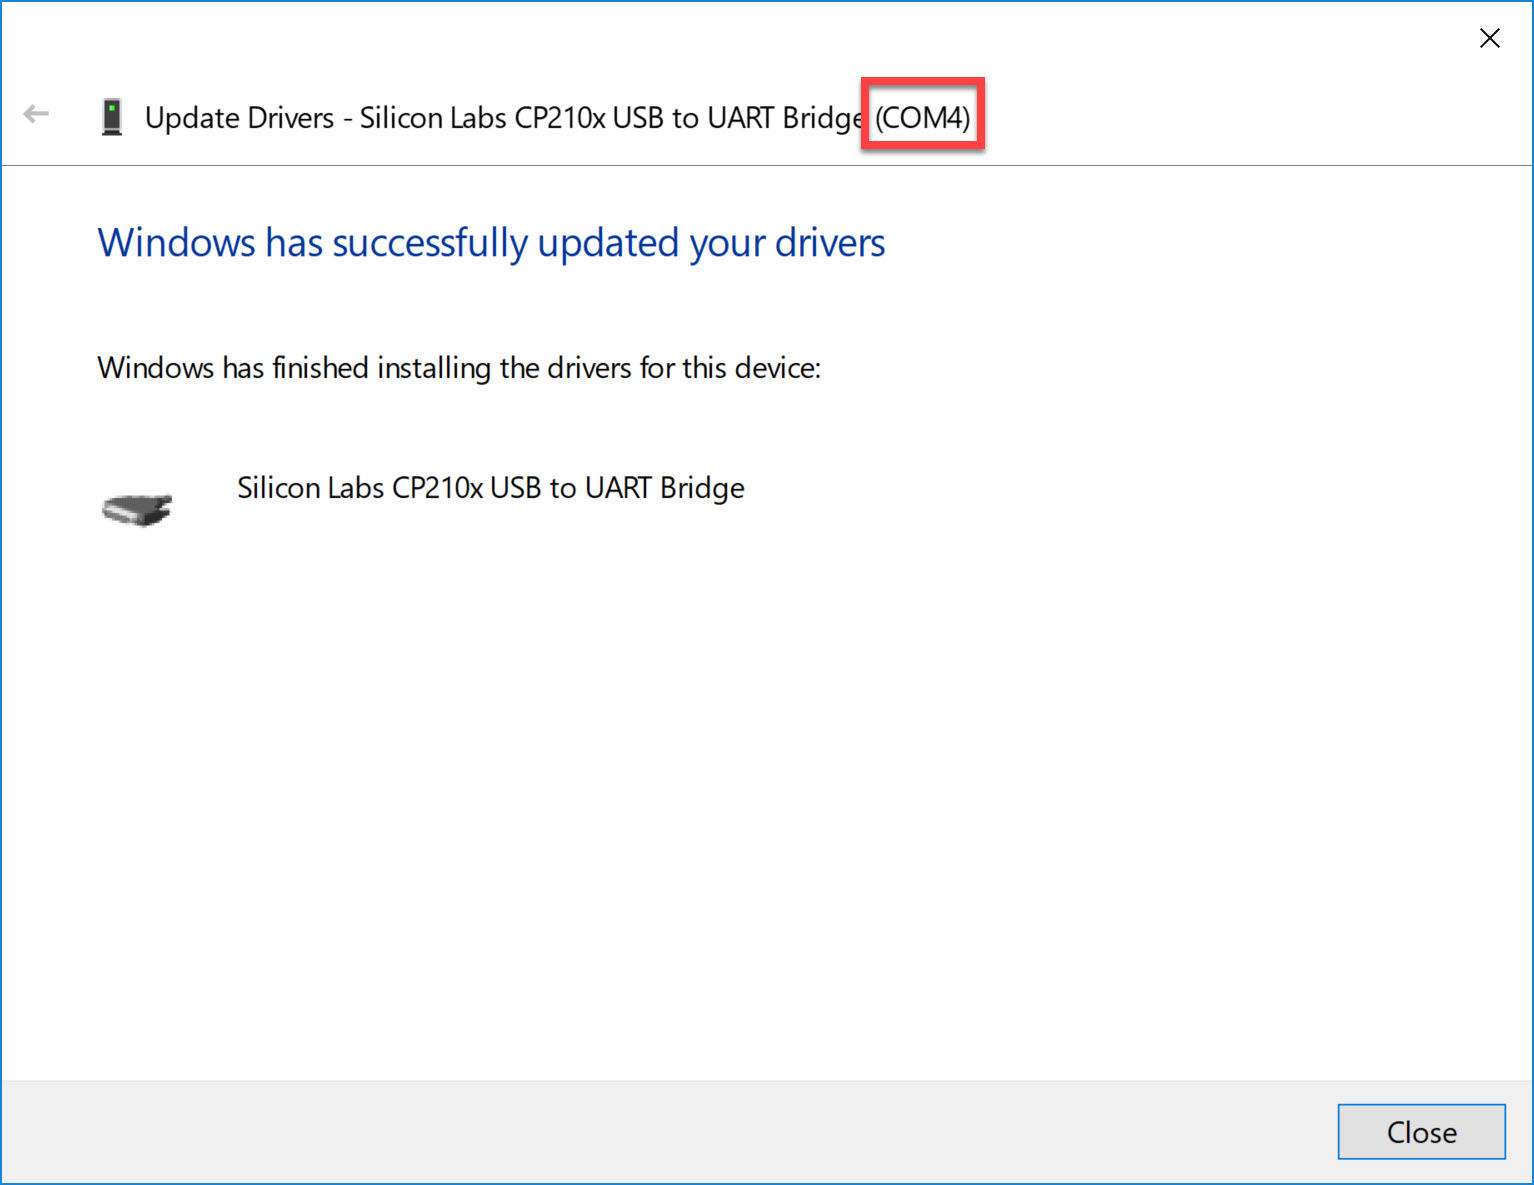
In my case, it’s COM4.
MicroPython Firmware
The ESP32 supports different firmwares. My personal favorite is MicroPython. I use Python for many things so it’s great that I can use it for the ESP32 as well.
MicroPython includes a small subset of the Python 3 standard library and is optimized to run on microcontrollers.
I downloaded the latest standard firmware (esp32-20190611-v1.11-44-g8b18cfede.bin) and saved it to my disk. To install the firmware, we need the esptool application. This tool allows us to communicate with the ROM bootloader of the ESP32.
We can install it with pip:
pip install esptoolOn Windows, this gets installed in the username folder in the following directory:
C:\Users\renemolenaar\AppData\Local\Programs\Python\Python37-32\ScriptsFirst, we need to erase the flash. We do this with the following command:
esptool.py.exe --chip esp32 -p com4 erase_flash
esptool.py v2.6
Serial port com4
Connecting.......
Chip is ESP32D0WDQ5 (revision 1)
Features: WiFi, BT, Dual Core, 240MHz, VRef calibration in efuse, Coding Scheme None
MAC: 24:0a:c4:c1:0f:50
Uploading stub...
Running stub...
Stub running...
Erasing flash (this may take a while)...
Chip erase completed successfully in 8.7s
Hard resetting via RTS pin...
Excellent. We now have an empty flash. Let’s install the firmware we just downloaded:
esptool.py.exe --chip esp32 -p com4 write_flash -z 0x1000 c:\users\renemolenaar\Downloads\esp32-20190611-v1.11-44-g8b18cfede.bin
esptool.py v2.6
Serial port com4
Connecting....
Chip is ESP32D0WDQ5 (revision 1)
Features: WiFi, BT, Dual Core, 240MHz, VRef calibration in efuse, Coding Scheme None
MAC: 24:0a:c4:c1:0f:50
Uploading stub...
Running stub...
Stub running...
Configuring flash size...
Auto-detected Flash size: 4MB
Compressed 1169696 bytes to 731891...
Wrote 1169696 bytes (731891 compressed) at 0x00001000 in 64.9 seconds (effective 144.2 kbit/s)...
Hash of data verified.

Leaving...
Hard resetting via RTS pin...
Our ESP32 now has the MicroPython firmware.
Python
Let’s see if we can connect to our ESP32. We can use Putty for this. Enter the COM port number we found in Device Manager and set the speed to 115200:
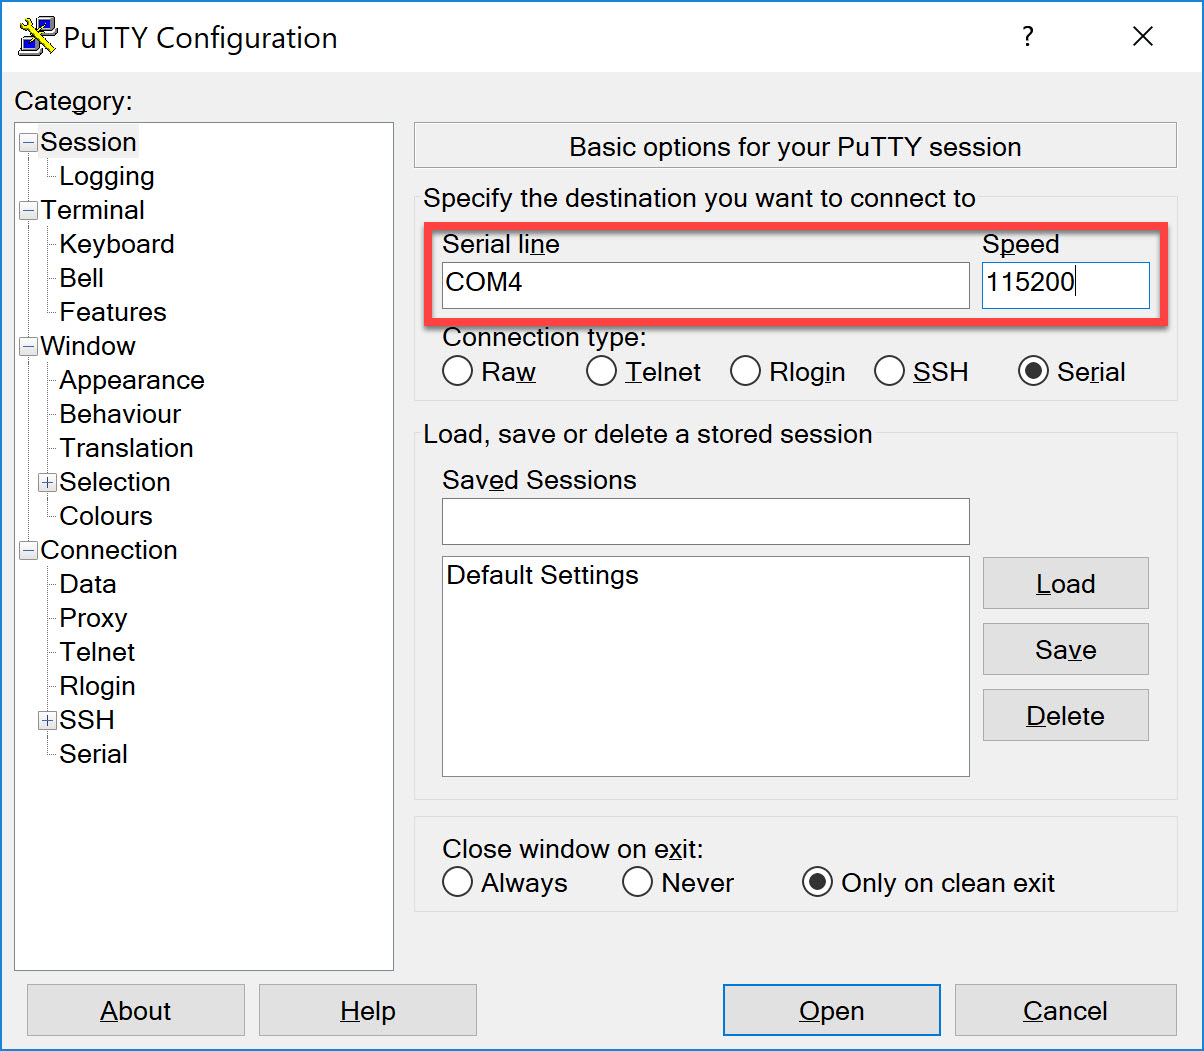
Once you open the console, you see the following prompt:
>>>Awesome. We now have access to Python on our ESP32!
Wireless
Before we can connect our ESP32 “thing” to the Internet, we need connectivity. I’ll use the Wi-Fi chip for this. First we need to activate the Wi-Fi chip:
>>> sta_if = network.WLAN(network.STA_IF)
I (268050) wifi: wifi driver task: 3ffe2d70, prio:23, stack:3584, core=0
I (285637) wifi: wifi firmware version: 38e2484
I (285637) wifi: config NVS flash: enabled
I (285637) wifi: config nano formating: disabled
I (285637) system_api: Base MAC address is not set, read default base MAC address from BLK0 of EFUSE
I (285647) system_api: Base MAC address is not set, read default base MAC address from BLK0 of EFUSE
I (285677) wifi: Init dynamic tx buffer num: 32
I (285677) wifi: Init data frame dynamic rx buffer num: 32
I (285677) wifi: Init management frame dynamic rx buffer num: 32
I (285687) wifi: Init static rx buffer size: 1600
I (285687) wifi: Init static rx buffer num: 10
I (285697) wifi: Init dynamic rx buffer num: 32
You can verify whether the interface is active or not:

From where we can get the device to practice and whats the cost of device , currently I am in Saudia Arabia
Hello Muhammad
If you do a quick search online, you will see that the device is available on many sites including eBay. I’m not sure what the shipping capabilities are for each of these retailers for Saudi Arabia, but you will have to look at the policies of each provider.
I hope this has been helpful!
Laz
Hello Vic,
In this example, technically, you only need these two files:
You could use the IoT root CA certificates to verify that you are communicating with the actual AWS IoT servers, and some server impersonating them. In this example, I didn’t.
Rene
Hi Christian,
Did you also try the one I used?
(esp32-20190611-v1.11-44-g8b18cfede.bin)
Just to make sure it’s a software issue, not a hardware issue.
It is possible to convert certificate types. You could try to convert the AWS IOT X.509 certificates to DER:
You can convert any certificate with
opensslbut if you are trying this in a lab and want a more convenient solution, there are online GUI converters.Rene
Hello Imran
Thanks for sharing that! It’s so important for the community to share information that will make it easier for others to implement the lessons.
Thanks again!
Laz