In this lesson, I’ll show you how to configure your own Cisco Terminal Server. This is a great solution for your home or remote lab when you want to have access to the console of multiple devices. There are a couple of hardware products that we can use for this. Below is an example of the Cisco 2511-RJ:
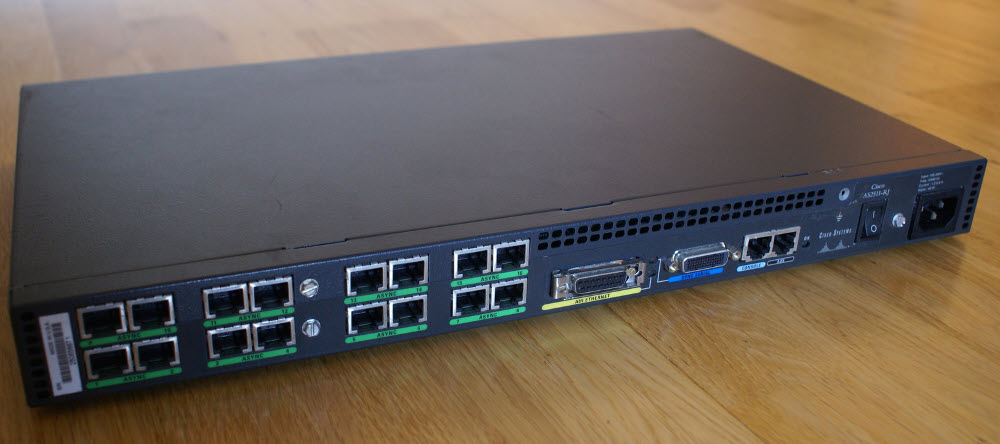
This router has 16 built-in connectors that can be used for console access. This is a great “all-in-one” router to use as a terminal server but they can be expensive sometimes. Another option is the NM16-A or NM32-A Async Network Module. They look like this:
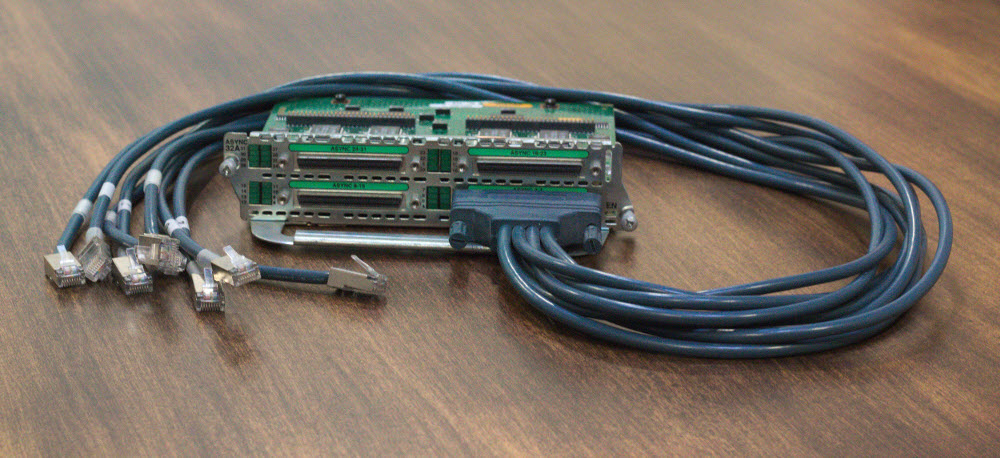
You can use this module in a router, and it comes with a convenient cable to connect to your console ports. Whatever you pick, the configuration will be pretty much the same.
I’ll walk you through the configuration, and I’ll explain why you require certain commands.
Configuration
Making a connection from the router to one of the console ports is called reverse telnet. In order to do this, we require an IP address to connect to. We can do this by creating a loopback interface with an IP address on it:
Router(config)#interface Loopback 0
Router(config-if)#ip address 10.10.10.10 255.255.255.0
Just pick any IP address you like, it’s only used locally on your router.
Your terminal server-to-be comes with some lines that refer to the ports that it has. You can use the show line command to see what line numbers it uses:
Router#show line
   Tty Typ     Tx/Rx    A Modem  Roty AccO AccI   Uses   Noise  Overruns   Int
     0 CTY              -    -      -    -    -      0       0     0/0       -
     1 TTY   9600/9600  -    -      -    -    -      0       0     0/0       -
     2 TTY   9600/9600  -    -      -    -    -      0       0     0/0       -
     3 TTY   9600/9600  -    -      -    -    -      0       0     0/0       -
     4 TTY   9600/9600  -    -      -    -    -      0       0     0/0       -
     5 TTY   9600/9600  -    -      -    -    -      0       0     0/0       -
     6 TTY   9600/9600  -    -      -    -    -      0       0     0/0       -
     7 TTY   9600/9600  -    -      -    -    -      0       0     0/0       -
     8 TTY   9600/9600  -    -      -    -    -      0       0     0/0       -
     9 TTY   9600/9600  -    -      -    -    -      0       0     0/0       -
    10 TTY   9600/9600  -    -      -    -    -      0       0     0/0       -
    11 TTY   9600/9600  -    -      -    -    -      0       0     0/0       -
    12 TTY   9600/9600  -    -      -    -    -      0       0     0/0       -
    13 TTY   9600/9600  -    -      -    -    -      0       0     0/0       -
    14 TTY   9600/9600  -    -      -    -    -      0       0     0/0       -
    15 TTY   9600/9600  -    -      -    -    -      0       0     0/0       -
    16 TTY   9600/9600  -    -      -    -    -      0       0     0/0       -
    17 AUX   9600/9600  -    -      -    -    -      0       0     0/0       -
[output omitted]
My router (2511-RJ) has 16 ports which translate to TTY lines 1-16, you can see them above. To test our lines, we can telnet to our IP address on the loopback interface and specify the port number. The port number is 2000 + line number, so for line 1, I need to telnet to port 2001:
Router#telnet 10.10.10.10 2001
Trying 10.10.10.10, 2001 ... Open
This seems to be working, it says “Open” which means it is connected. You should be able to see the console of whatever device you are connected to now. If you want to return to your terminal server you need to press CTRL+SHIFT+6 and then X. This doesn’t kill the connection but puts it in the background, if you want to terminate it you’ll have to use the clear line command:
Router#clear line 1
[confirm]
 [OK]
Instead of typing these commands, we can use some shortcuts. We also require these for our menu:
Router(config)#ip host R1 2001 10.10.10.10
Router(config)#alias exec clr1 clear line 1
The ip host command tells the router that whenever we type “R1,” it has to telnet to 10.10.10.10 port 2001. The alias exec command means that whenever we type “clr1” it has to perform “clear line 1“.
Here’s a demonstration of these two commands:
Router#R1
Translating "R1"
Trying R1 (10.10.10.10, 2001)... Open
We are now connected to R1, and after doing SHIFT+CTRL+6, X to return to the router we’ll clear the line:
Router#clr1
[confirm]
 [OK]
So far, so good. Now it’s time to create a menu that shows these options to our lab users. I’ll add some commands for R2 and R3, so we’ll have a nice menu with three routers to connect to:
Router(config)#ip host R2 2002 10.10.10.10
Router(config)#ip host R3 2003 10.10.10.10
Router(config)#alias exec clr2 clear line 2
Router(config)#alias exec clr3 clear line 3
Now it’s time to configure the menu:
Router(config)#
menu MYMENU title ^
************************    TERMINAL SERVER   **************************
************************         MENU         **************************
      To exit ssh session and return to the menu press
   <CTRL>+<SHFT>+<6> then <X>.  To clear a connection to begin
 a new console session type cls# (where # = the menu item number)
               Type "exit" to return to main menu.
*****************************************************************
  ITEM#        DEVICE NAME
-----------------------------------------------------------------^C
menu MYMENU prompt ^ Please enter your selection: ^C
menu MYMENU text 1 R1
menu MYMENU command 1 resume R1 /connect telnet R1
menu MYMENU text 2 R2
menu MYMENU command 2 resume R2 /connect telnet R2
menu MYMENU text 3 R3
menu MYMENU command 3 resume R3 /connect telnet R3
menu MYMENU text 4 Exit
menu MYMENU command 4 hangup
menu MYMENU command cls1 clr1
menu MYMENU command cls2 clr2
menu MYMENU command cls3 clr3
The menu is called “MYMENU” and first, it will show the user an introduction to how to use the menu. It will then show an option to connect to R1, R2, or R3, quit the menu or clear the lines.
We can test this menu by running it from the console:

Very good work Rene.
thank you
Good timing! Do you recommend this router over the Digi cm32 ??
Hi Frank,
A Digi CM32 is a great device as well, also pretty cheap on Ebay.
Rene
Your description thoroghly in any particular topic is Awesome.
Waiting for your next post.
Thank you.
Thank you for your kind words! Glad to hear you enjoy my work.