Lesson Contents
We used the CLI to configure all the devices in our Cisco SD-WAN controllers installation and vEdge onboarding lessons. The CLI is a good way to configure something quickly. You configure one device, and with a bit of copy/pasting, it’s easy to configure other devices. The CLI, however, doesn’t scale. To configure a few devices it’s OK, but when you need to manage dozens of devices, it takes too much time and is prone to errors.
A scalable alternate is templates. Everything that you can configure through the CLI, you can also configure with templates. We create templates beforehand, and then you can apply them to one or as many devices as you like. When you start with templates, there is a learning curve, and it is time-consuming. However, once everything is set up, you will save time and reduce the chance of configuration errors.
The controllers and vEdge routers which we configured are currently in CLI mode. We are going to change this so that we can manage them with templates. When we create templates, we have to convert the existing CLI configurations to templates. If you don’t do this, some items in the configuration will be overwritten with default values.
Once the devices are managed through templates, you can’t configure them through the CLI anymore. However, you can still use show commands.
In this lesson, I’ll show you how to create and attach templates to our vEdge routers.
CLI Mode
Go to Configuration > Devices and look at the WAN Edge List and Controllers tabs. You’ll see that all devices are in CLI mode:
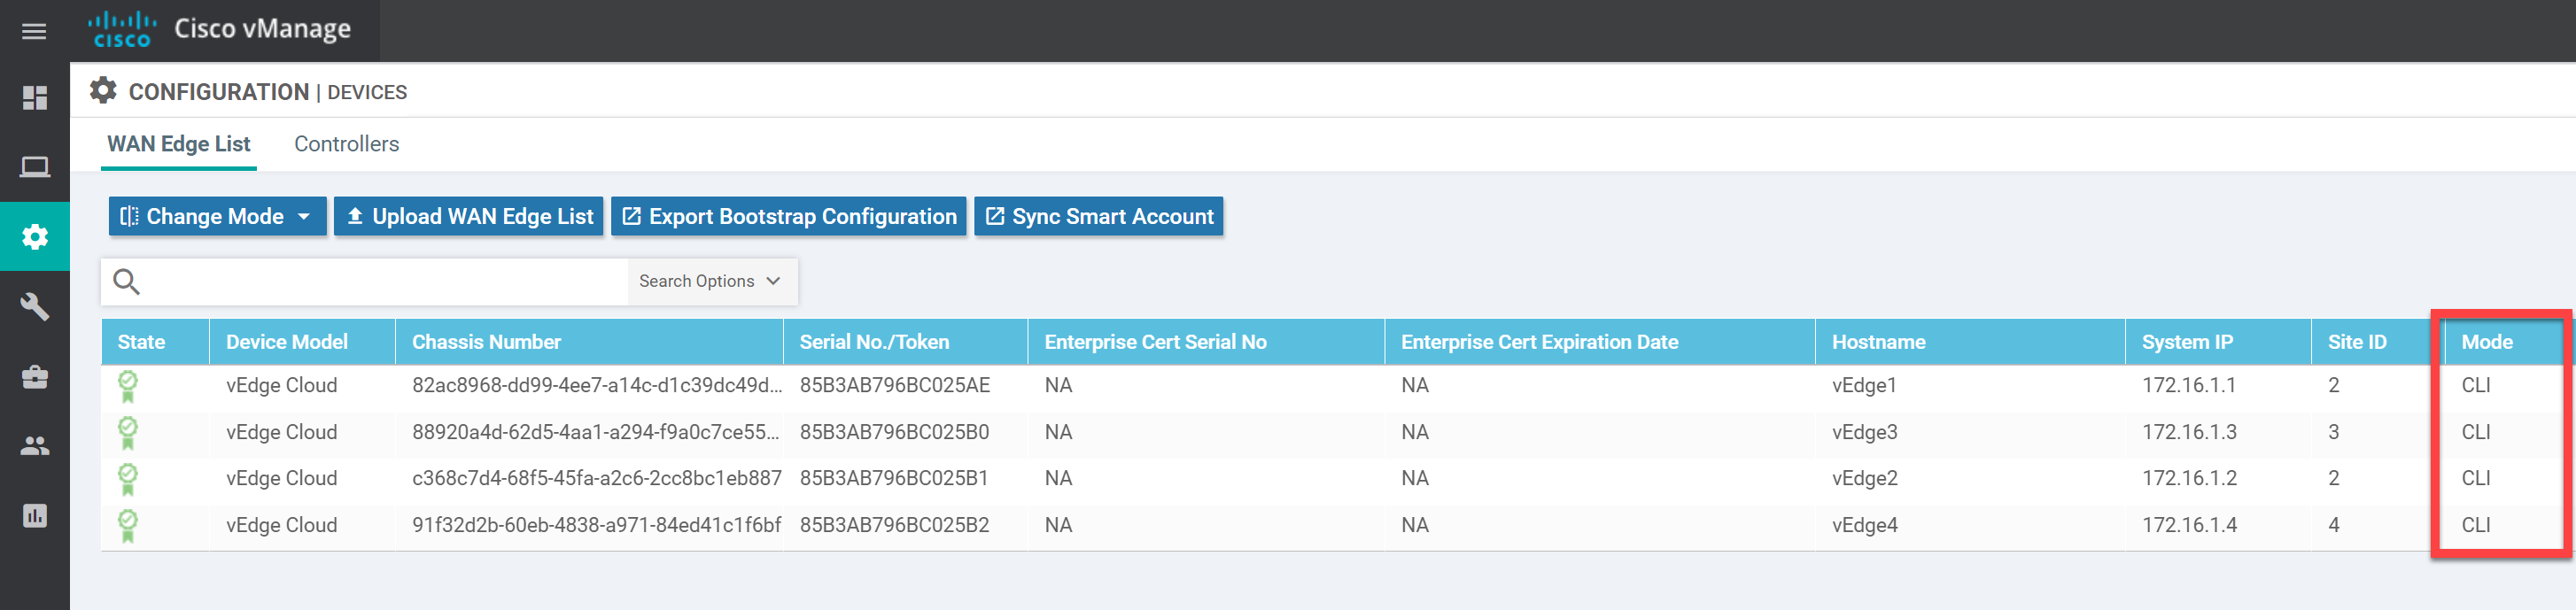
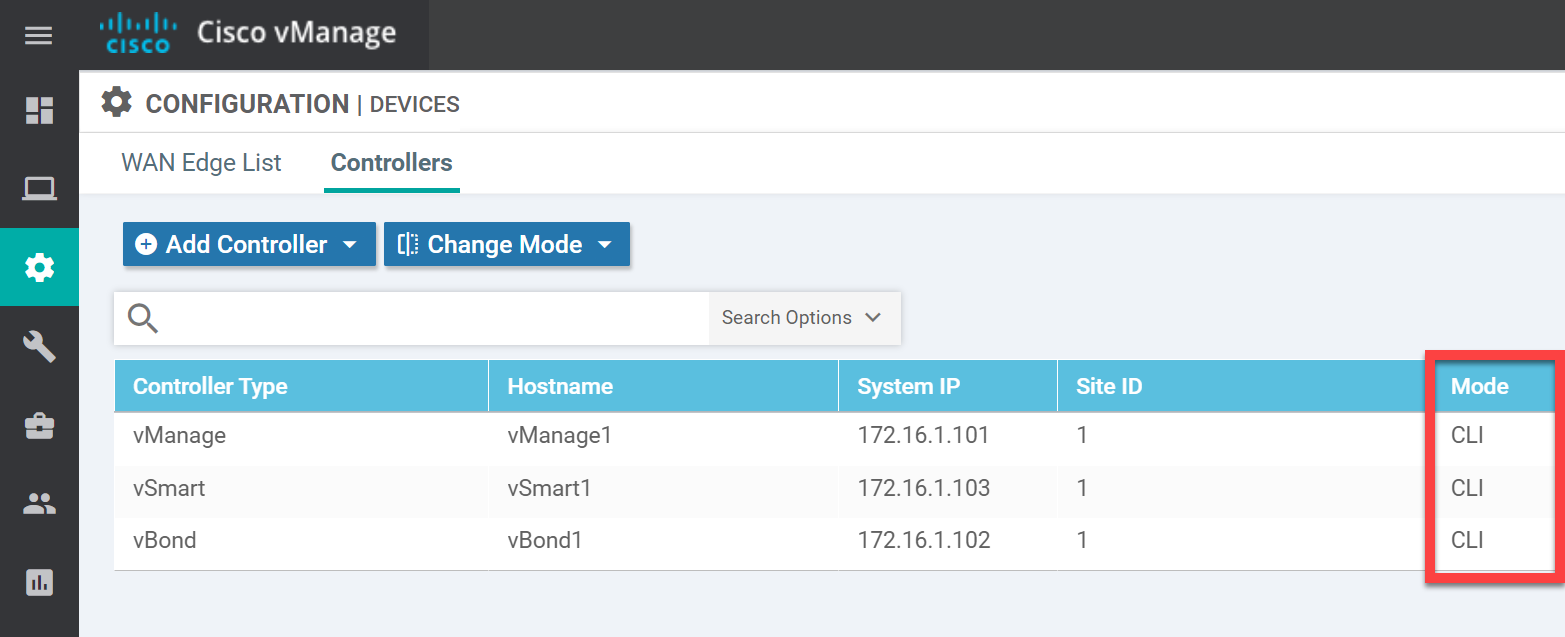
I’ll explain how to change the vEdge routers from CLI mode to vManage mode. When we finish this lesson, you’ll have to manage them through templates from then on and you can’t make any changes through the CLI anymore. But, of course, you can always detach templates from a device and switch back to CLI mode.
Templates
There are two template types:
- Device template: For each device “type”, we create a device template. This is the template that we attach to a device.
- Feature template: We create a feature template for each “feature” that you want to configure. Some examples are the system configuration, VPN, VPN interface, OSPF, EIGRP, BGP, AAA, etc.
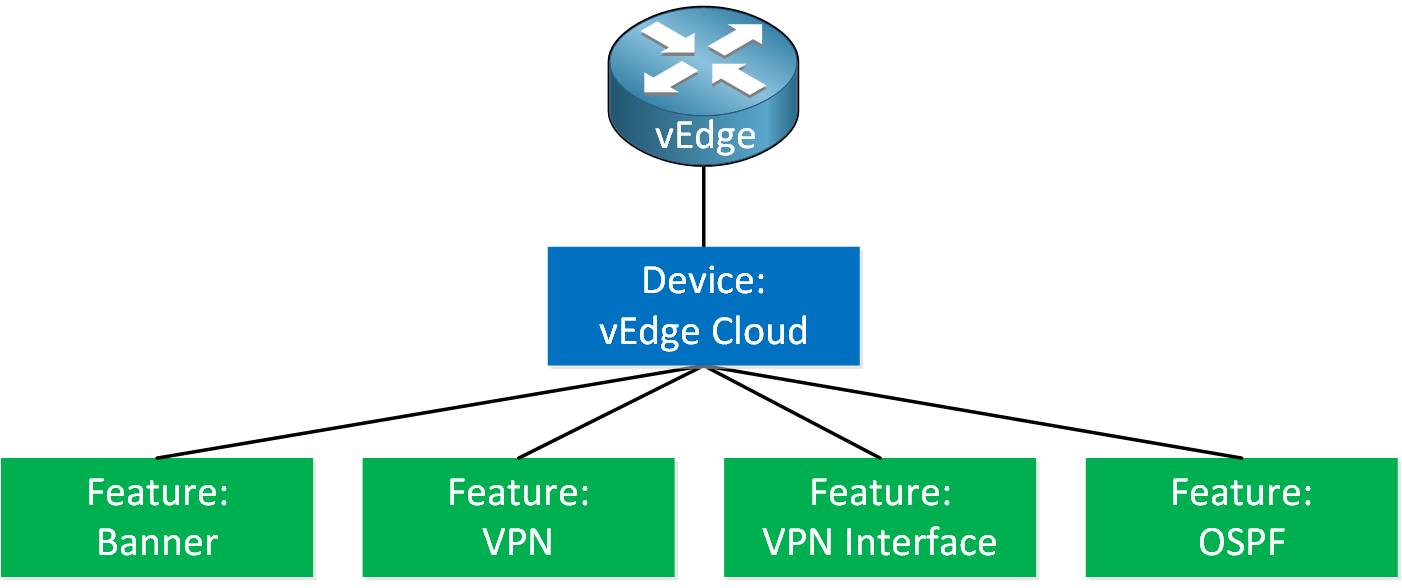
There is a “parent-child” relation between the device and feature templates. First, we create feature templates and attach them to a device template. We then attach the device template to a device, like a vEdge Cloud router.
Feature Templates
Let’s start with the feature templates. Below is the configuration of the vEdge routers which we created in the vEdge onboarding lesson.
system
host-name vEdge1
system-ip 172.16.1.1
site-id 2
organization-name nwl-lab-sdwan
vbond 10.1.0.2
!
vpn 0
interface ge0/0
ip address 10.65.91.1/24
ipv6 dhcp-client
tunnel-interface
encapsulation ipsec
color biz-internet
allow-service all
!
no shutdown
!
interface ge0/1
ip address 10.65.92.1/24
tunnel-interface
encapsulation ipsec
color public-internet
allow-service all
!
no shutdown
!
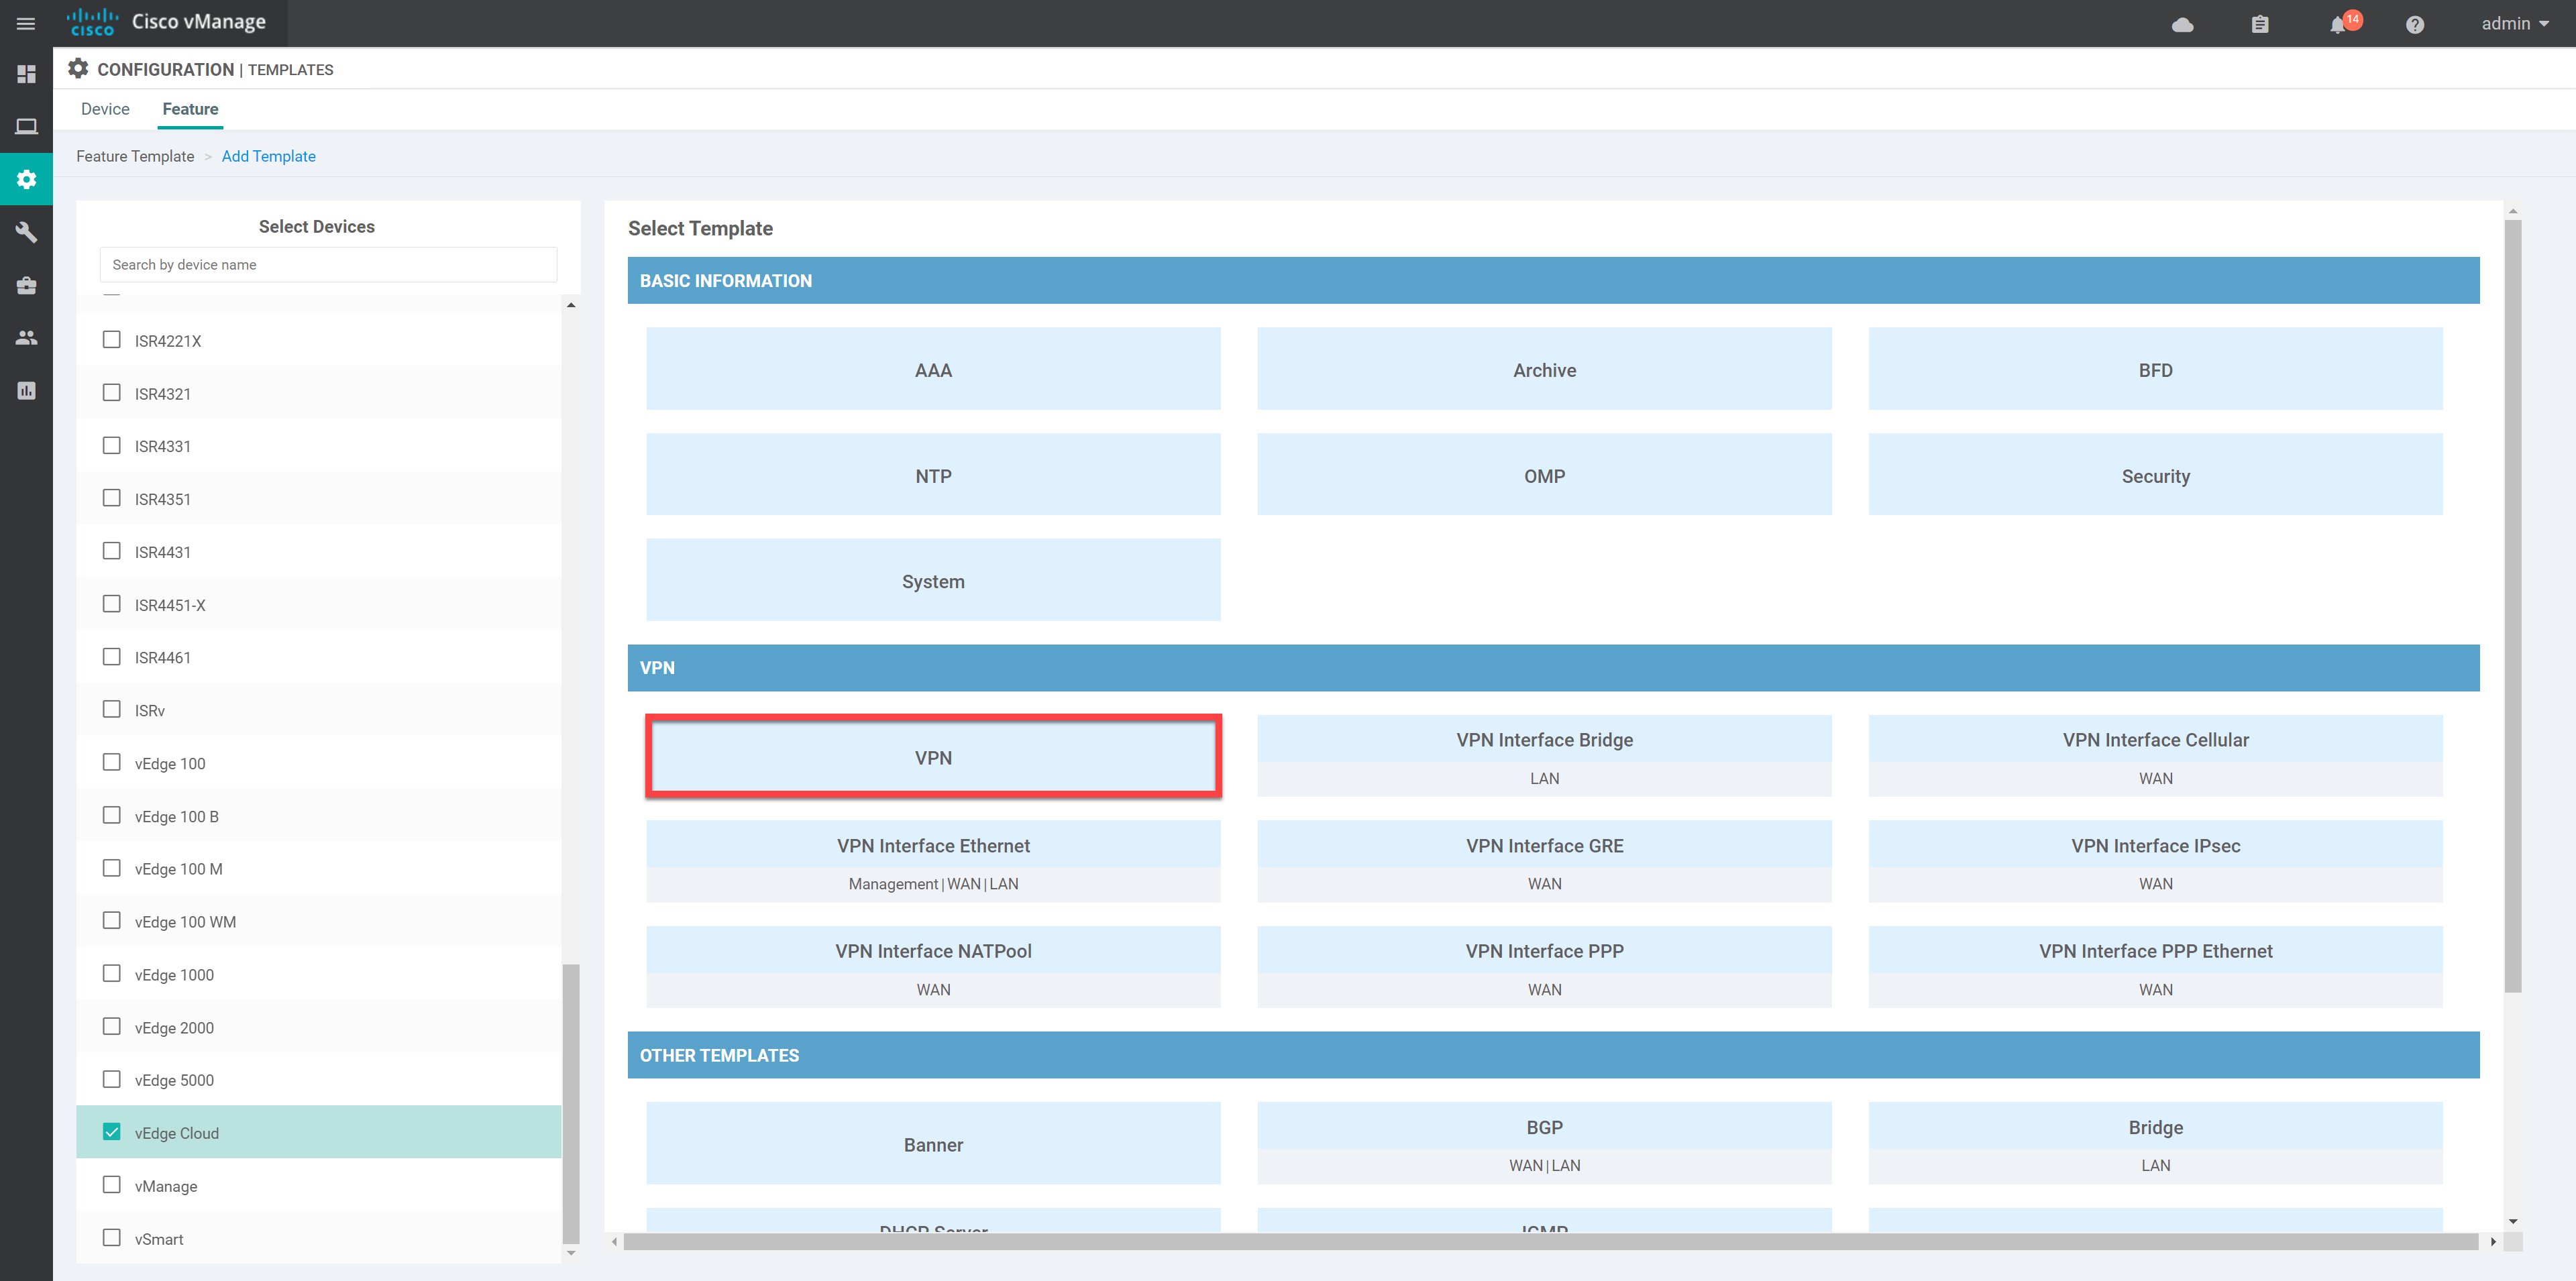
ip route 10.1.0.0/24 10.65.91.100We’ll convert the above configuration into multiple feature templates. Open Configuration > Templates > Feature and click on Add Template.
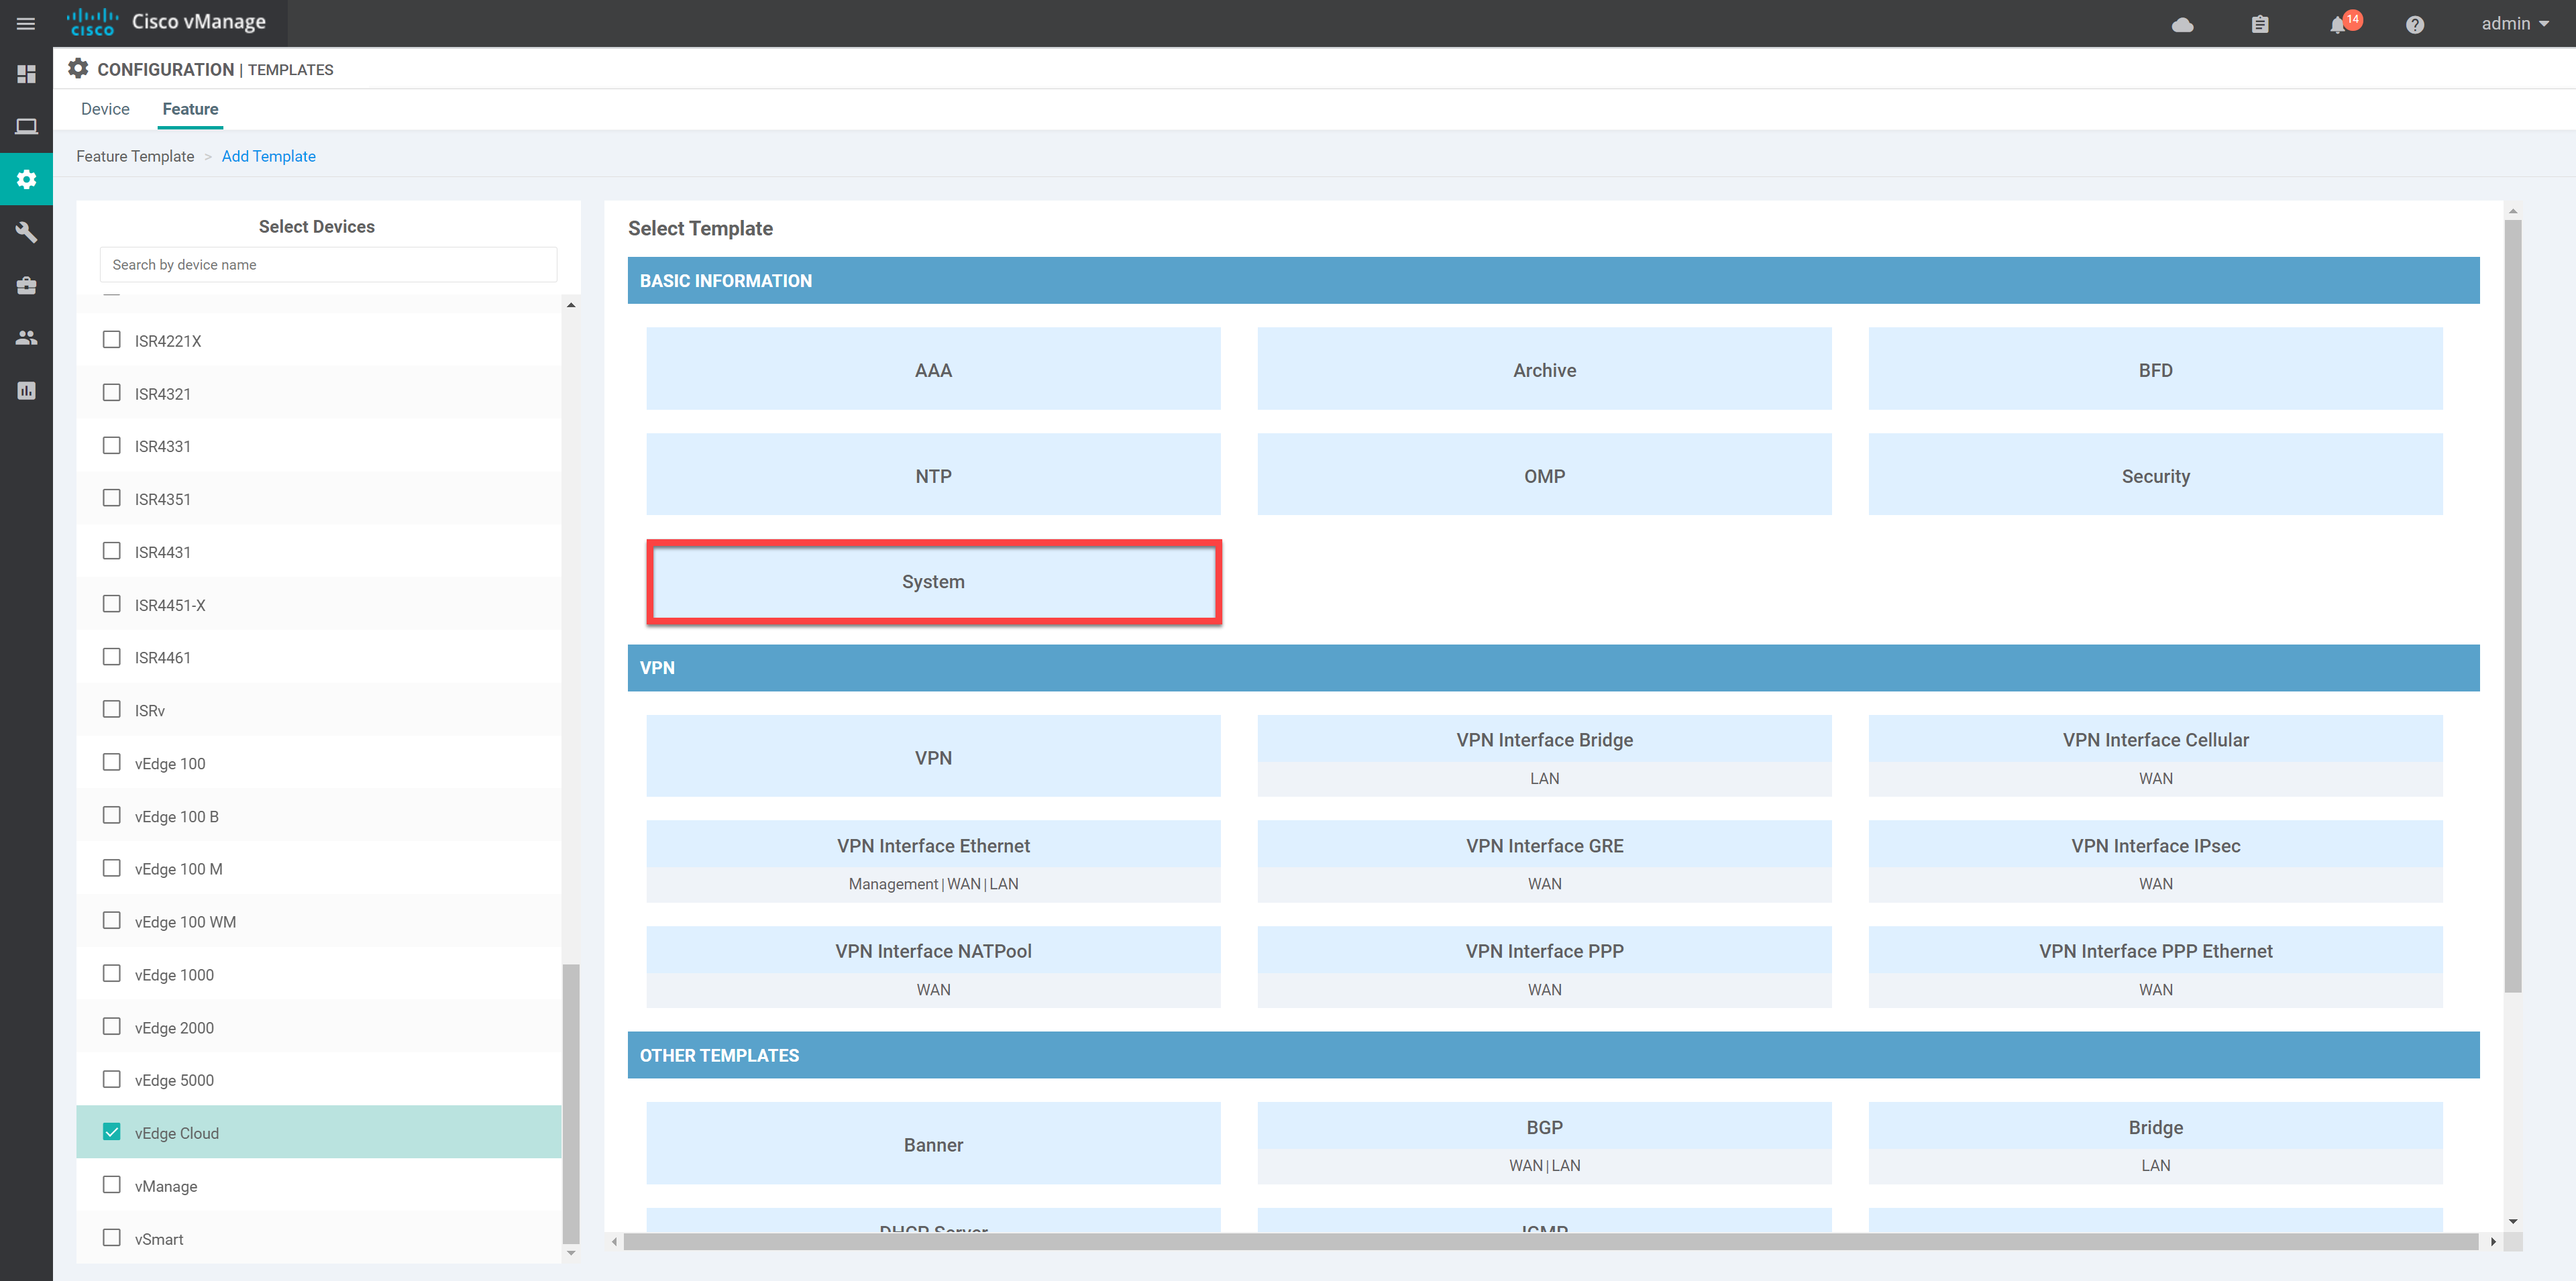
On the left side, choose the device type. I’m using vEdge Cloud:
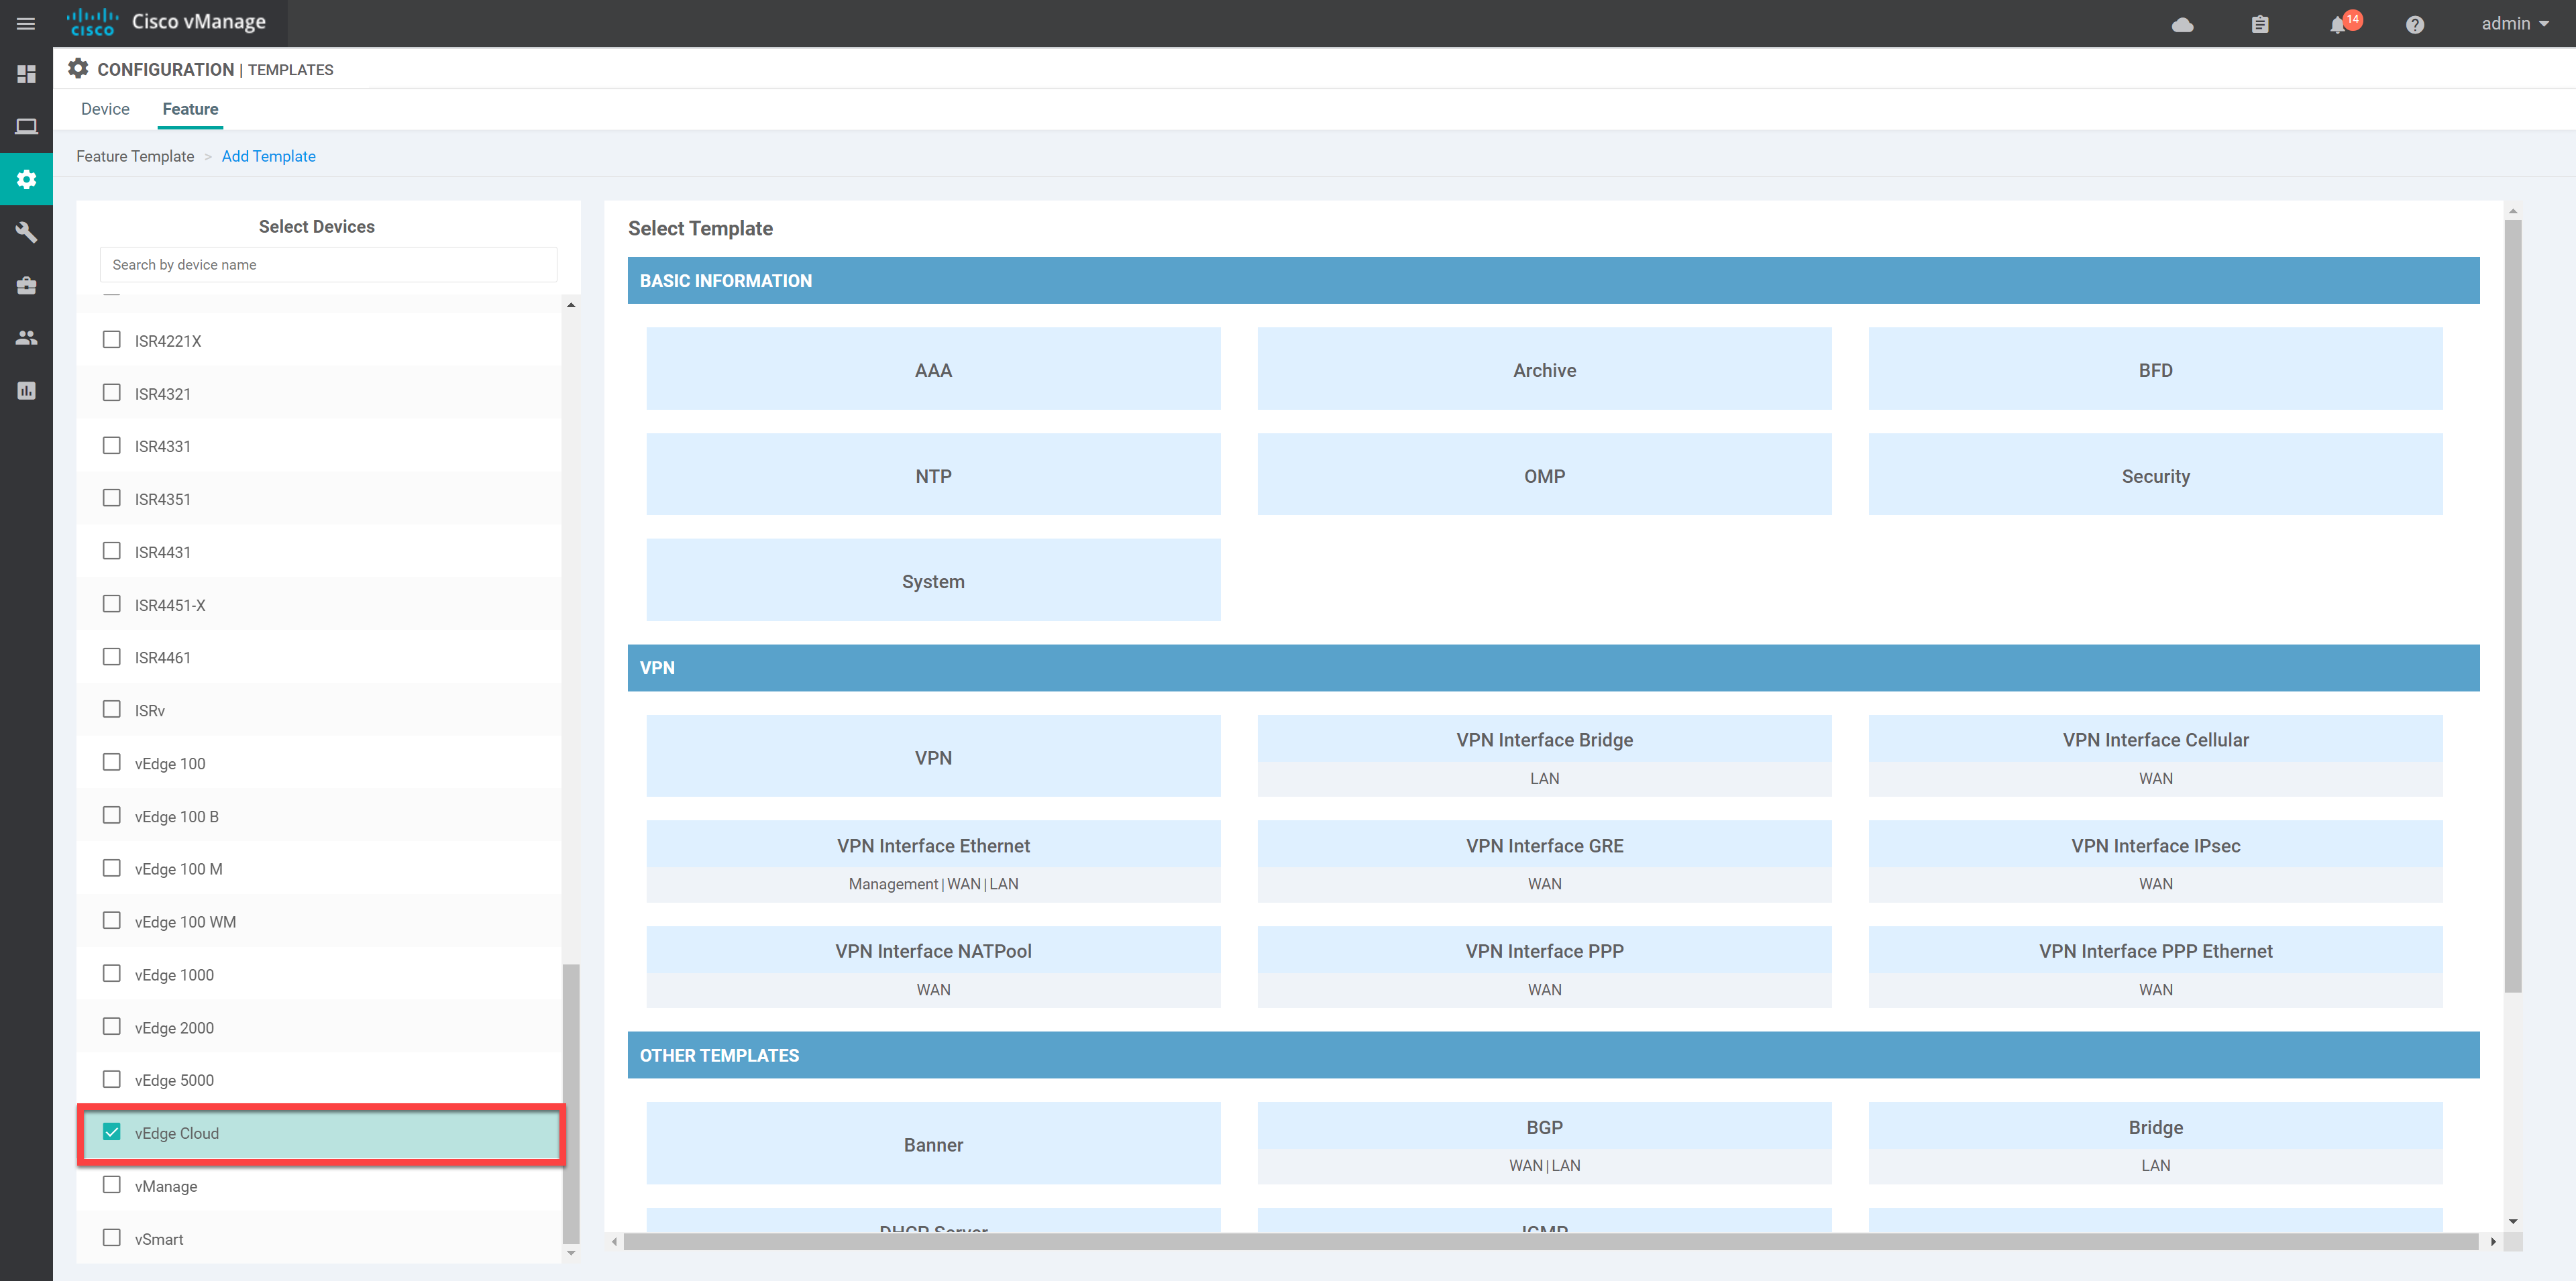
On the right side, choose System:
System
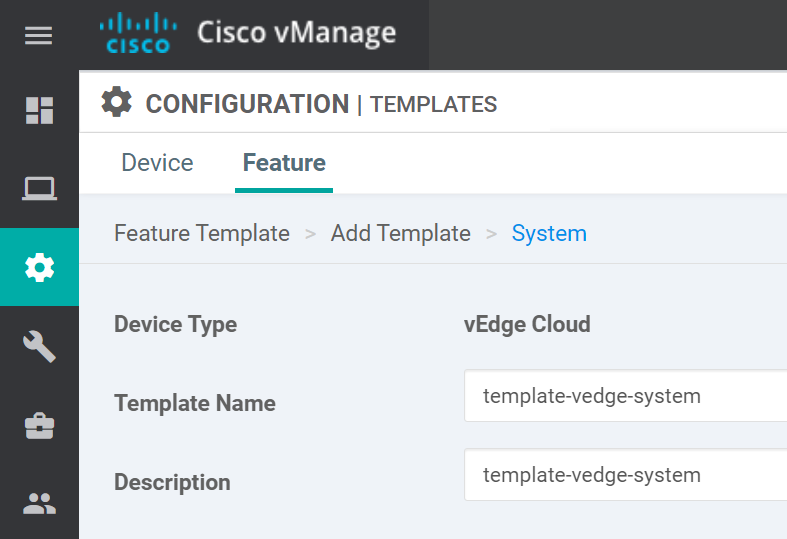
We can configure almost all the parameters that you find in the “system” part of the vEdge router configuration in the next screen. But, first, we give the template a name:
Below, there is a bunch of items we can configure, divided into four main sections:
- Basic Configuration
- GPS
- Tracker
- Advanced
Let’s take a look at the Basic Configuration Section:
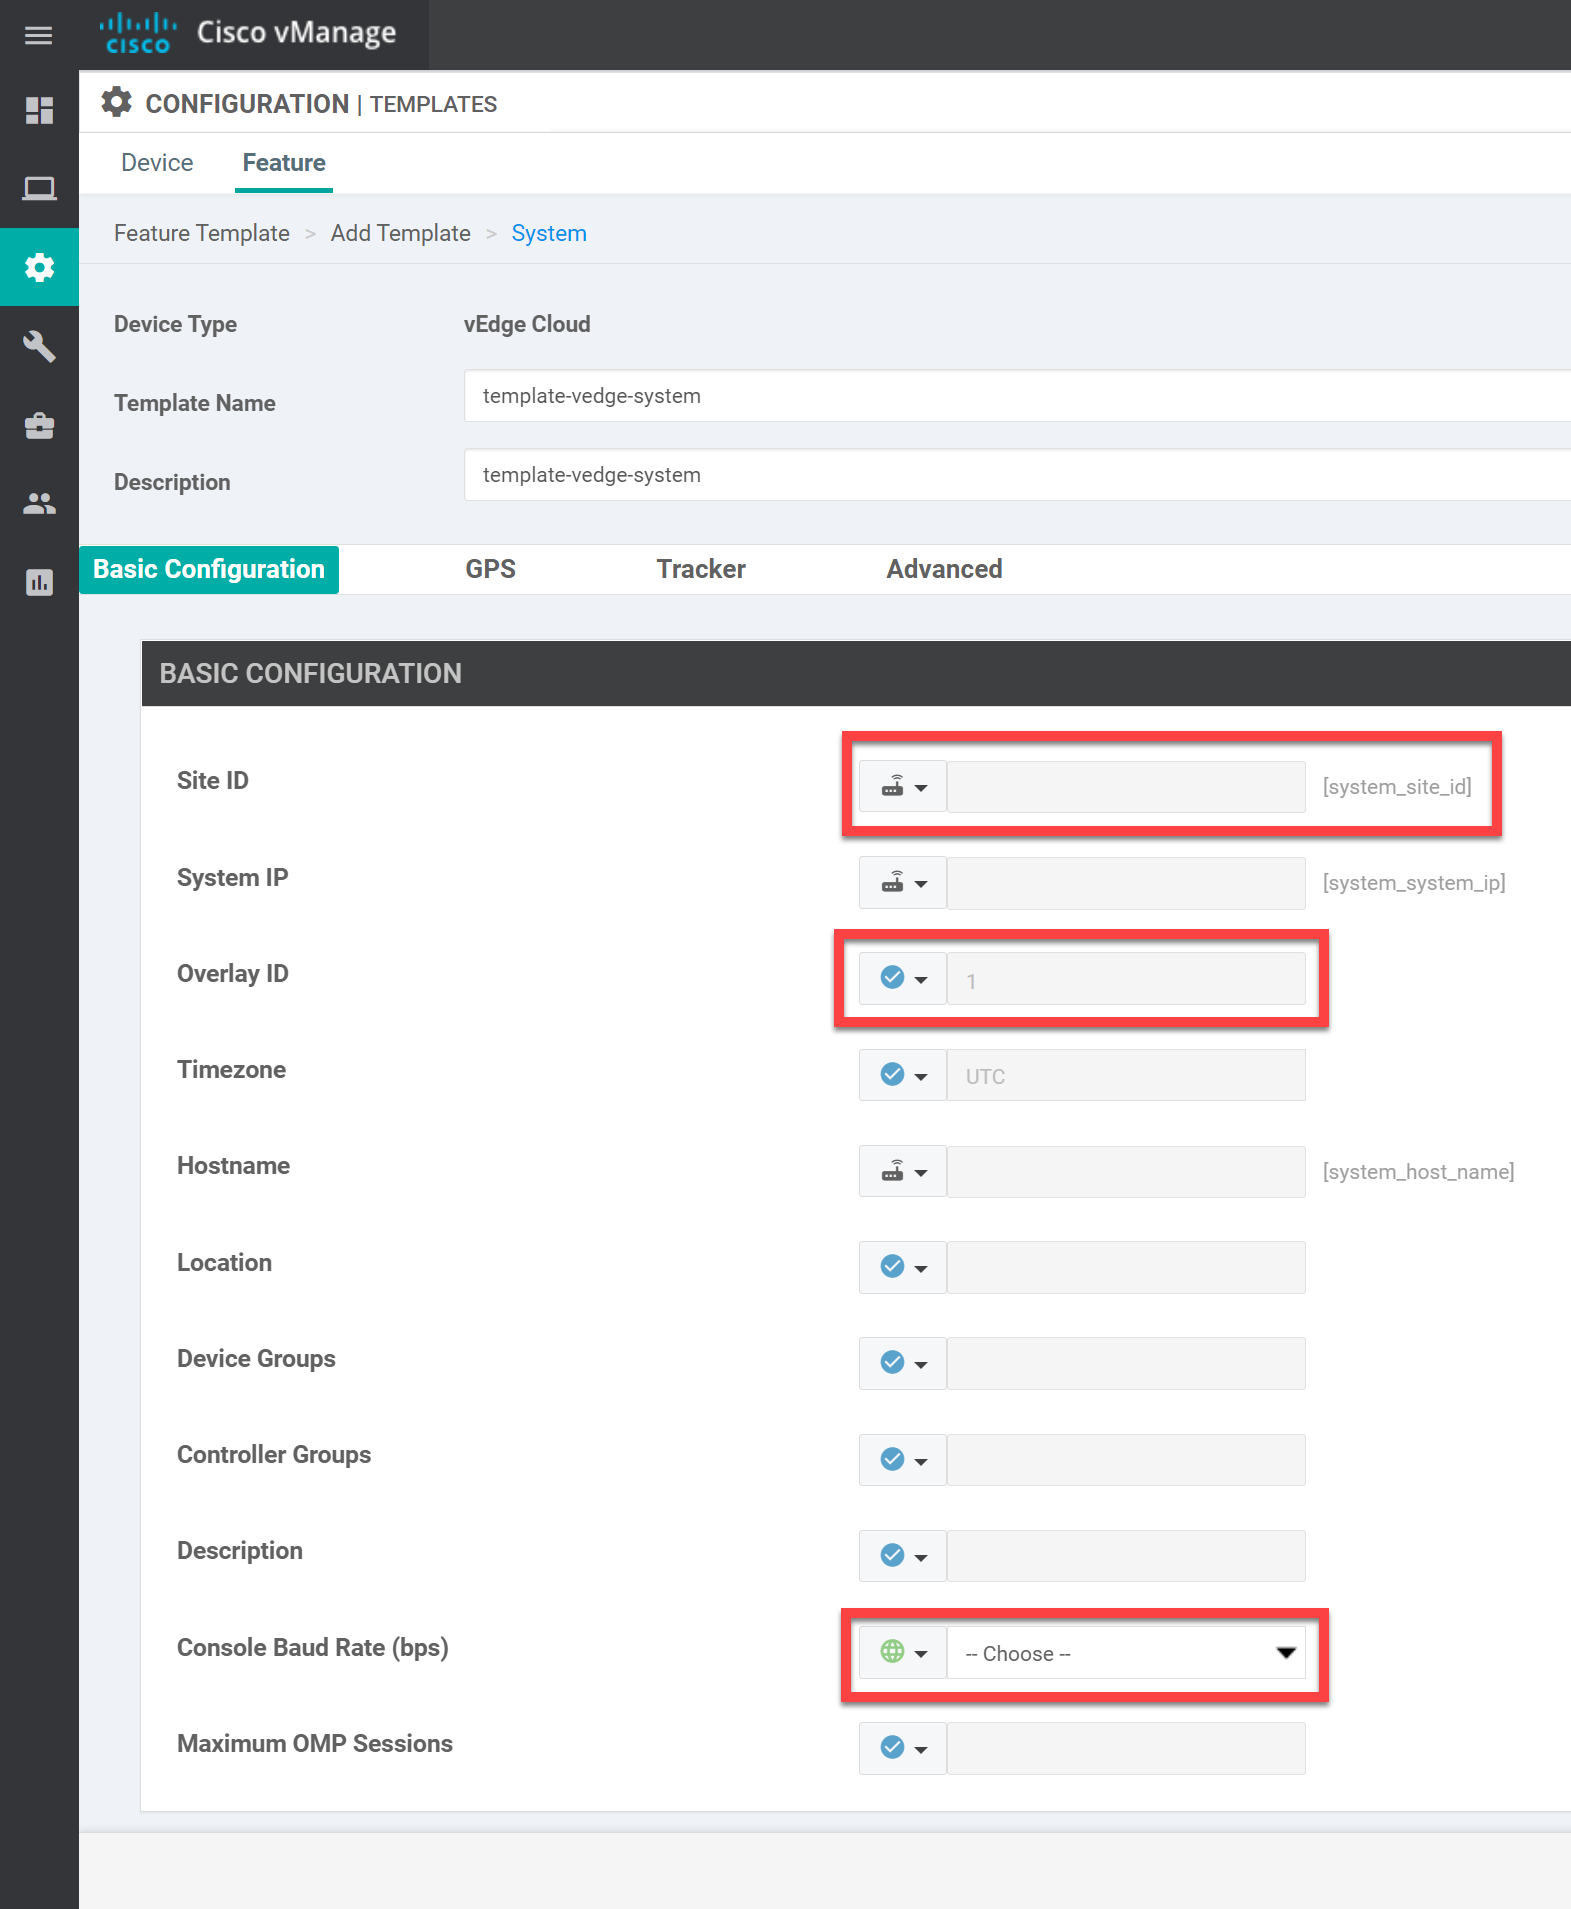
Above, you see some familiar items like the Site ID and System IP. For each item we want to configure, we have three options:
- Device Specific: (the icon with the radio)
- Default: (the blue checkmark)
- Global: (the green globe)
Let me explain these options.
Device Specific
We can use a feature template for multiple devices but some configuration items are specific to the device. For example:
- We want to use site ID 2 on two vEdge routers and site ID 3 on another vEdge router.
- The system IP is unique on every device.
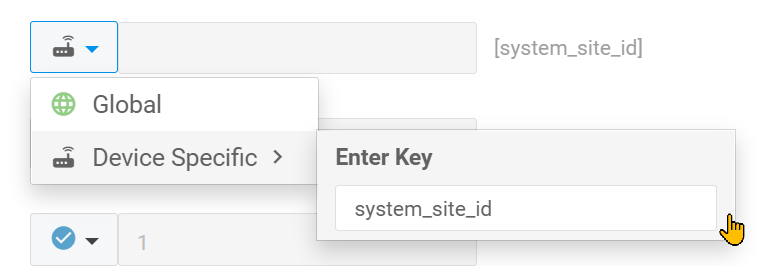
We can do this with the device-specific option, which uses variables:

In the screenshot above, you see these two items:
- [system_site_id]
- [system_system_ip]
These two are variables but are called “keys” in the template. Later, when we apply the template, you’ll see that we have to manually fill these fields. If you want, you can change the variable name:
Default
The default setting has some fields filled with default values. For example, the overlay ID or Timezone. Other fields are empty by default.

Global
The global values apply to all devices that you use this feature template for. One example is the Console Baud Rate:

If I use a global value for the Console Baud Rate, all devices using this feature template will have their baud rate set to 115200.
Let’s save this system feature template as it is. The default settings look good to me.
VPN0
Let’s configure the VPN0 interface. Create another feature template and select VPN:
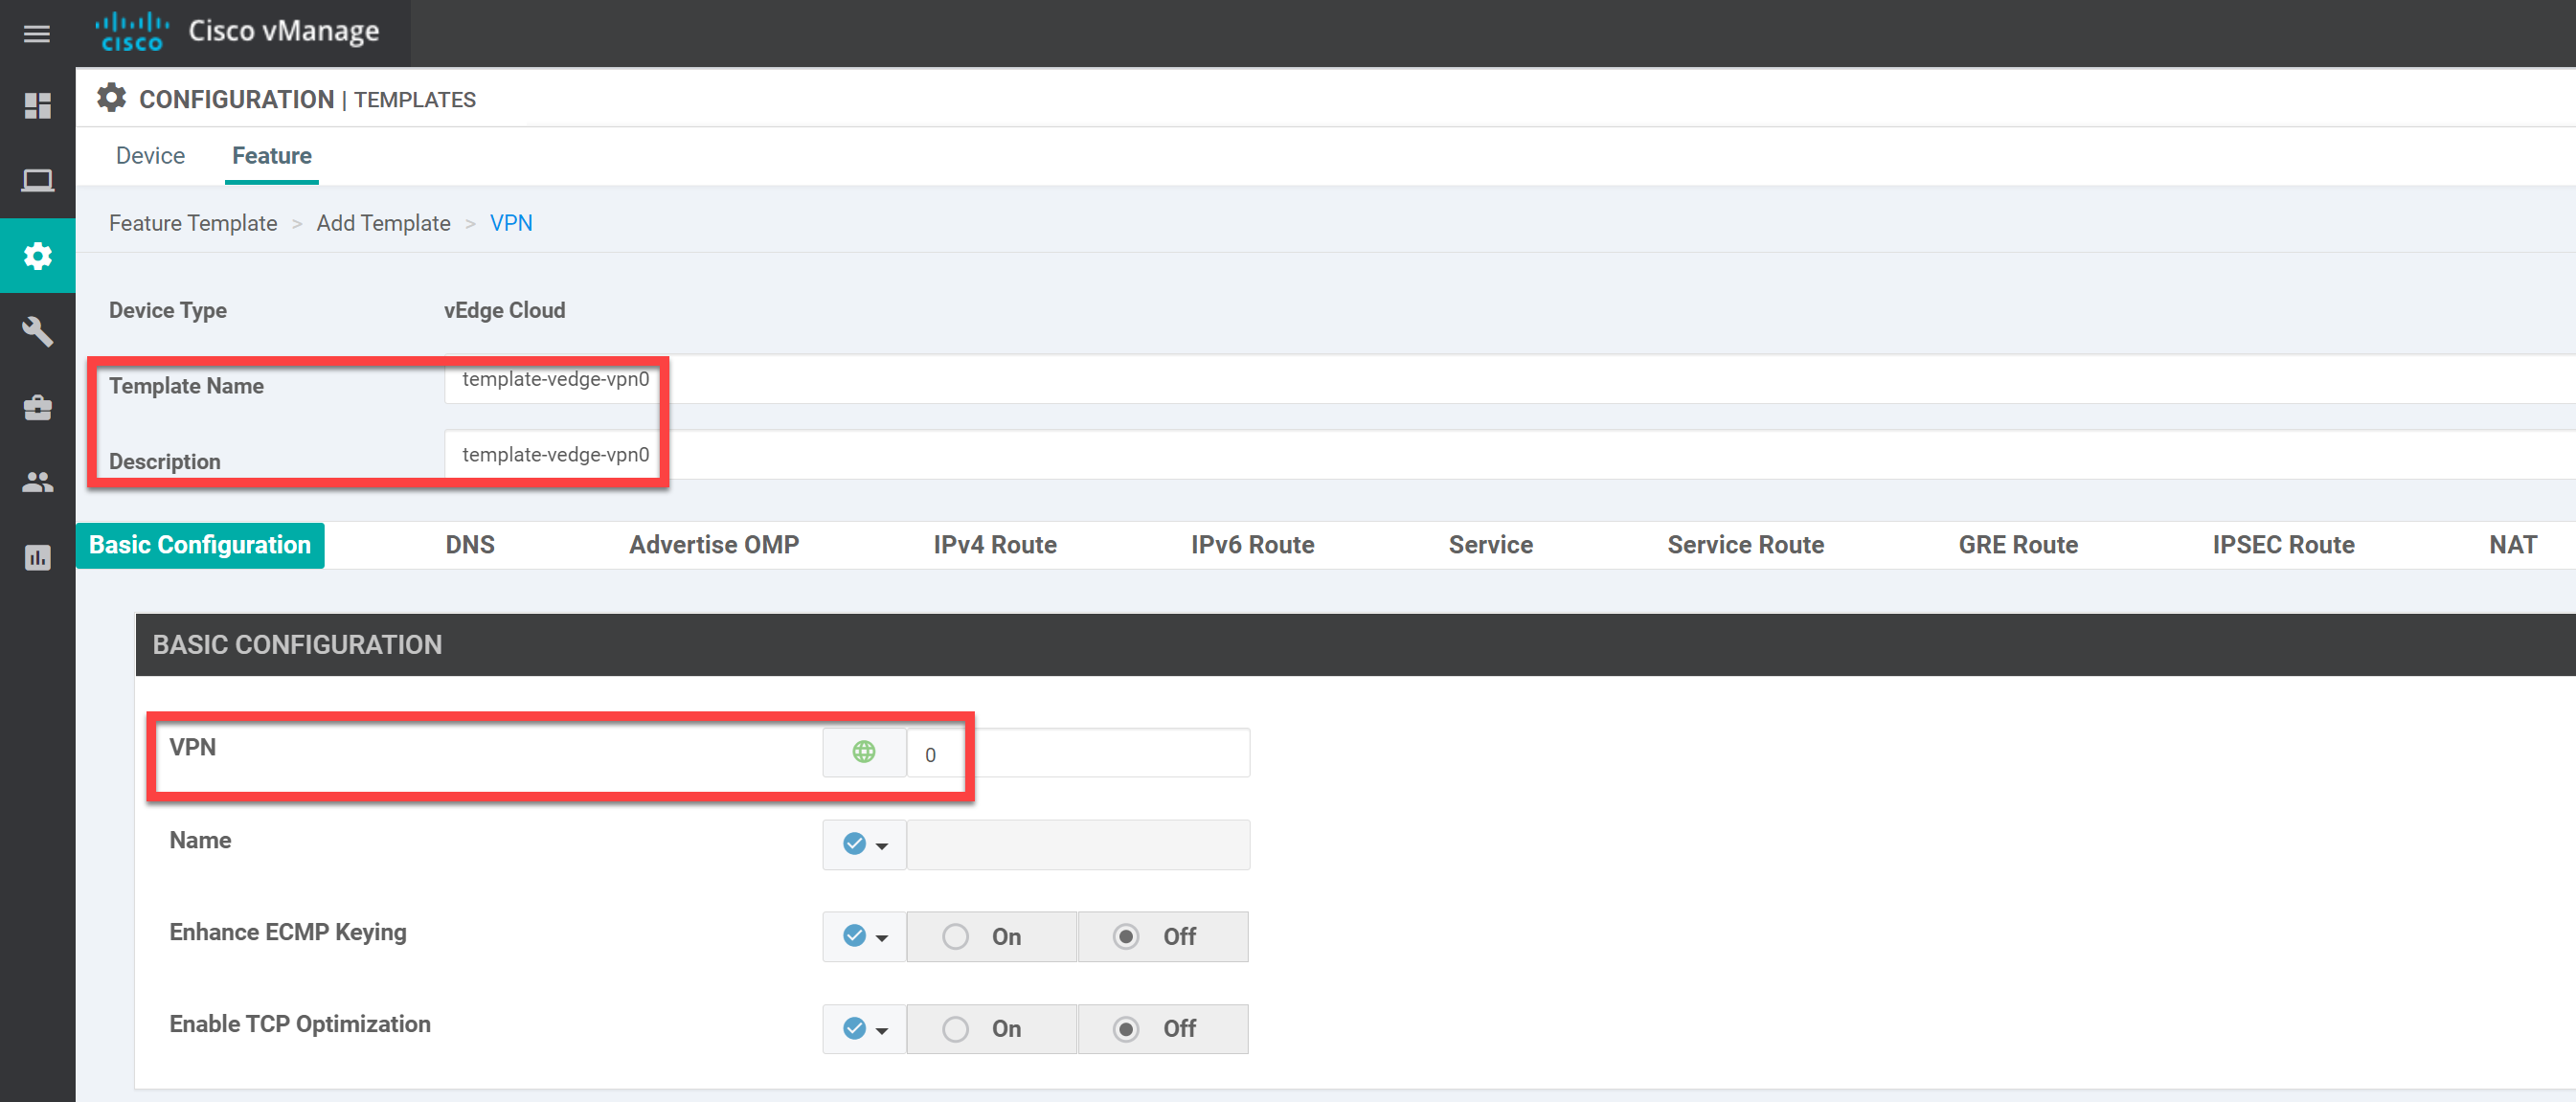
There are not many items that we have to configure here. I set the template name to “template-vedge-vpn0” and the default VPN is already set to 0:
I do need to add a static route. The default is global, which is fine because all my vEdge routes need this static route:
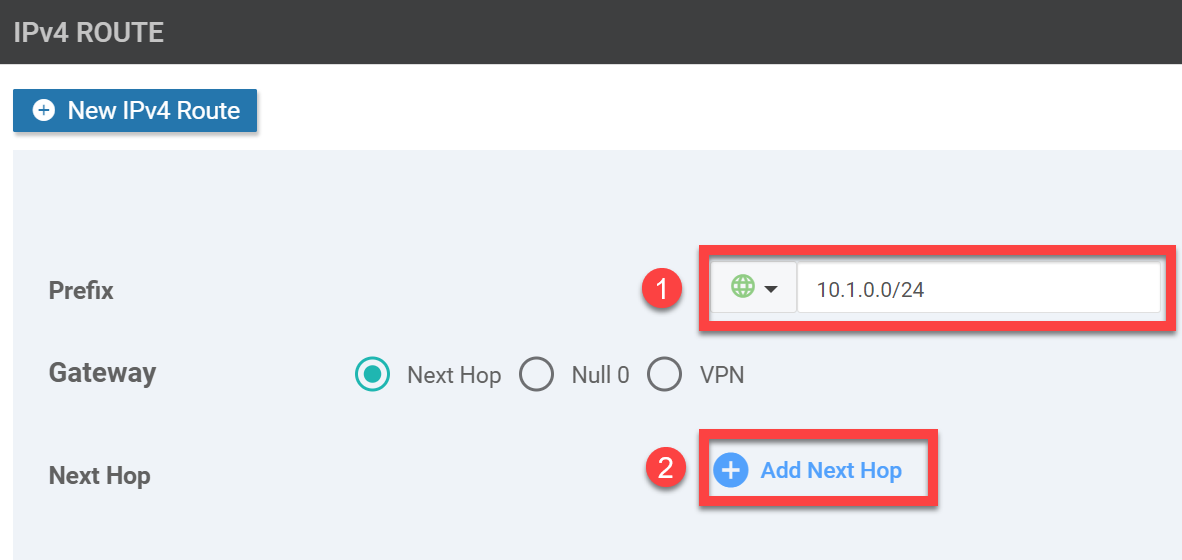
Click on + Add Next Hop and then once more on Add Next Hop:
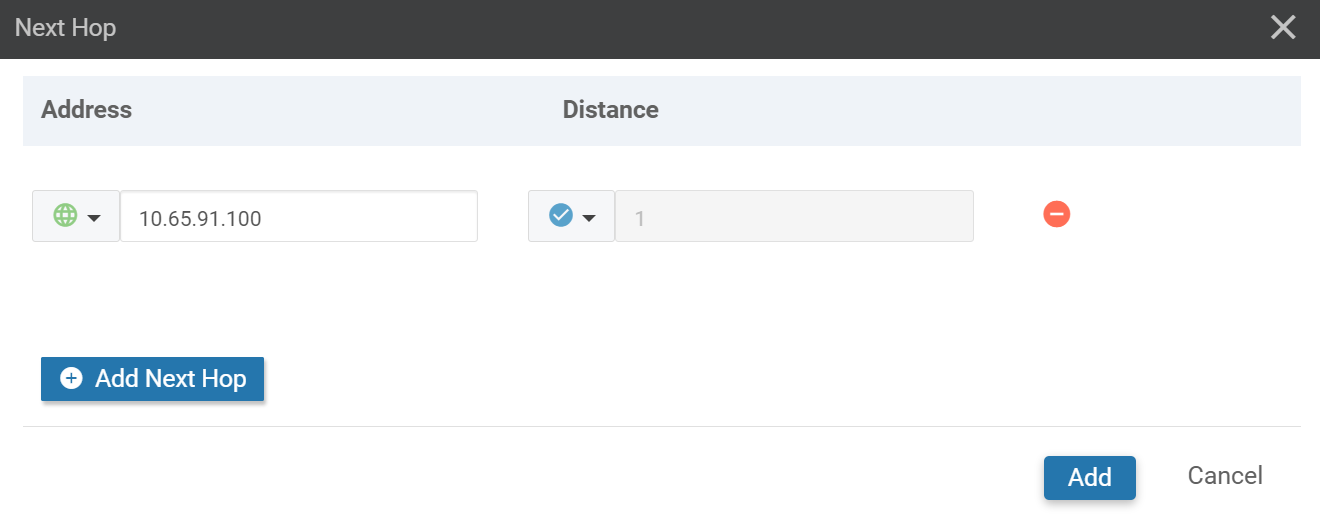
The next hop is also a global value. That’s fine by me because the next hop is also the same for all my vEdge routers. Click on Add to continue. You’ll see this overview:
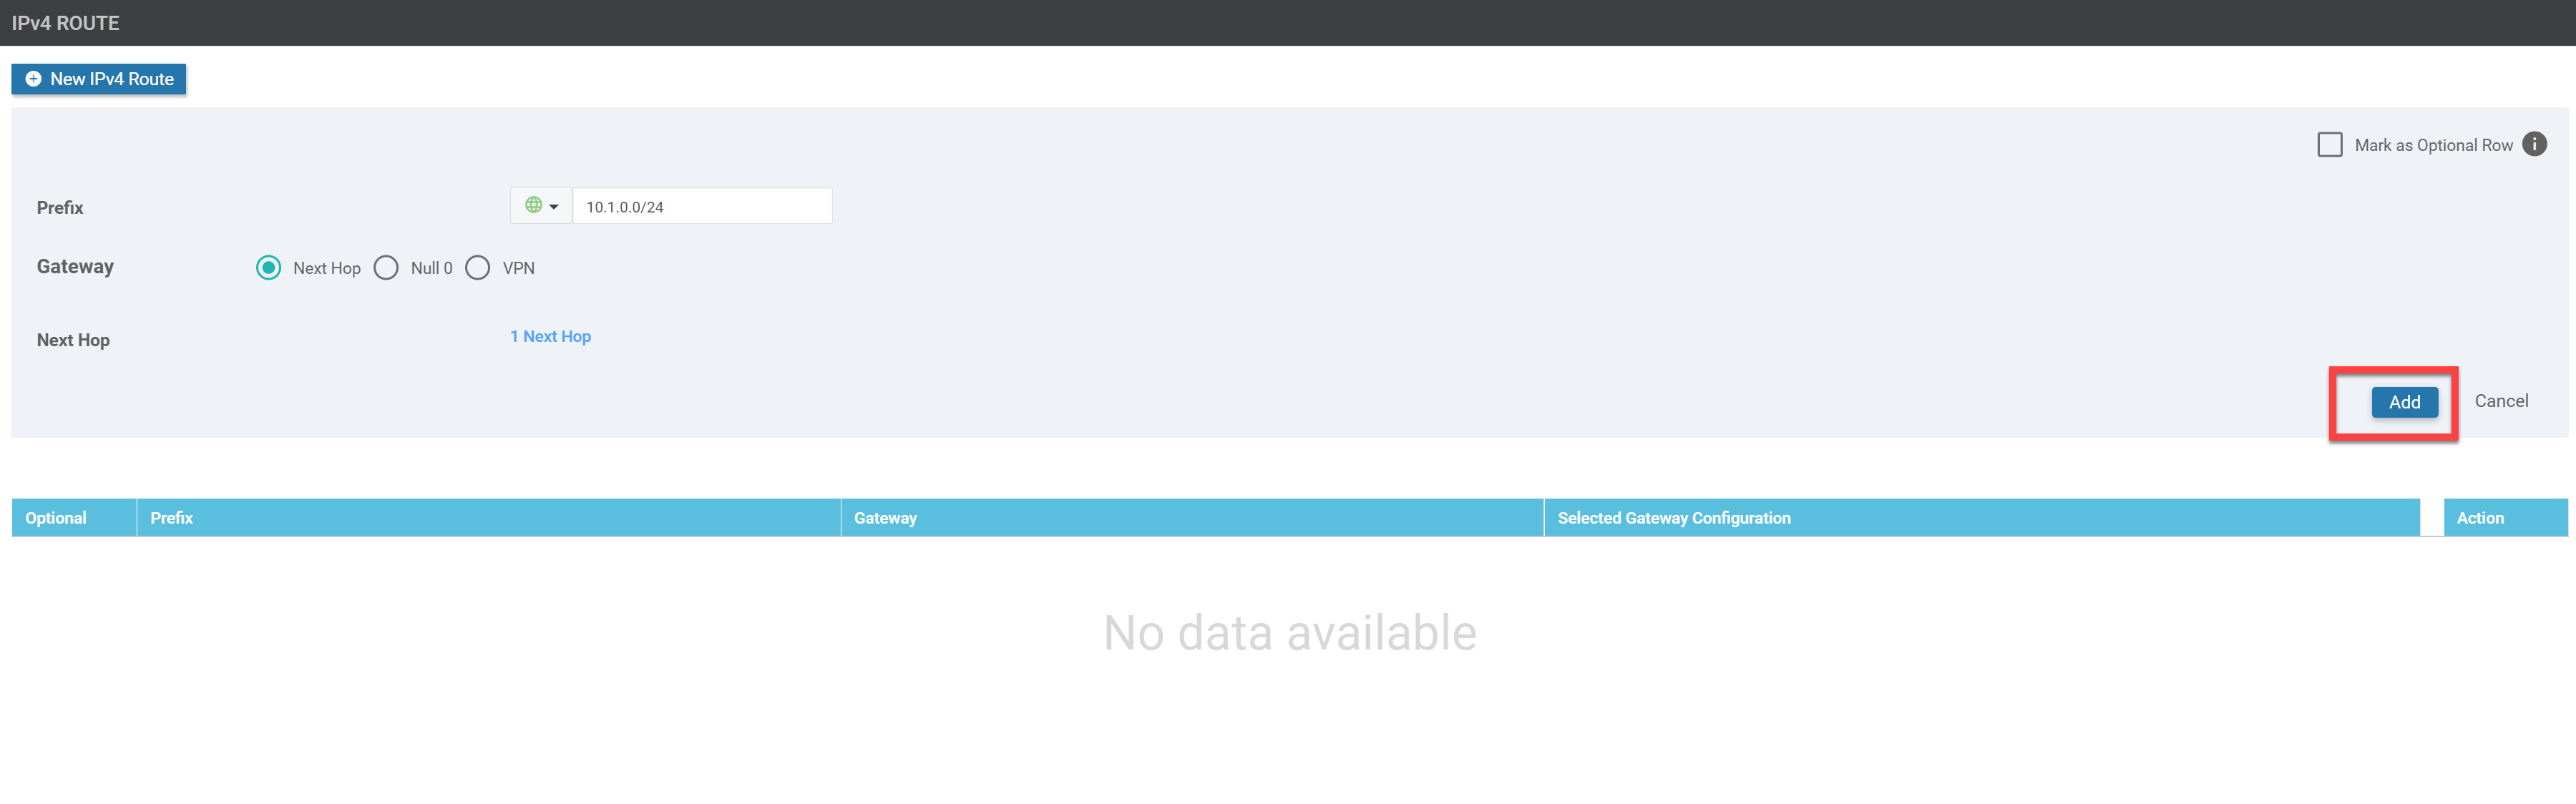
Click one Add one more time, and the static route shows up like this:

I don’t have to configure anything else here for VPN0. Click on Save to save this feature template.
Interfaces
We created the VPN0 template, but we also need the feature templates for the ge0/0 and ge0/1 interfaces.
Ge0/0 Interface
Create another feature template and select VPN Interface Ethernet:
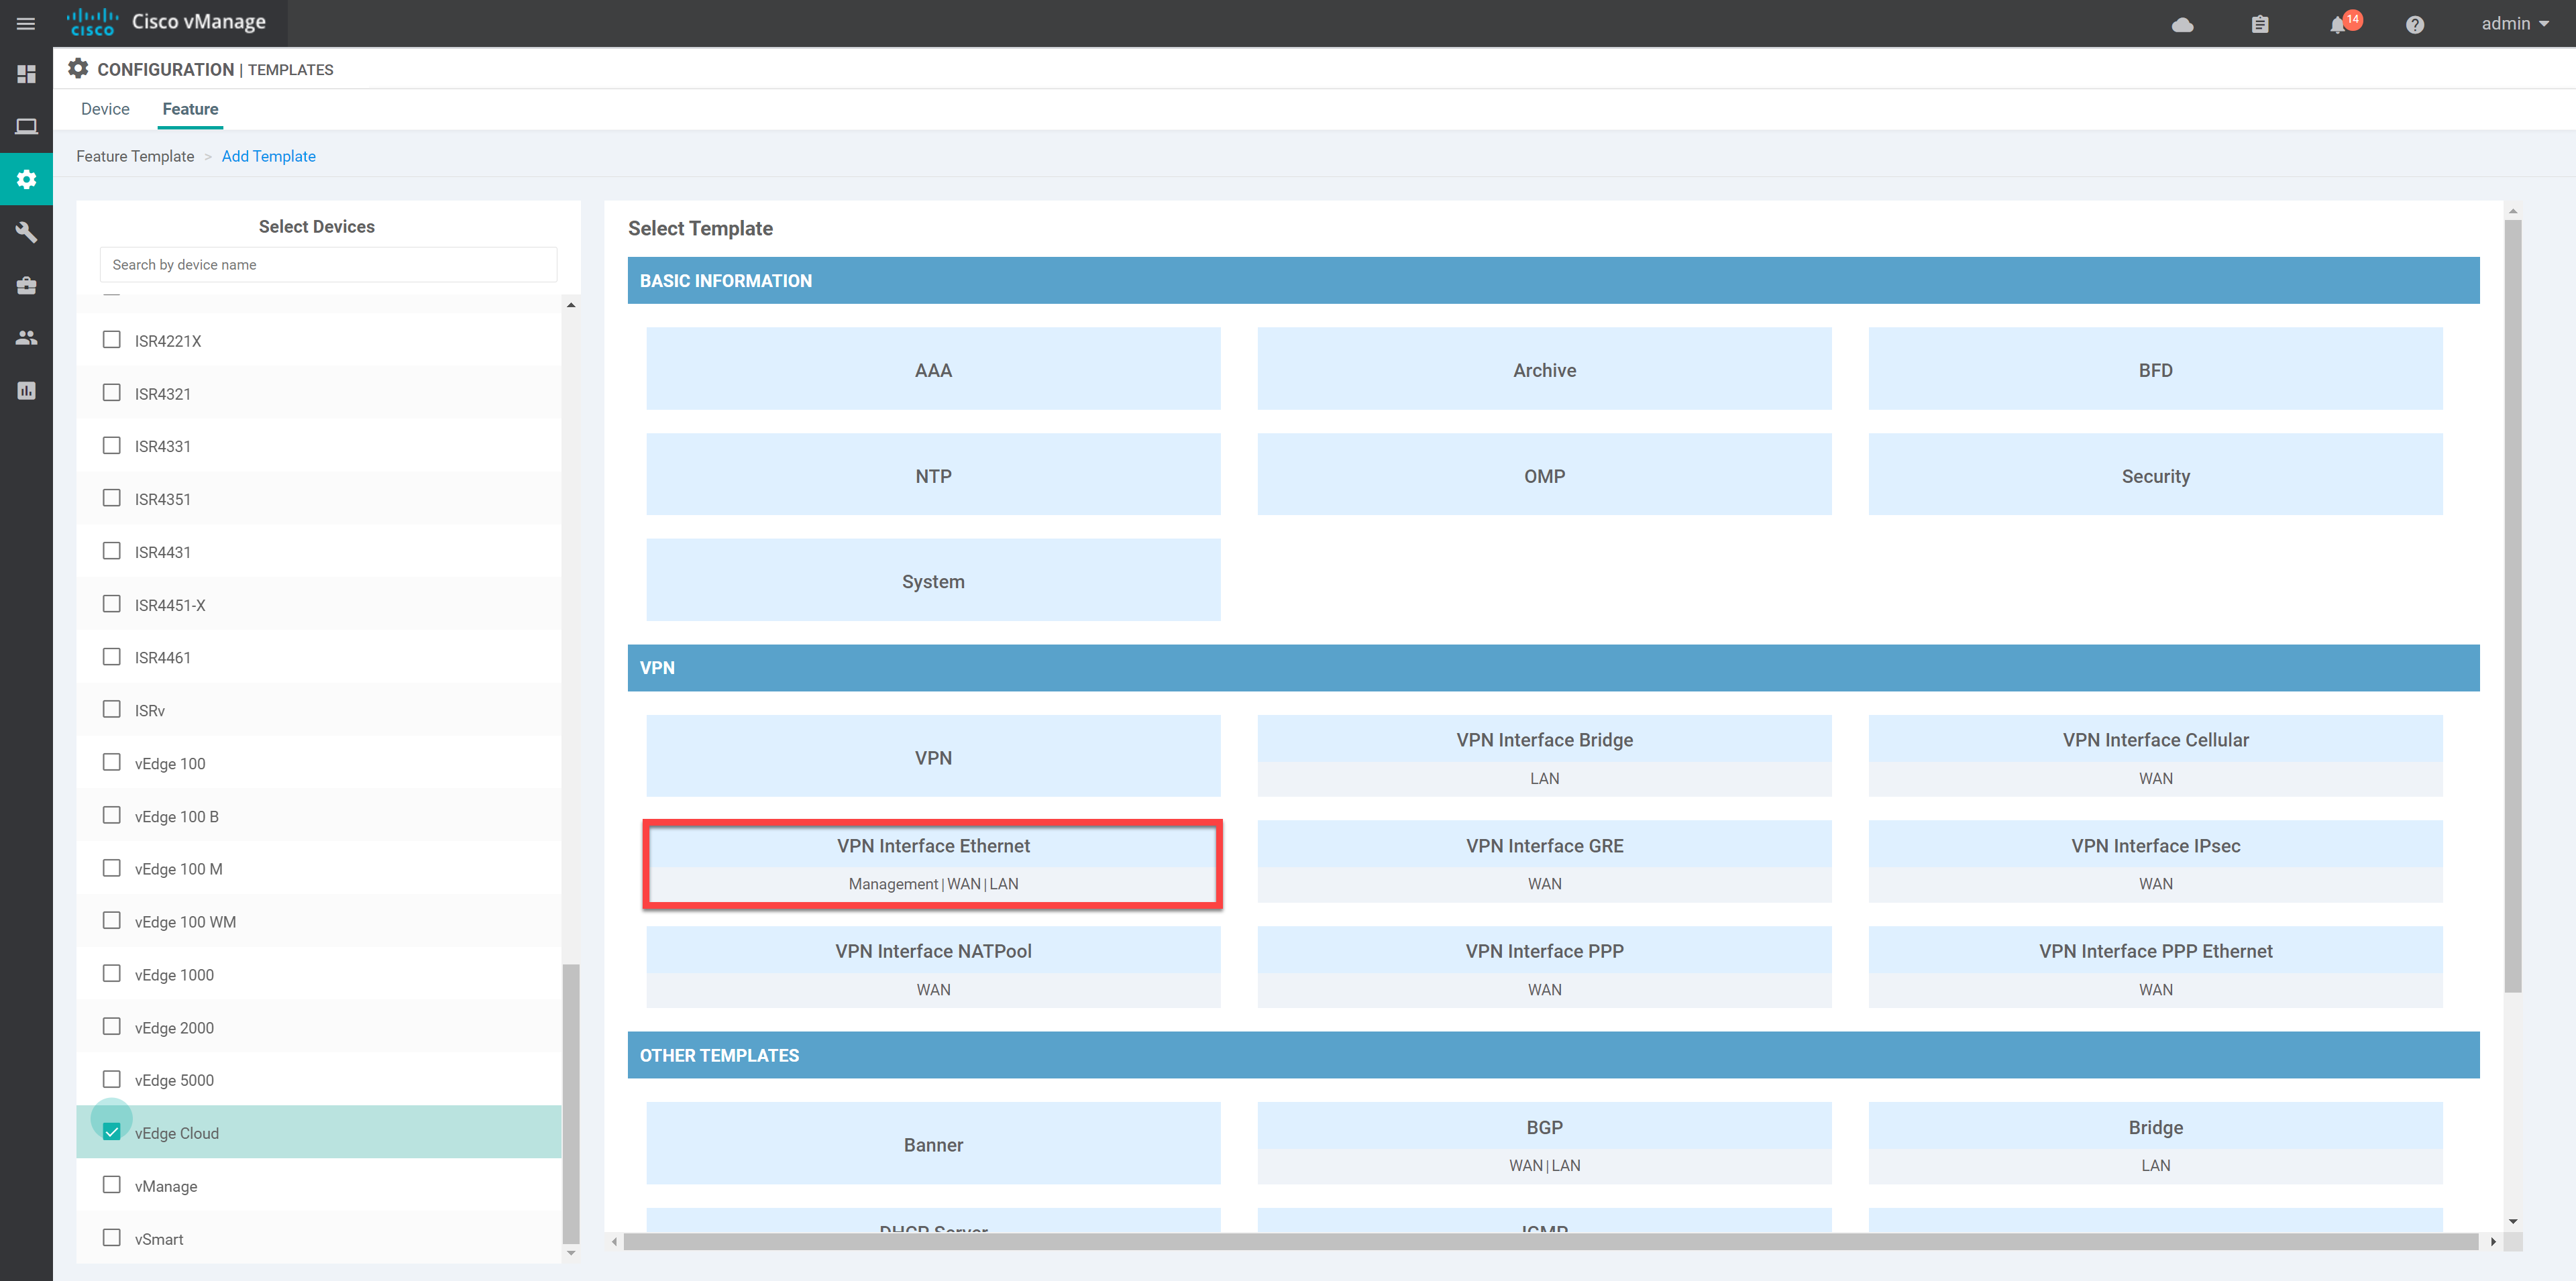
Let’s look at all the settings. First, we set a name and description:

Under the basic configuration, add these settings:
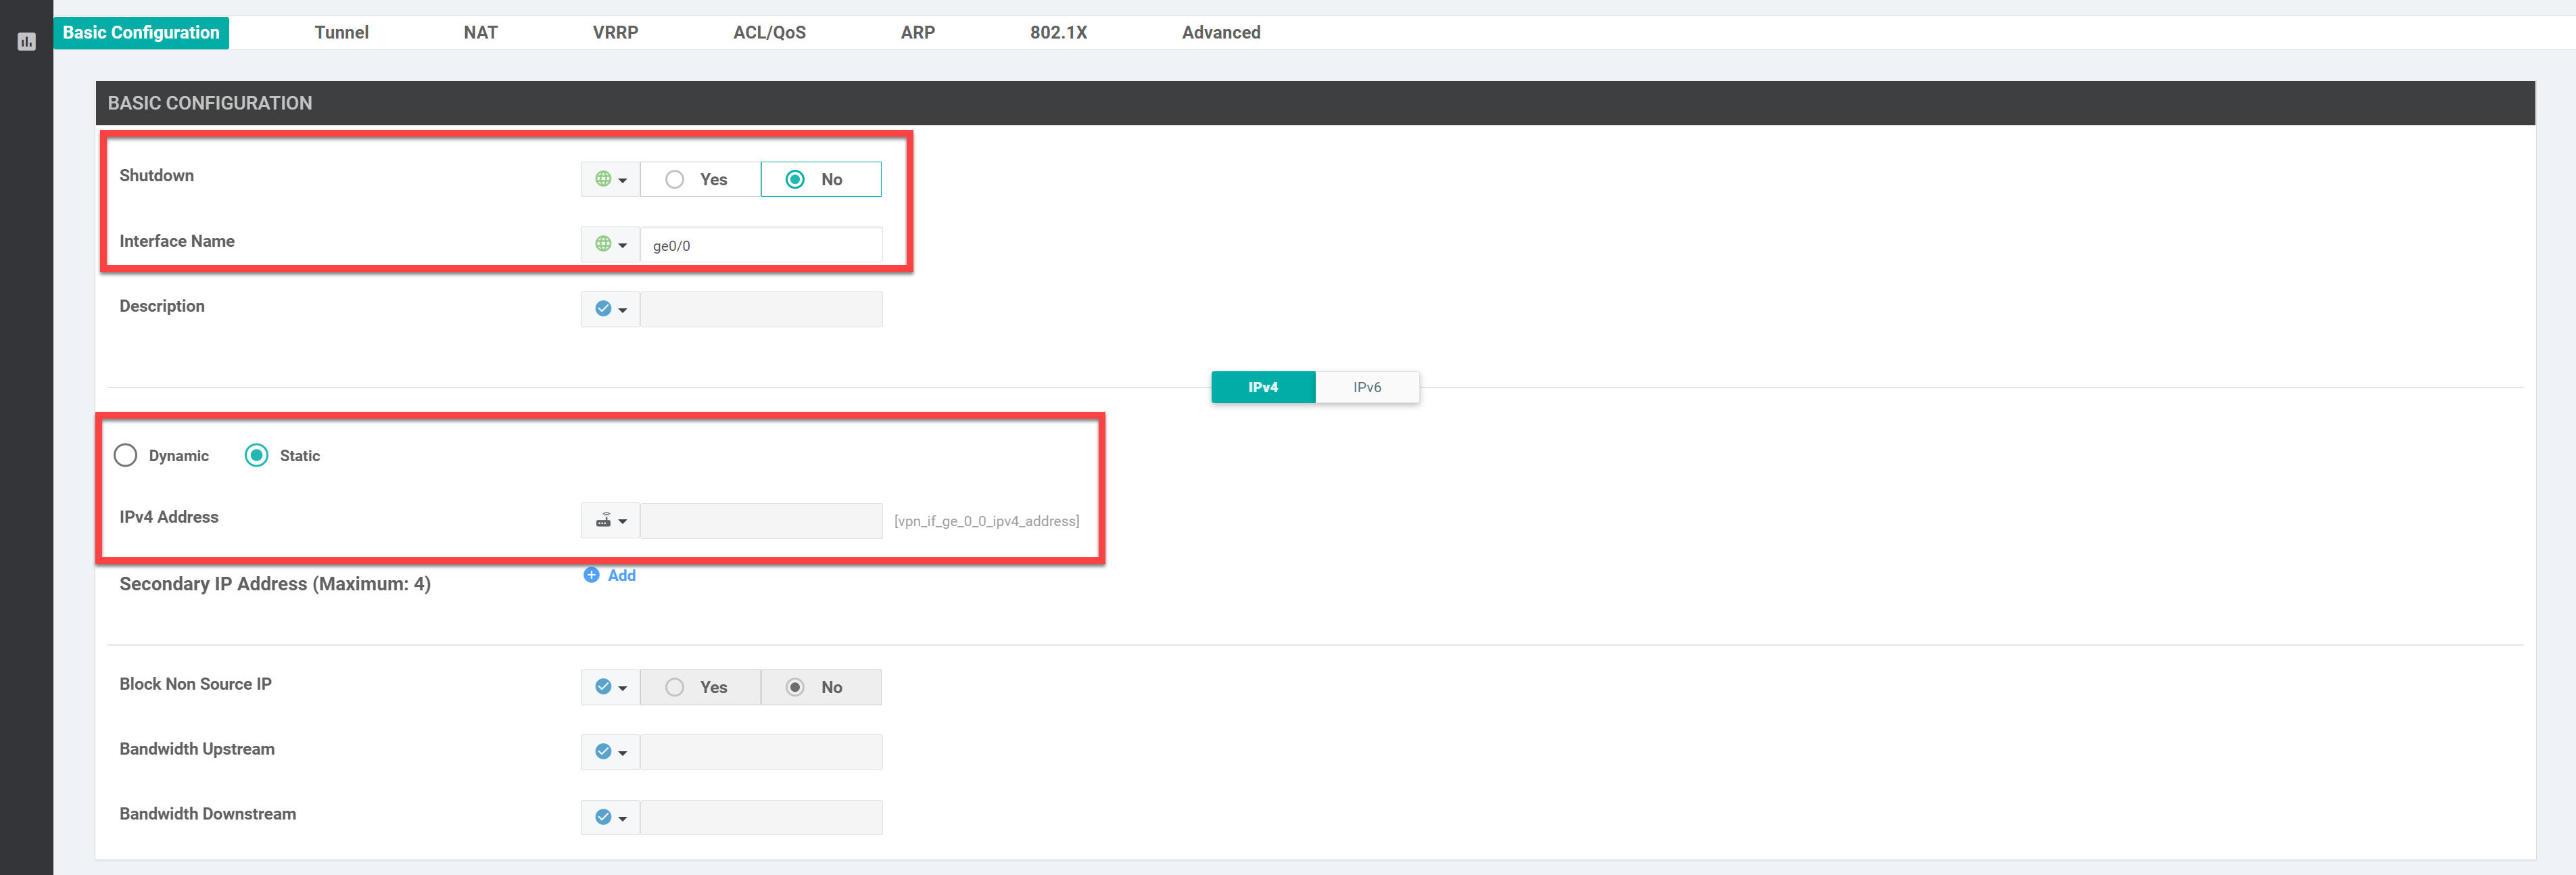
Most of the configuration items are the same for all my vEdge routers. However, the IPv4 address is device-specific. I’ll use the “vpn_if_ge_0_0_ipv4_address” key here. Here’s the tunnel configuration:
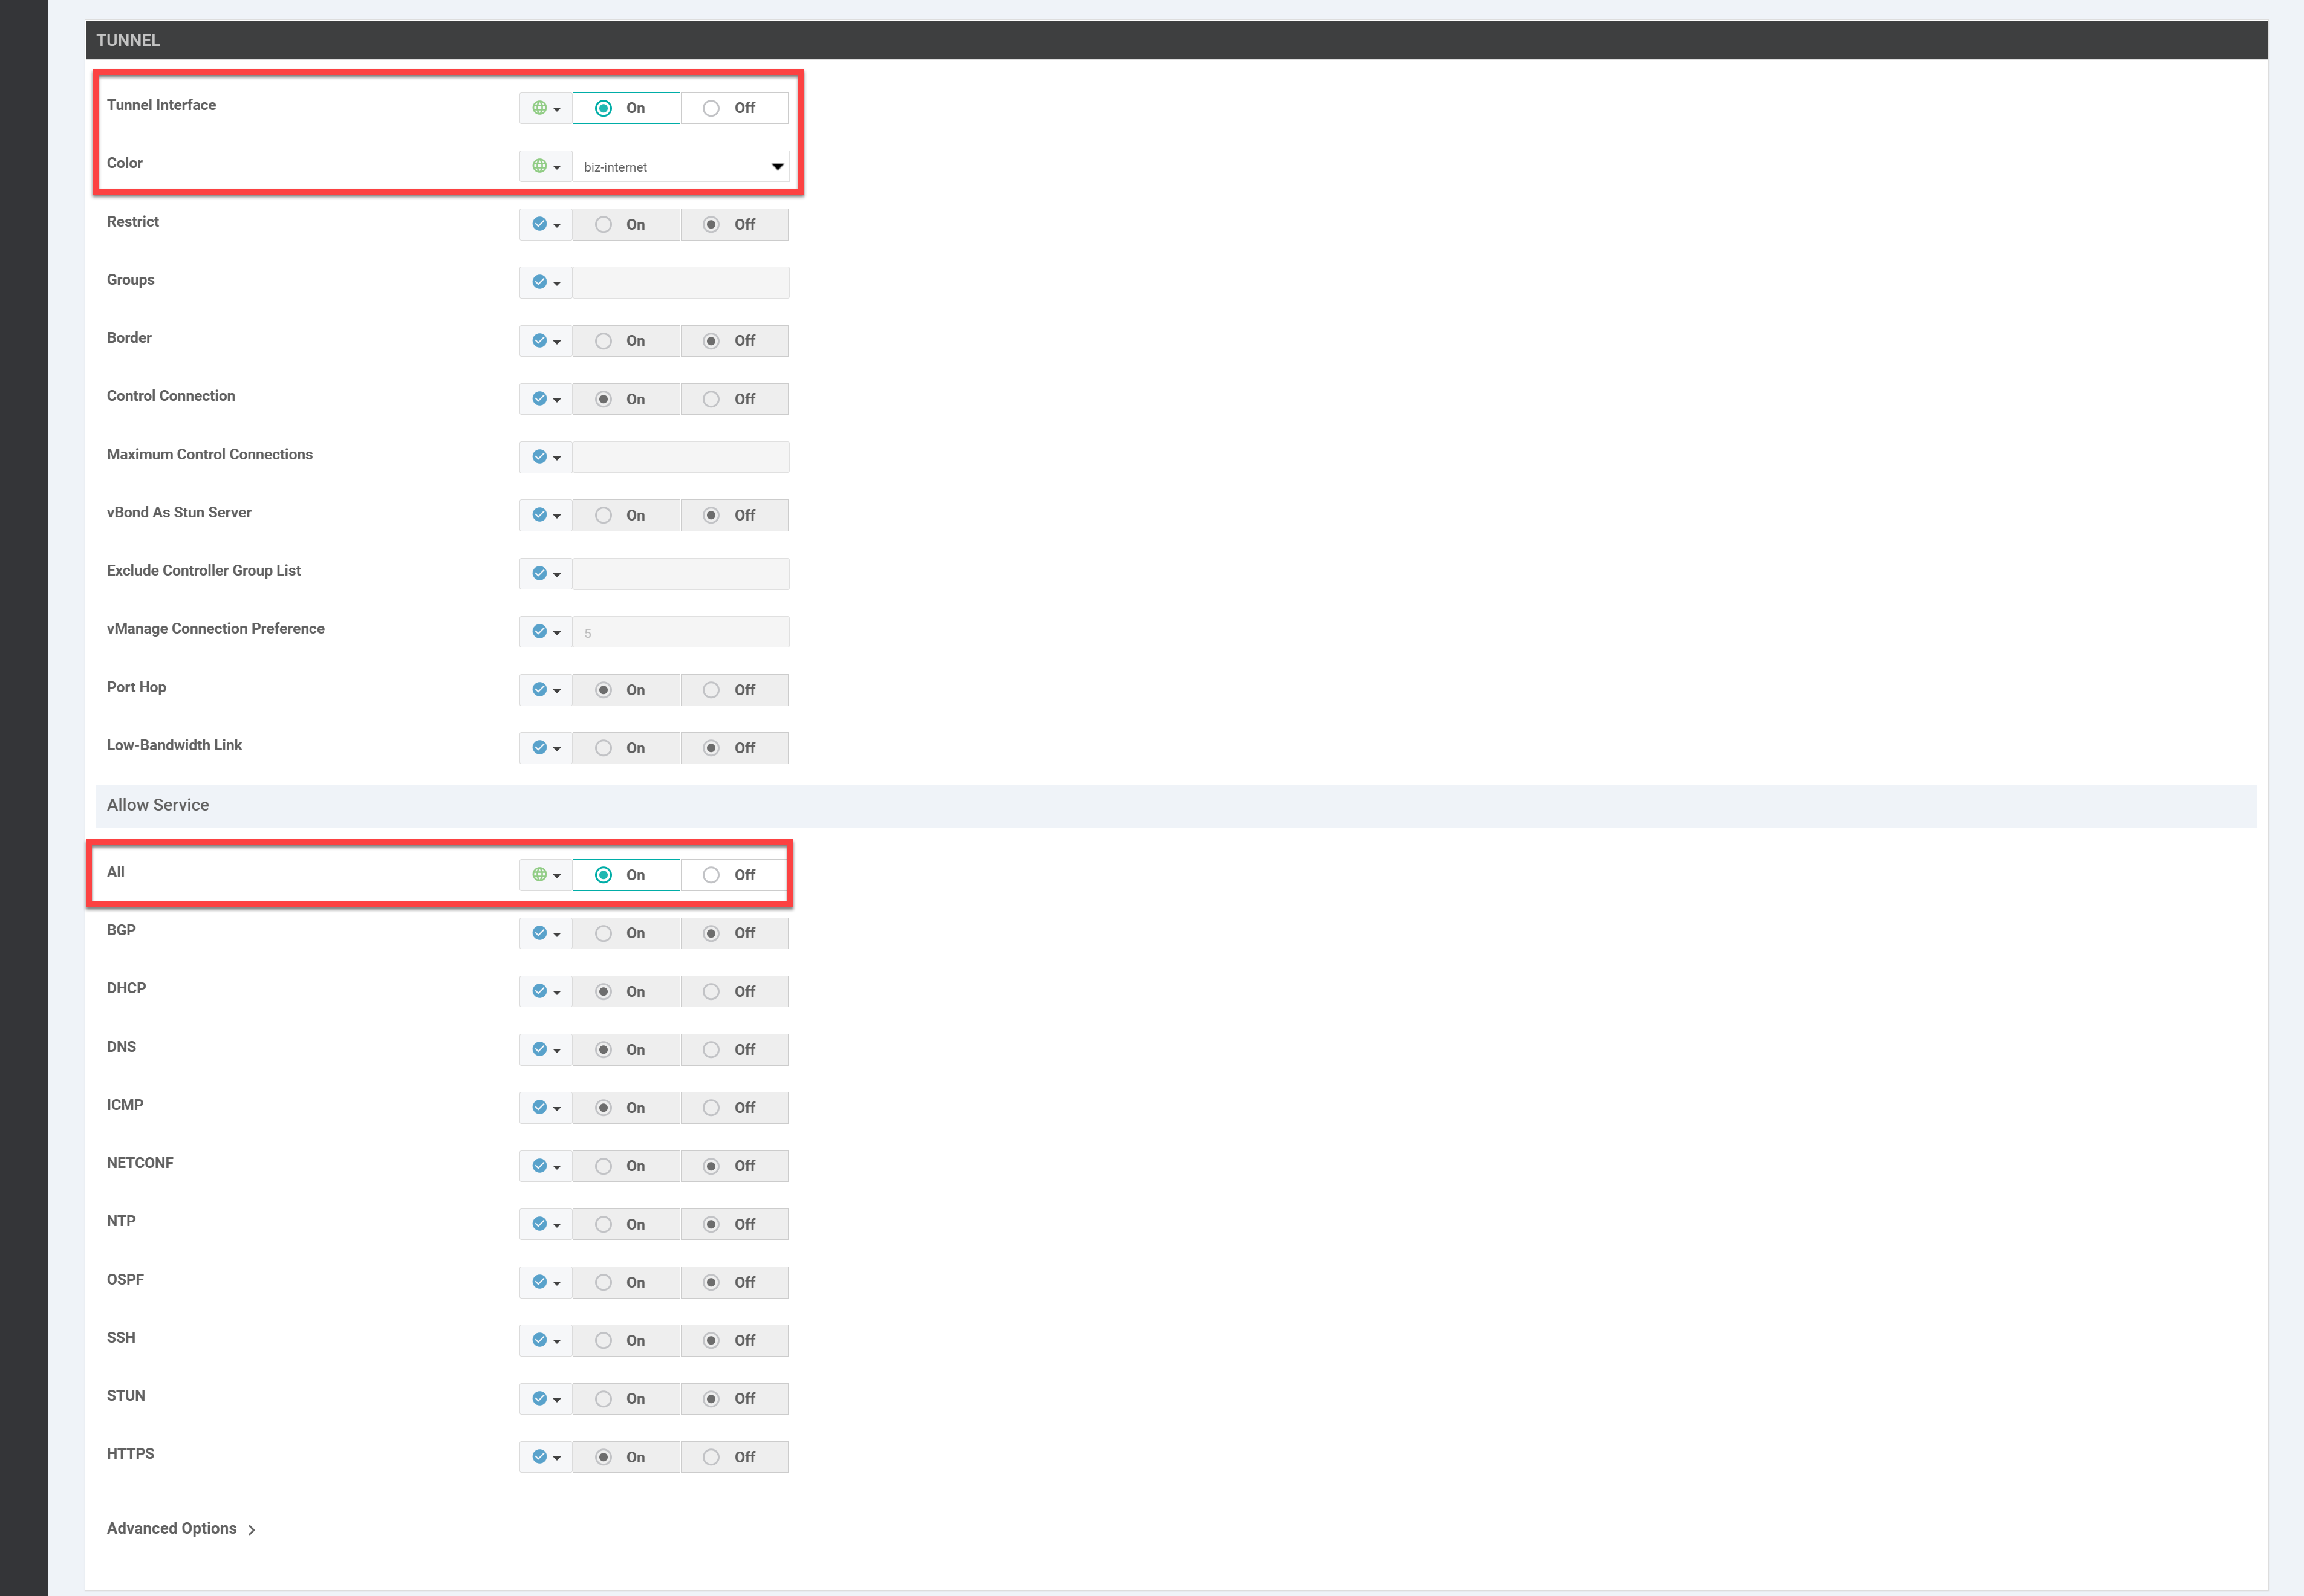
I enable the tunnel-interface option and set the correct color (biz-internet). I also allow all services. Click on Save to store the template.
Ge0/1 Interface
The Ge0/1 interface is almost the same as the Ge0/0 interface. So, instead of creating this feature template from scratch, I’ll copy our Ge0/0 template. Click on the three dots next to the template we just created:
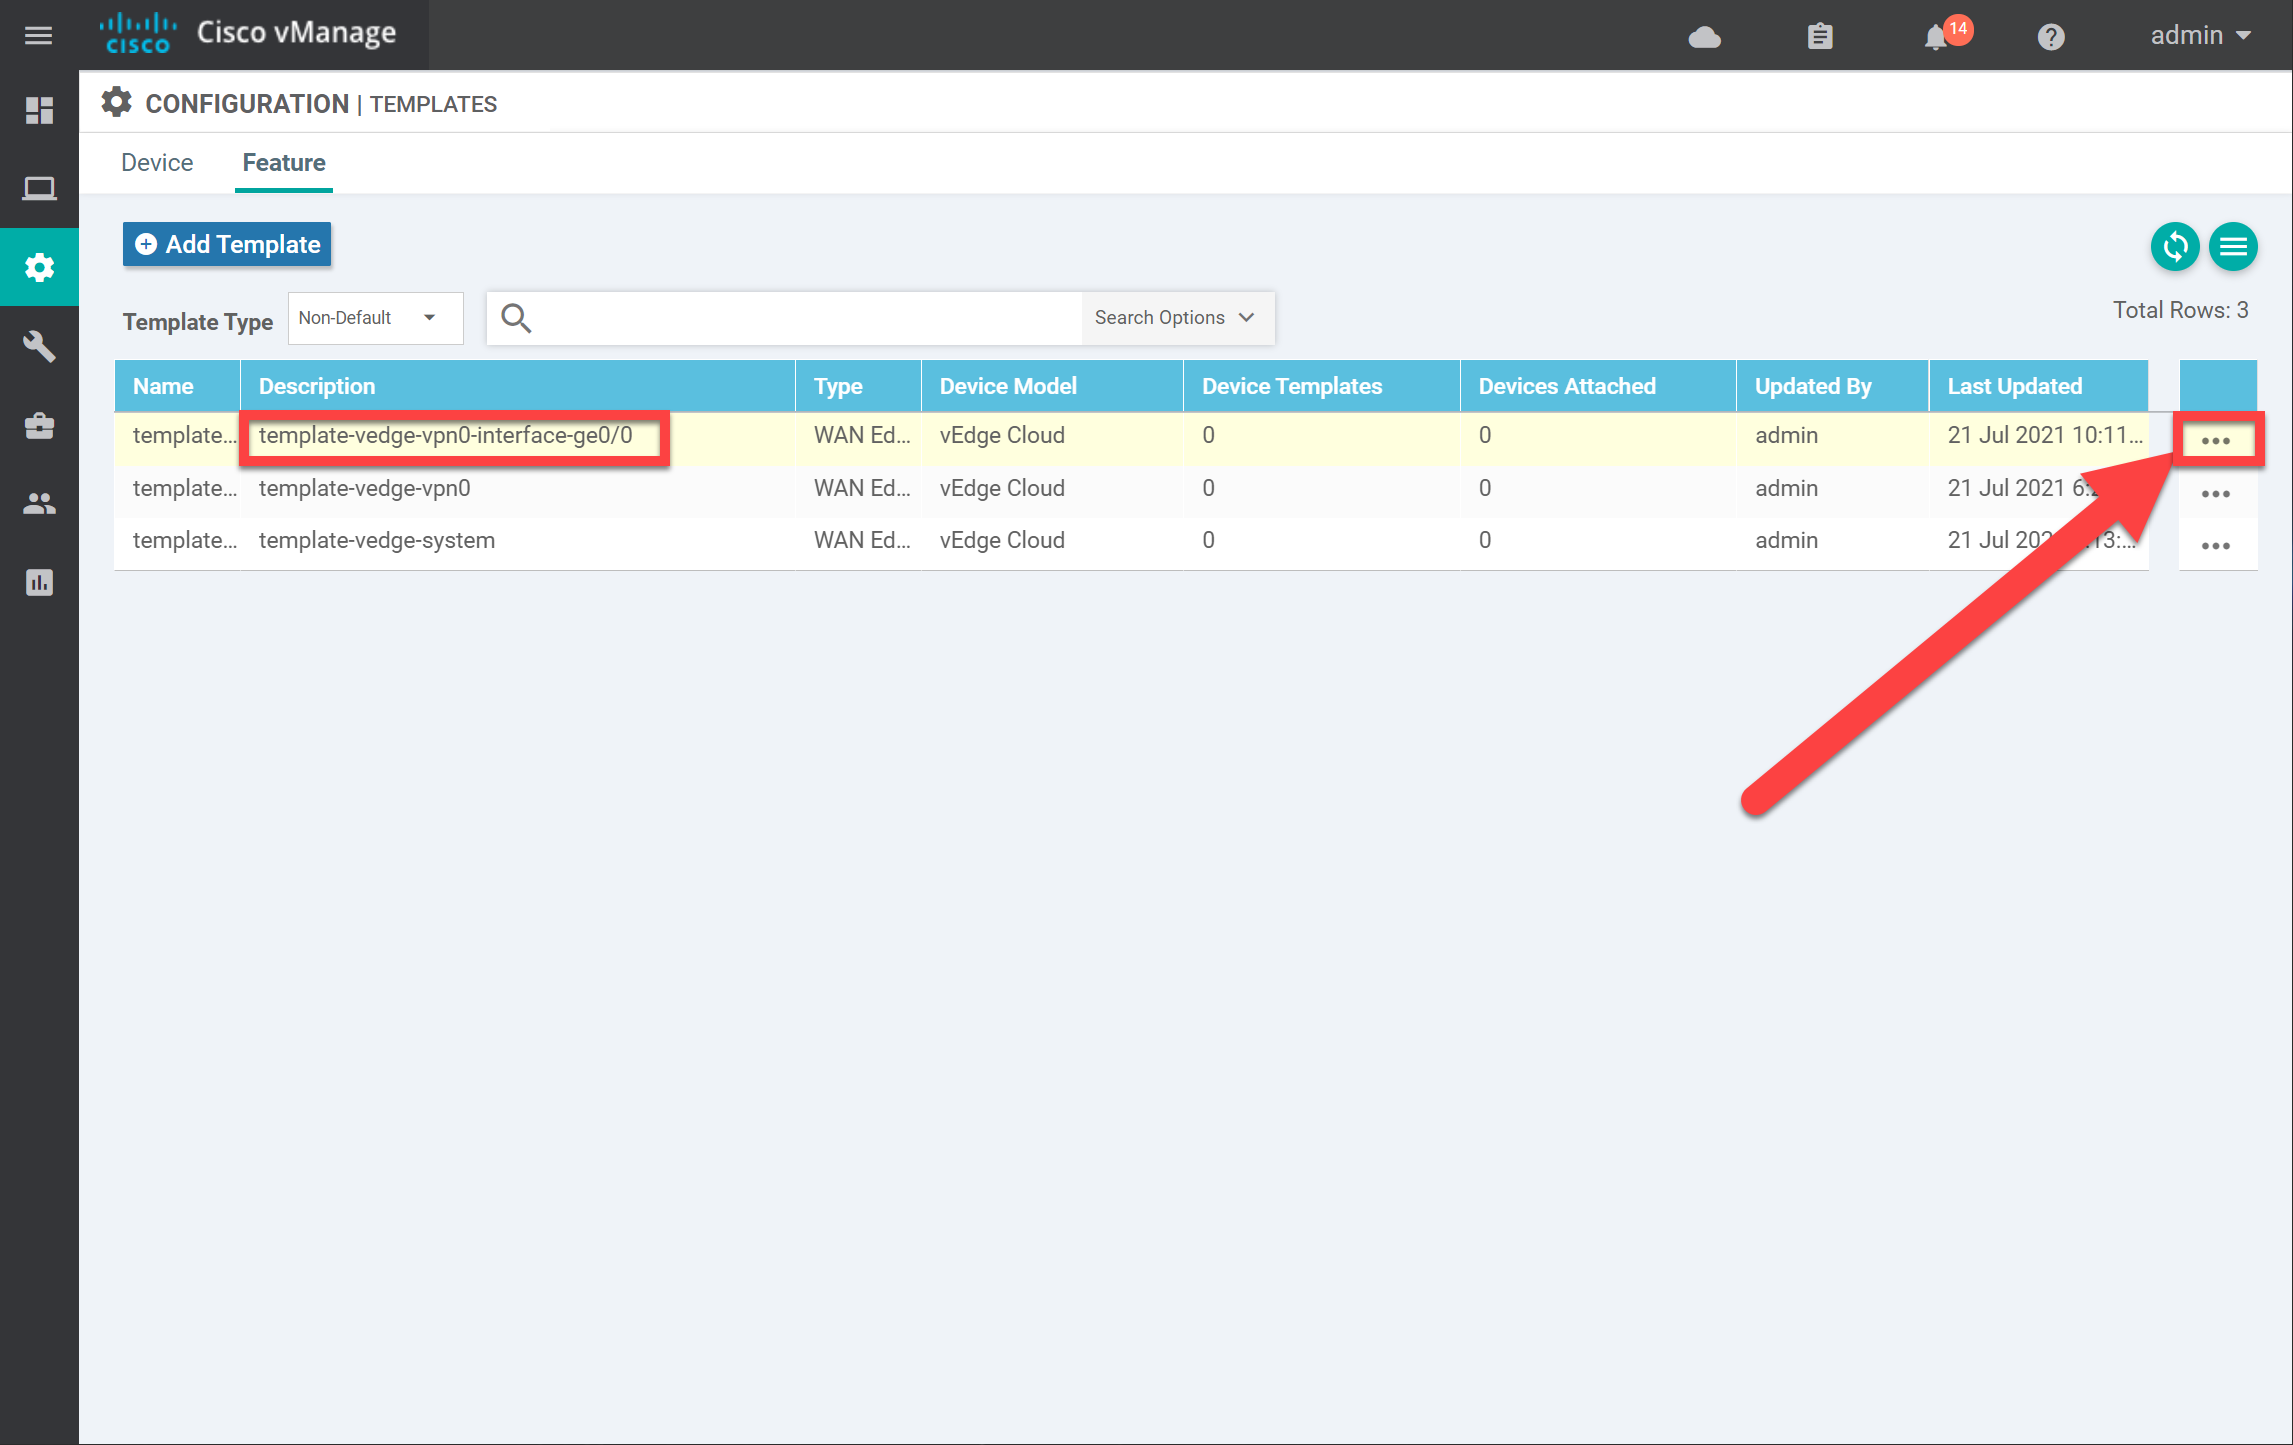
And click on Copy:
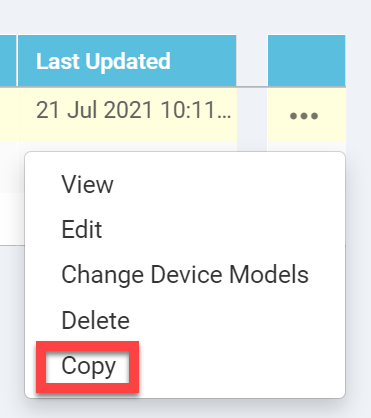
Give the template a new name:

And click on the Copy button. Now click on the three dots next to the new template and click on Edit. Under the basic configuration, I change these items:

Hi, I see some field is “Device Specific” but I don’t see any picture we need input value into this field
Hello Gioi
For each item in the Basic Configuration section, there is a mini dropdown menu from which you can choose one of three options. These options are depicted using icons, which I have listed below:
https://cdn-forum.networklessons.com/uploads/default/original/2X/5/5fc272747abf3bc45a319f06a73202b3f7df32bf.png
- Globalhttps://cdn-forum.networklessons.com/uploads/default/original/2X/2/2644382733ddae6345261820852abc9afea08803.png
- Device specifichttps://cdn-forum.networklessons.com/uploads/default/original/2X/4/4c085089a4e44068978fcdc6ea3c15e9ef2b554e.p
... Continue reading in our forumHello Kanu
These are additional parameters that you can set for Viptela devices. The details of each tab are further described in the following Cisco Viptela documentation:
https://sdwan-docs.cisco.com/Product_Documentation/vManage_Help/Release_18.4/Configuration/Templates/System
If you have any further questions, please let us know!
I hope this has been helpful!
Laz
Hi Rene and Laz,
What is the point of the template if we still have to add the device to vmanage.
In your notes you mentioned that the we attach the device, but the device needs to be added first to vmanage?
Shouldn’t the template automatically discover and add the vmanage?
Hello Champion
A prerequisite of using templates is having the device added to the vManage controller. It is actually via the vManage interface that you can configure the devices that use templates. So templates don’t solve the problem of automatic discovery and addition to the vManage controller, but they deliver a more scalable way of configuring large numbers of devices.
I hope this has been helpful!
Laz